Repairing an Osborne 1 - Part 1
13th April 2022
A friend gave me a non-functional Osborne 1 several weeks ago, and I finally got around to taking a look at it. For those unfamiliar with the Osborne 1, it's not a DOS-based system - it pre-dates DOS, instead running on the CP/M operating system by Digital Research. CP/M, or Control Program for Microcomputers was first created in 1974 and over the next 8 years became the OS of choice for many computers.
The Osborne 1 computer is widely viewed as the world's first portable computer, and was launched in April 1981 by Adam Osborne of Osborne Computer Corporation. It runs a Zilog Z80A microprocessor at 4 MHz and has 64 KB of RAM. Despite being called 'portable' it has no internal batteries (you have to plug it into the mains) and weighs in at 10 kg! Brand new it retailed for £1,250 plus tax, though it did come bundled with CP/M 2.2, the MicroPro WordStar word processor with MailMerge, and the SuperCalc spreadsheet. Because it ran CP/M, many thousands of applications were available to run on it, making it hugely popular.
During those years, Osborne maintained close contacts with industry leaders and reported his findings and interpretations of the marketplace, first in a column for Interface Age, later in InfoWorld. Sometime in early 1980, Osborne decided that microcomputer makers were simply churning out copies of one another's machines rather than innovating.
"I became convinced that the established manufacturers were missing the next major product evolution," says Osborne. The result of Osborne's observation was the start of the Osborne Computer Corporation in January 1981, and the design and beginning of production of the Osborne 1. " InfoWorld, April 13, 1981
This particular computer's history is clearer than most. It spent most of its life in a household appliances shop in the UK before being relegated to a dry barn after the shop was closed about 5 years ago. Here are some pics:
.jpg)
.jpg)
.jpg)
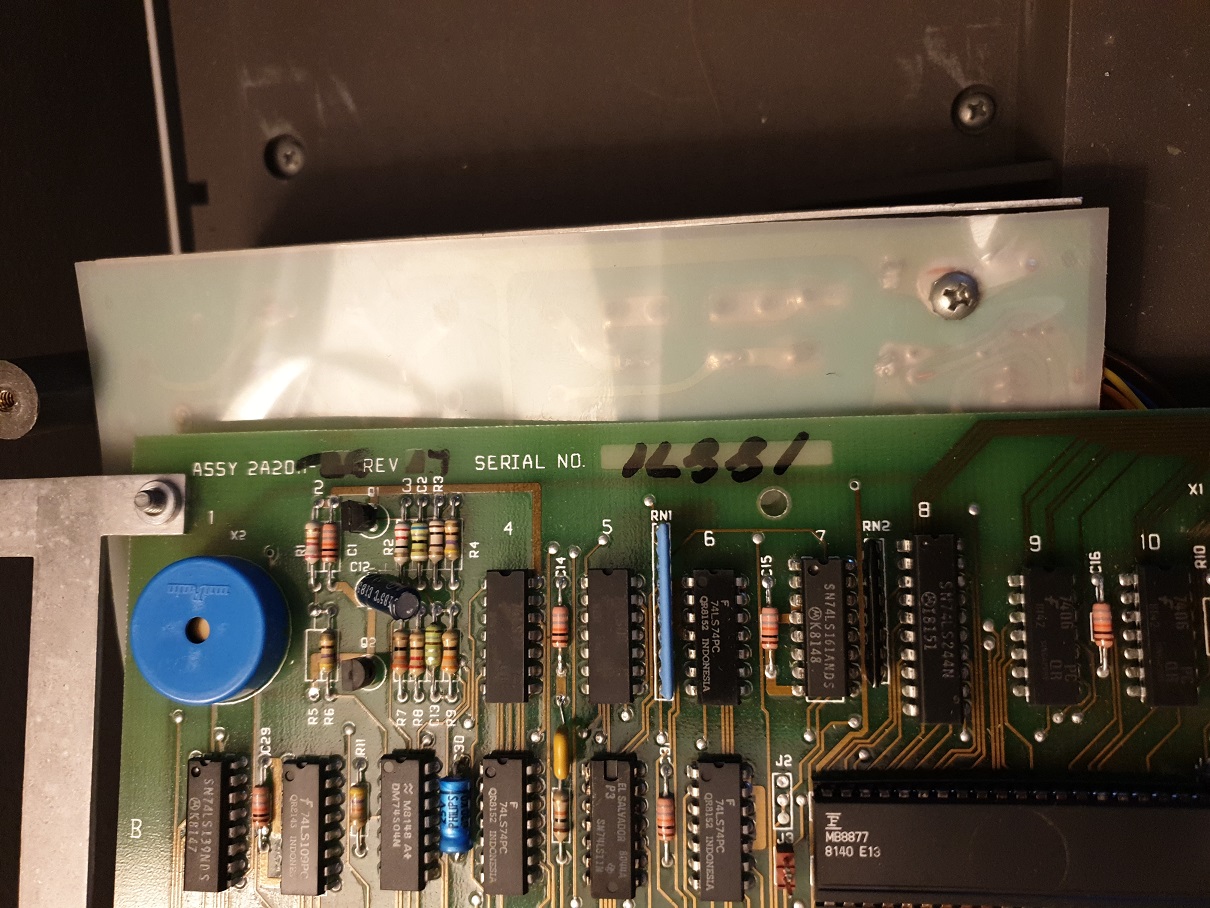
The latest date code on the main logic board is 8149 (week 49 of 1981). All the memory ICs are the same National Semiconductor MM5290N-2 chips, which are 16,384 x 1 bit, meaning that each chip holds 16384 divided by 8 = 2048 bytes = 2 KB. Since we have 32 chips on the board that makes a total of 64 KB. It's a good sign that all RAM chips are the same as it implies nothing's been tampered with from its original factory state.
Problem #1: Blown power supply capacitor
I had switched the computer on briefly when it first arrived, and it appeared to not do very much - nothing appeared on the screen, though the power supply was making a fairly loud buzzing noise. I powered down and left it for a few hours. Upon returning later, I fired it up again, and this time I was met with what some have called the "magic blue smoke" - pops and bangs and smoke emanating from every hole on the front of the unit and bad smells.
Before I go taking a screwdriver to this thing...
Power supplies contain circuitry with high voltages that can kill - EVEN AFTER BEING POWERED OFF OR DISCONNECTED FROM THE MAINS SUPPLY. Do not remove the cover of any power supply or operate it under any circumstances contrary to the manufacturer's intended use unless you are a qualified electrical engineer. Even if you are qualified, I take no responsibility if you read this article and suffer any loss, damage or other negative consequence to yourself, anyone around you or property - this site is not instructional - it is intended to be purely informative and to be taken as anecdotal in nature.
The cause? A blown filter capacitor in the Astec power supply. This a very common point of failure on these Osborne 1s, and there are several reports of this on the internet.
In order to get at the power supply you need to unscrew the main logic board from its casing and lift it off:
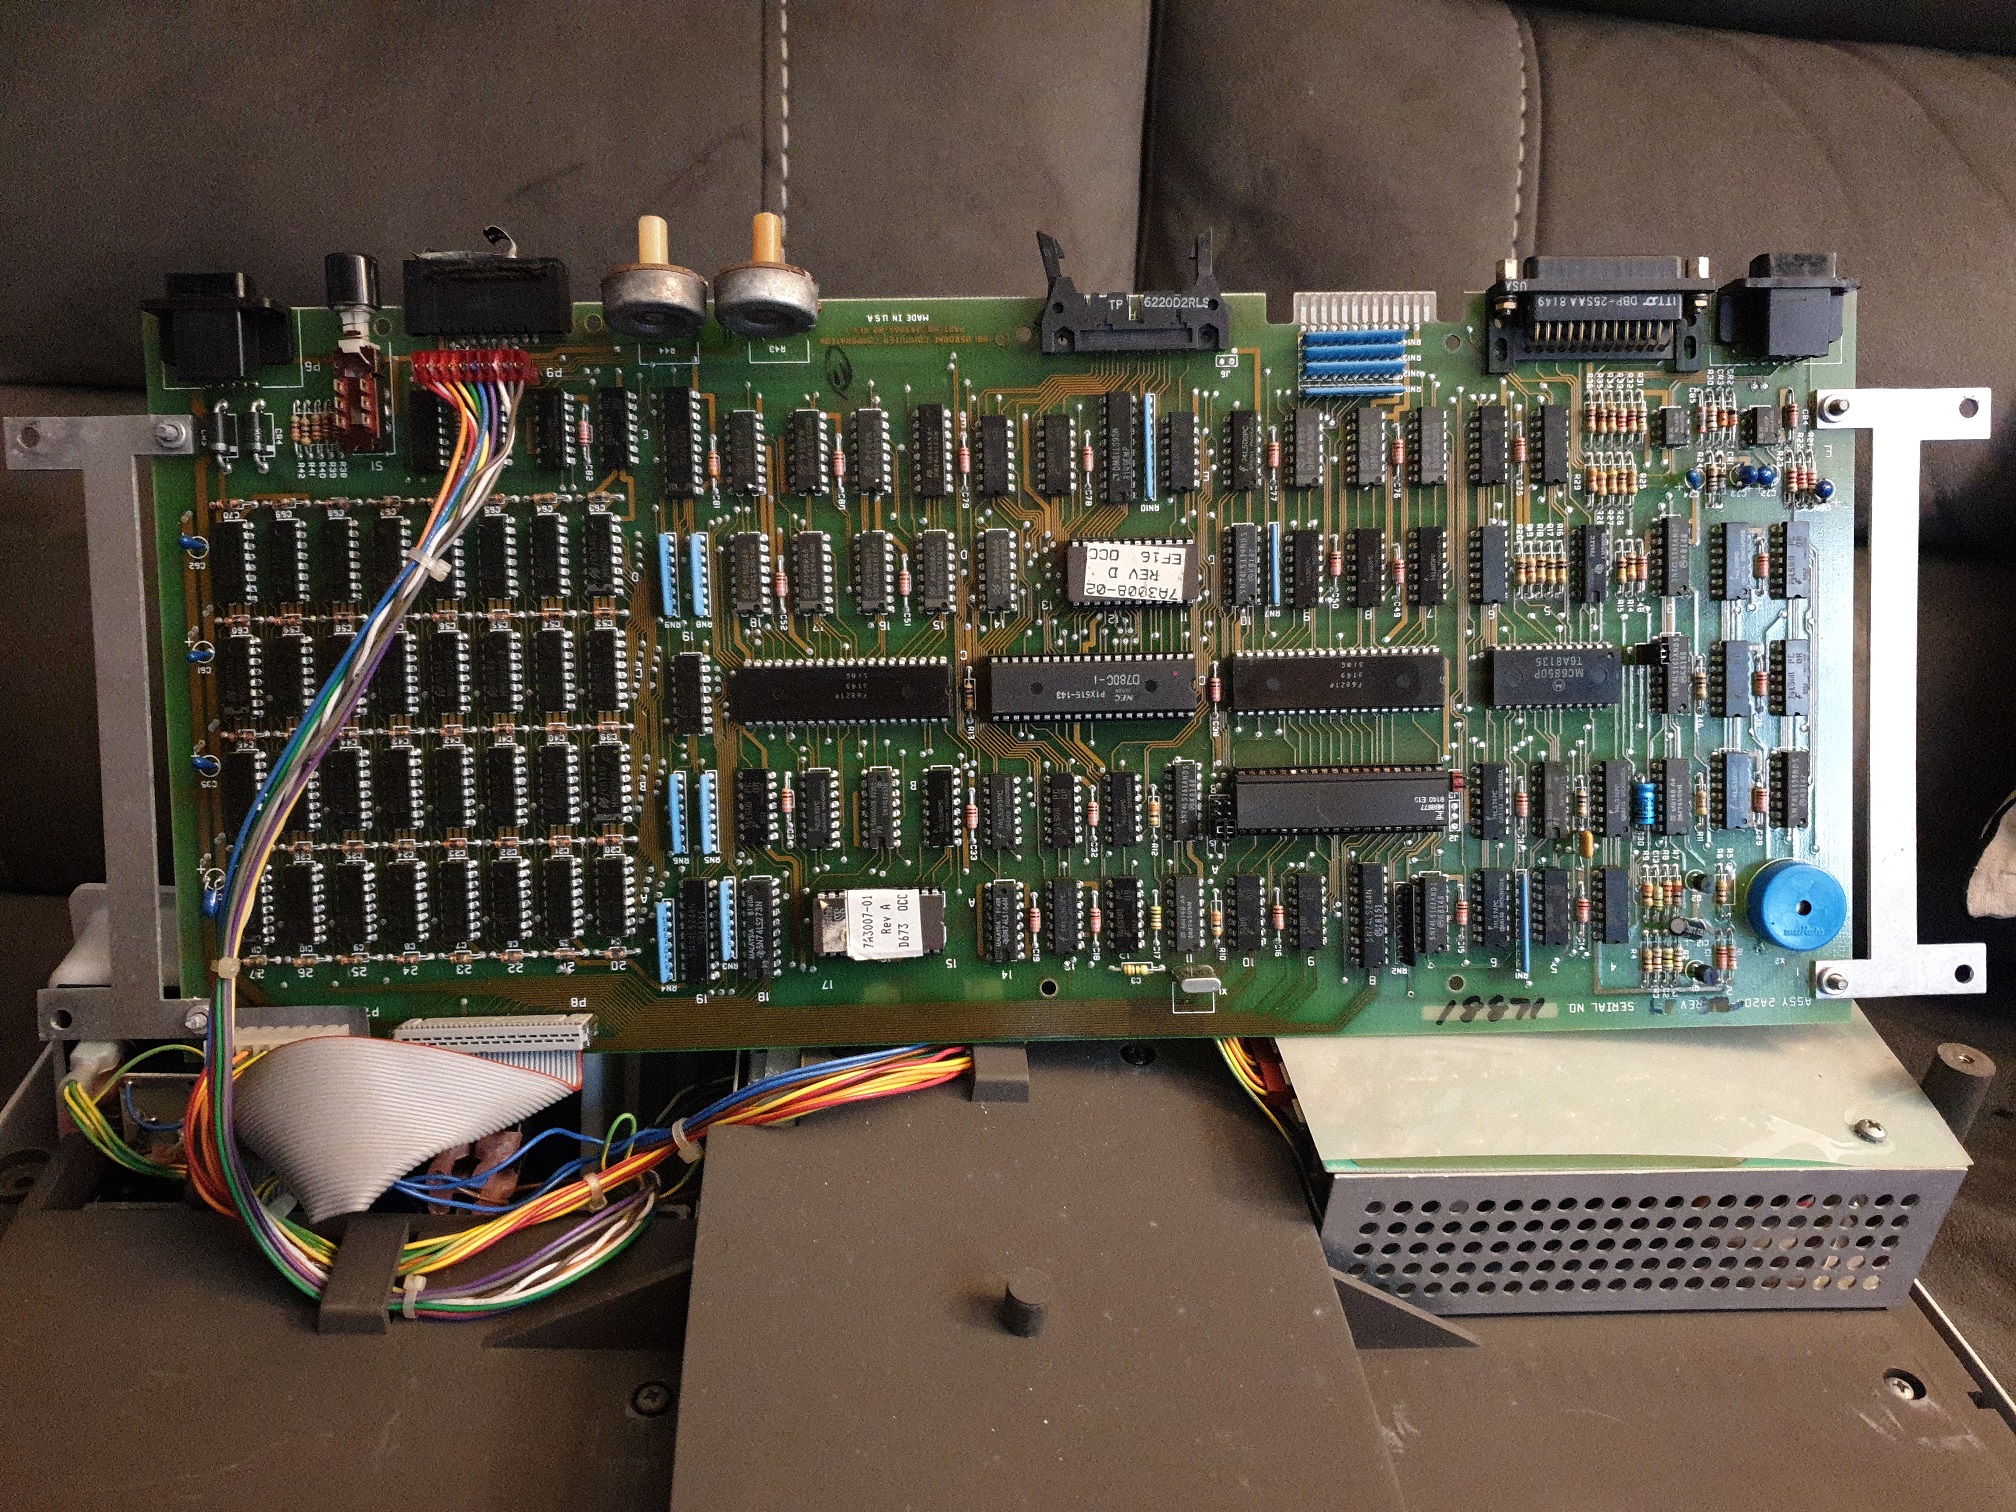
It's connected to the rest of the computer via three cables. Toward the top-left in the pic above is the CRT cable and in the lower-left we have the main power block and the floppy drive ribbon cable. The power block provides two of each +5V, -5V, and +12V, plus GND.
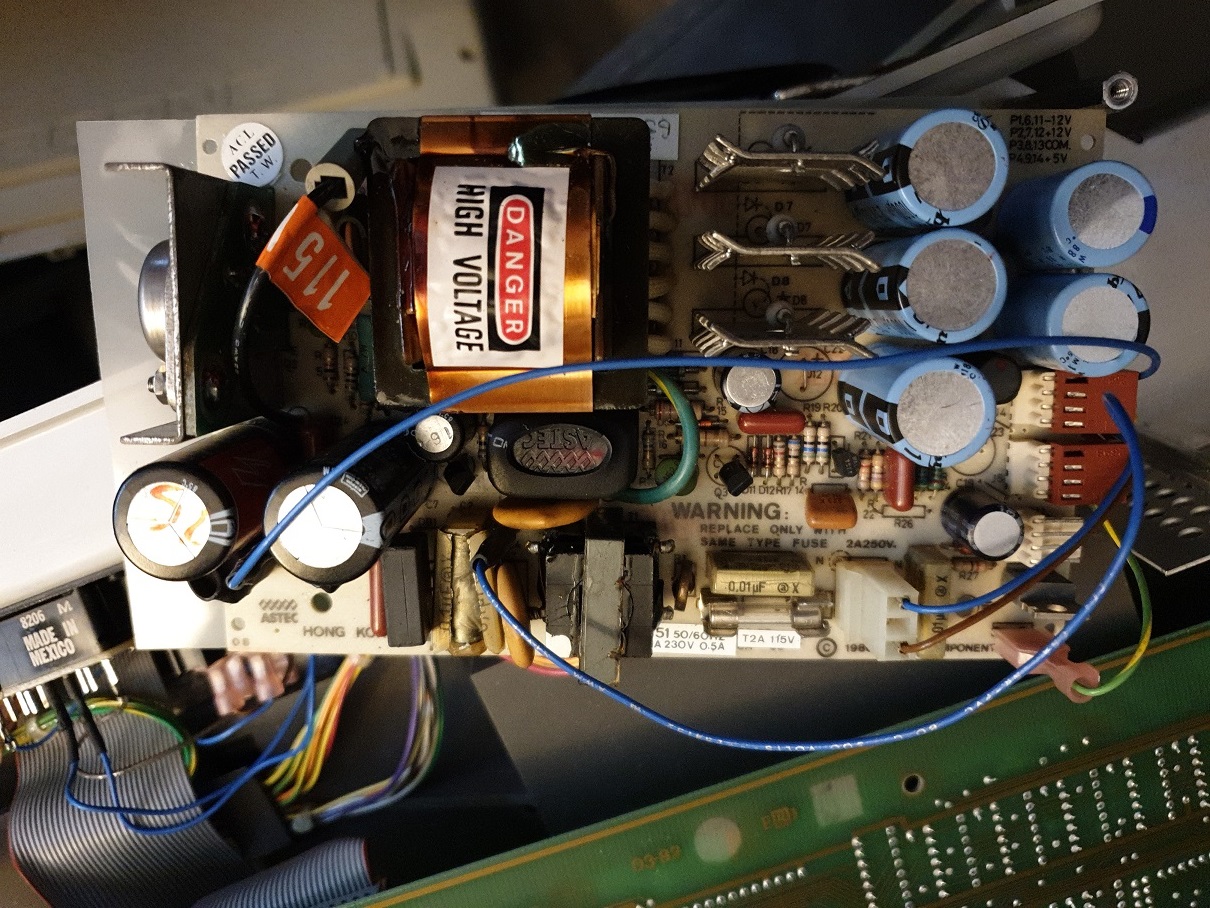
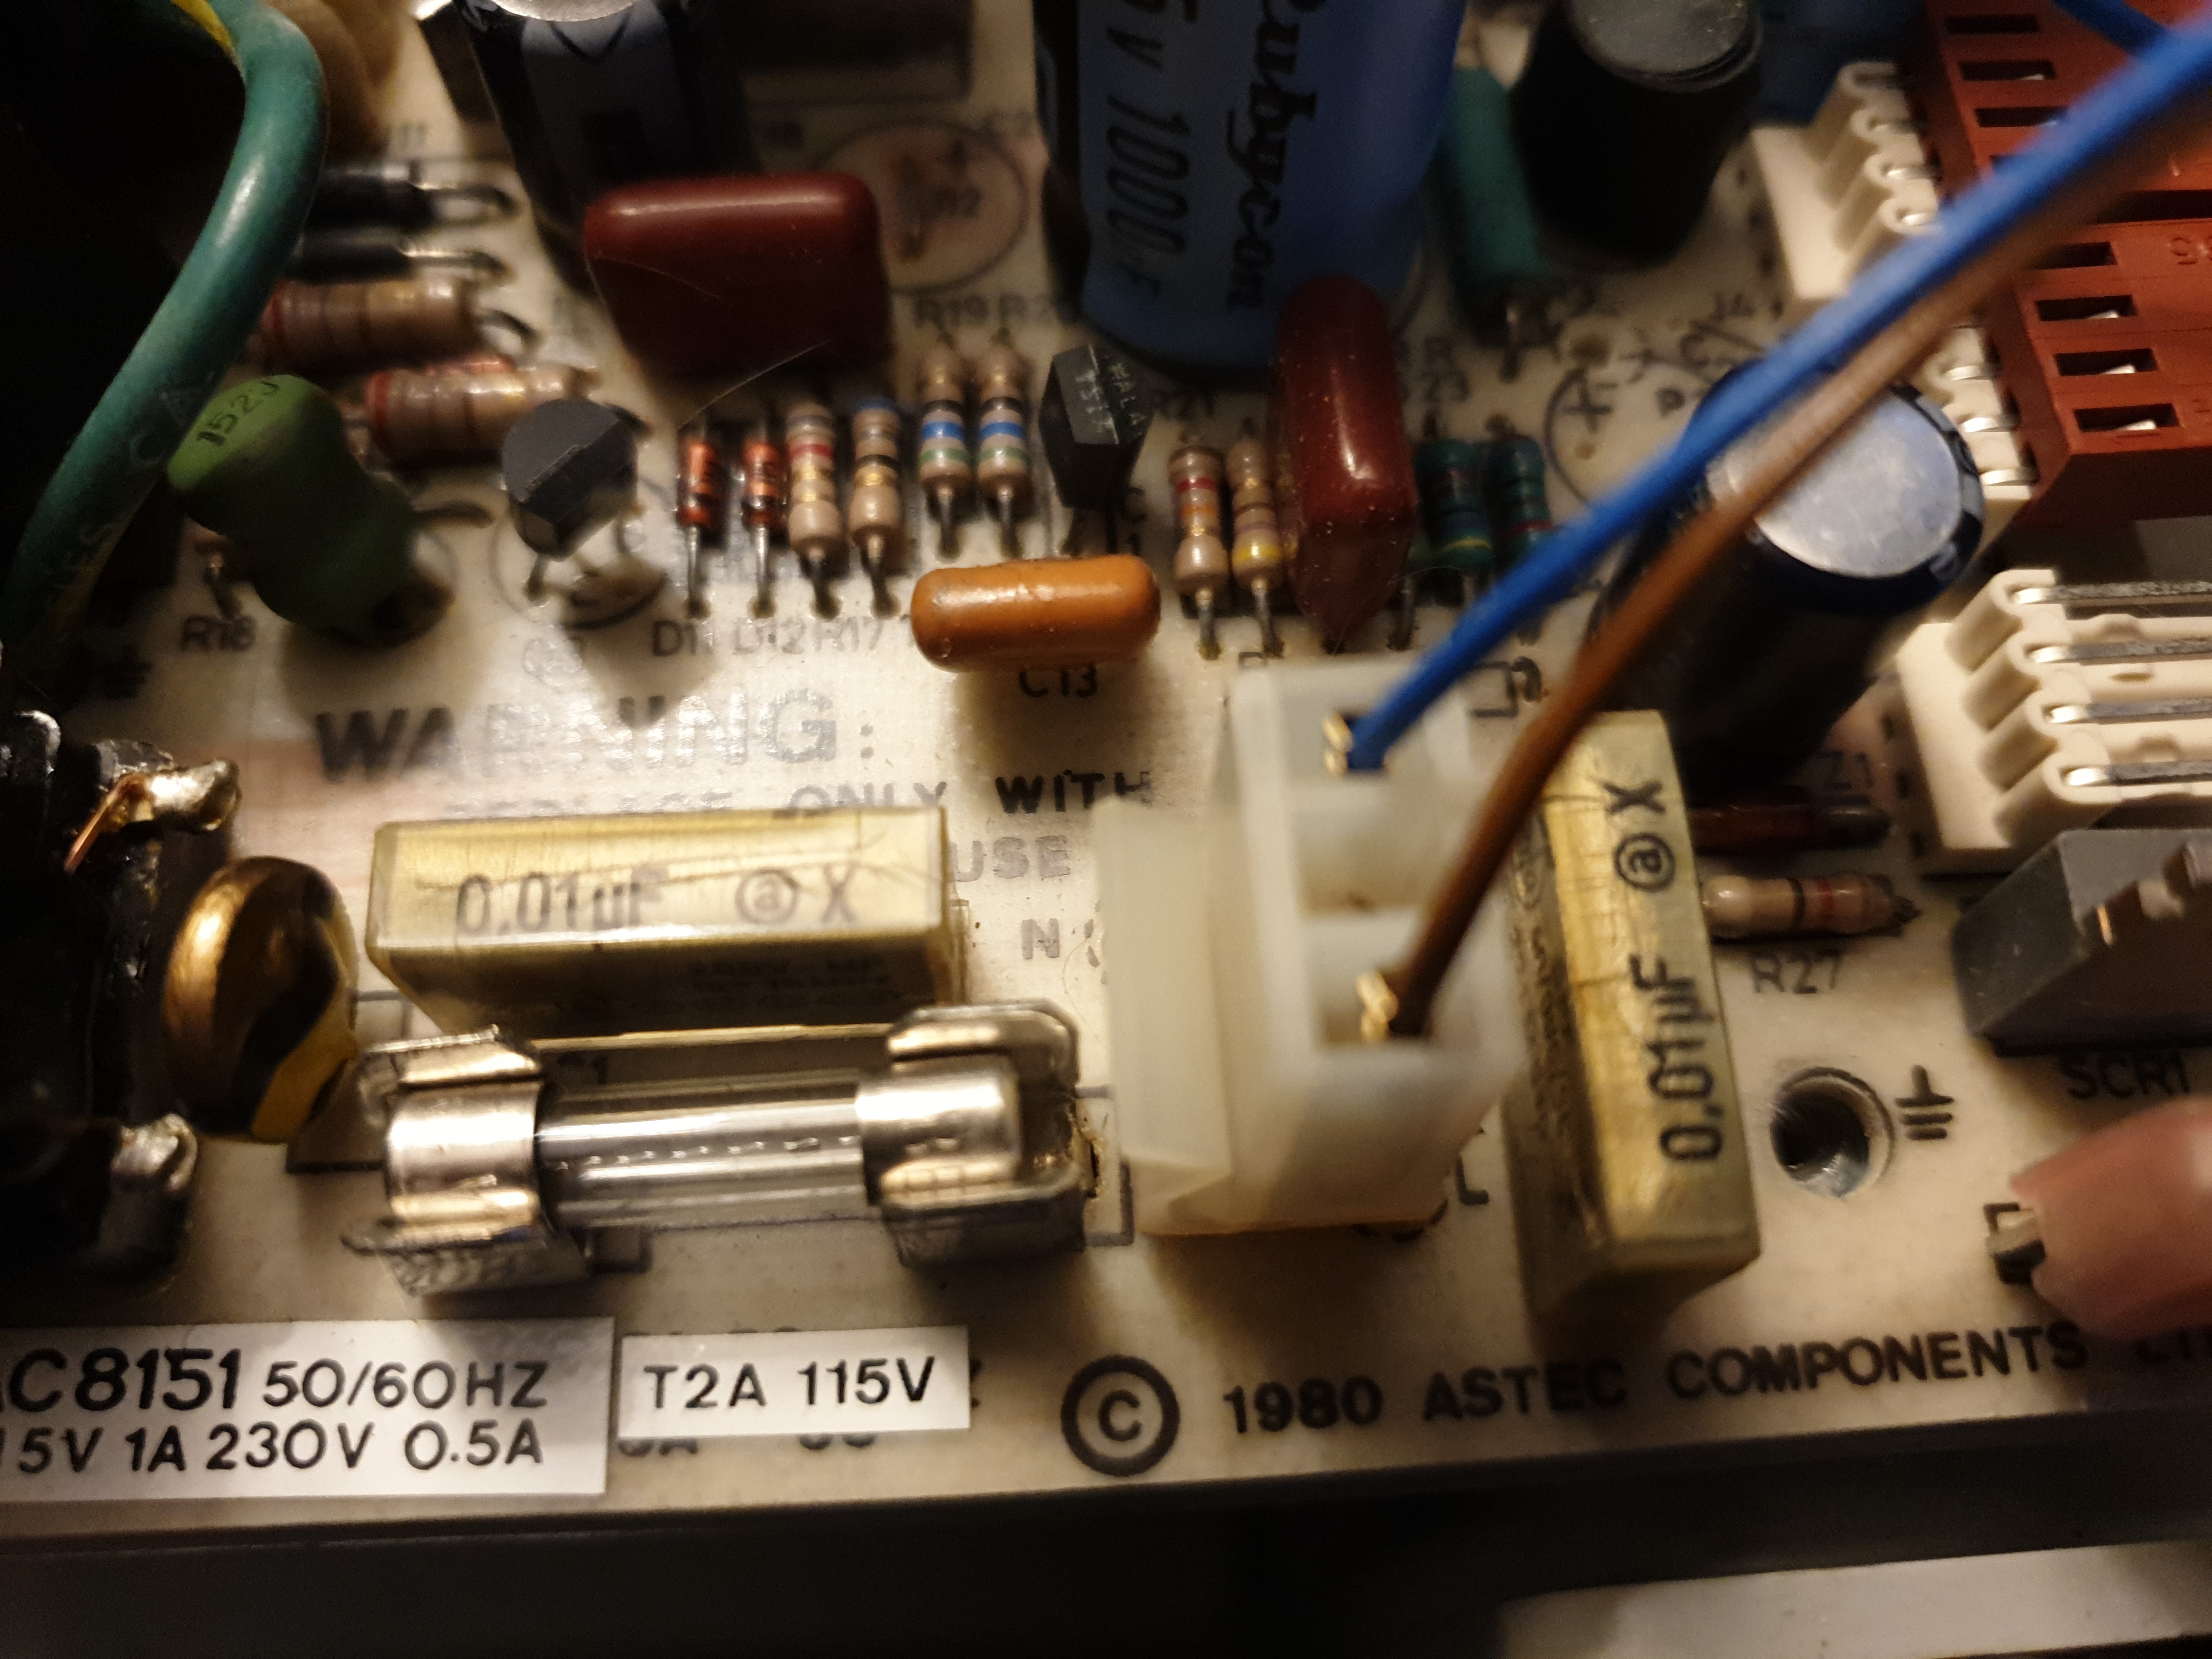
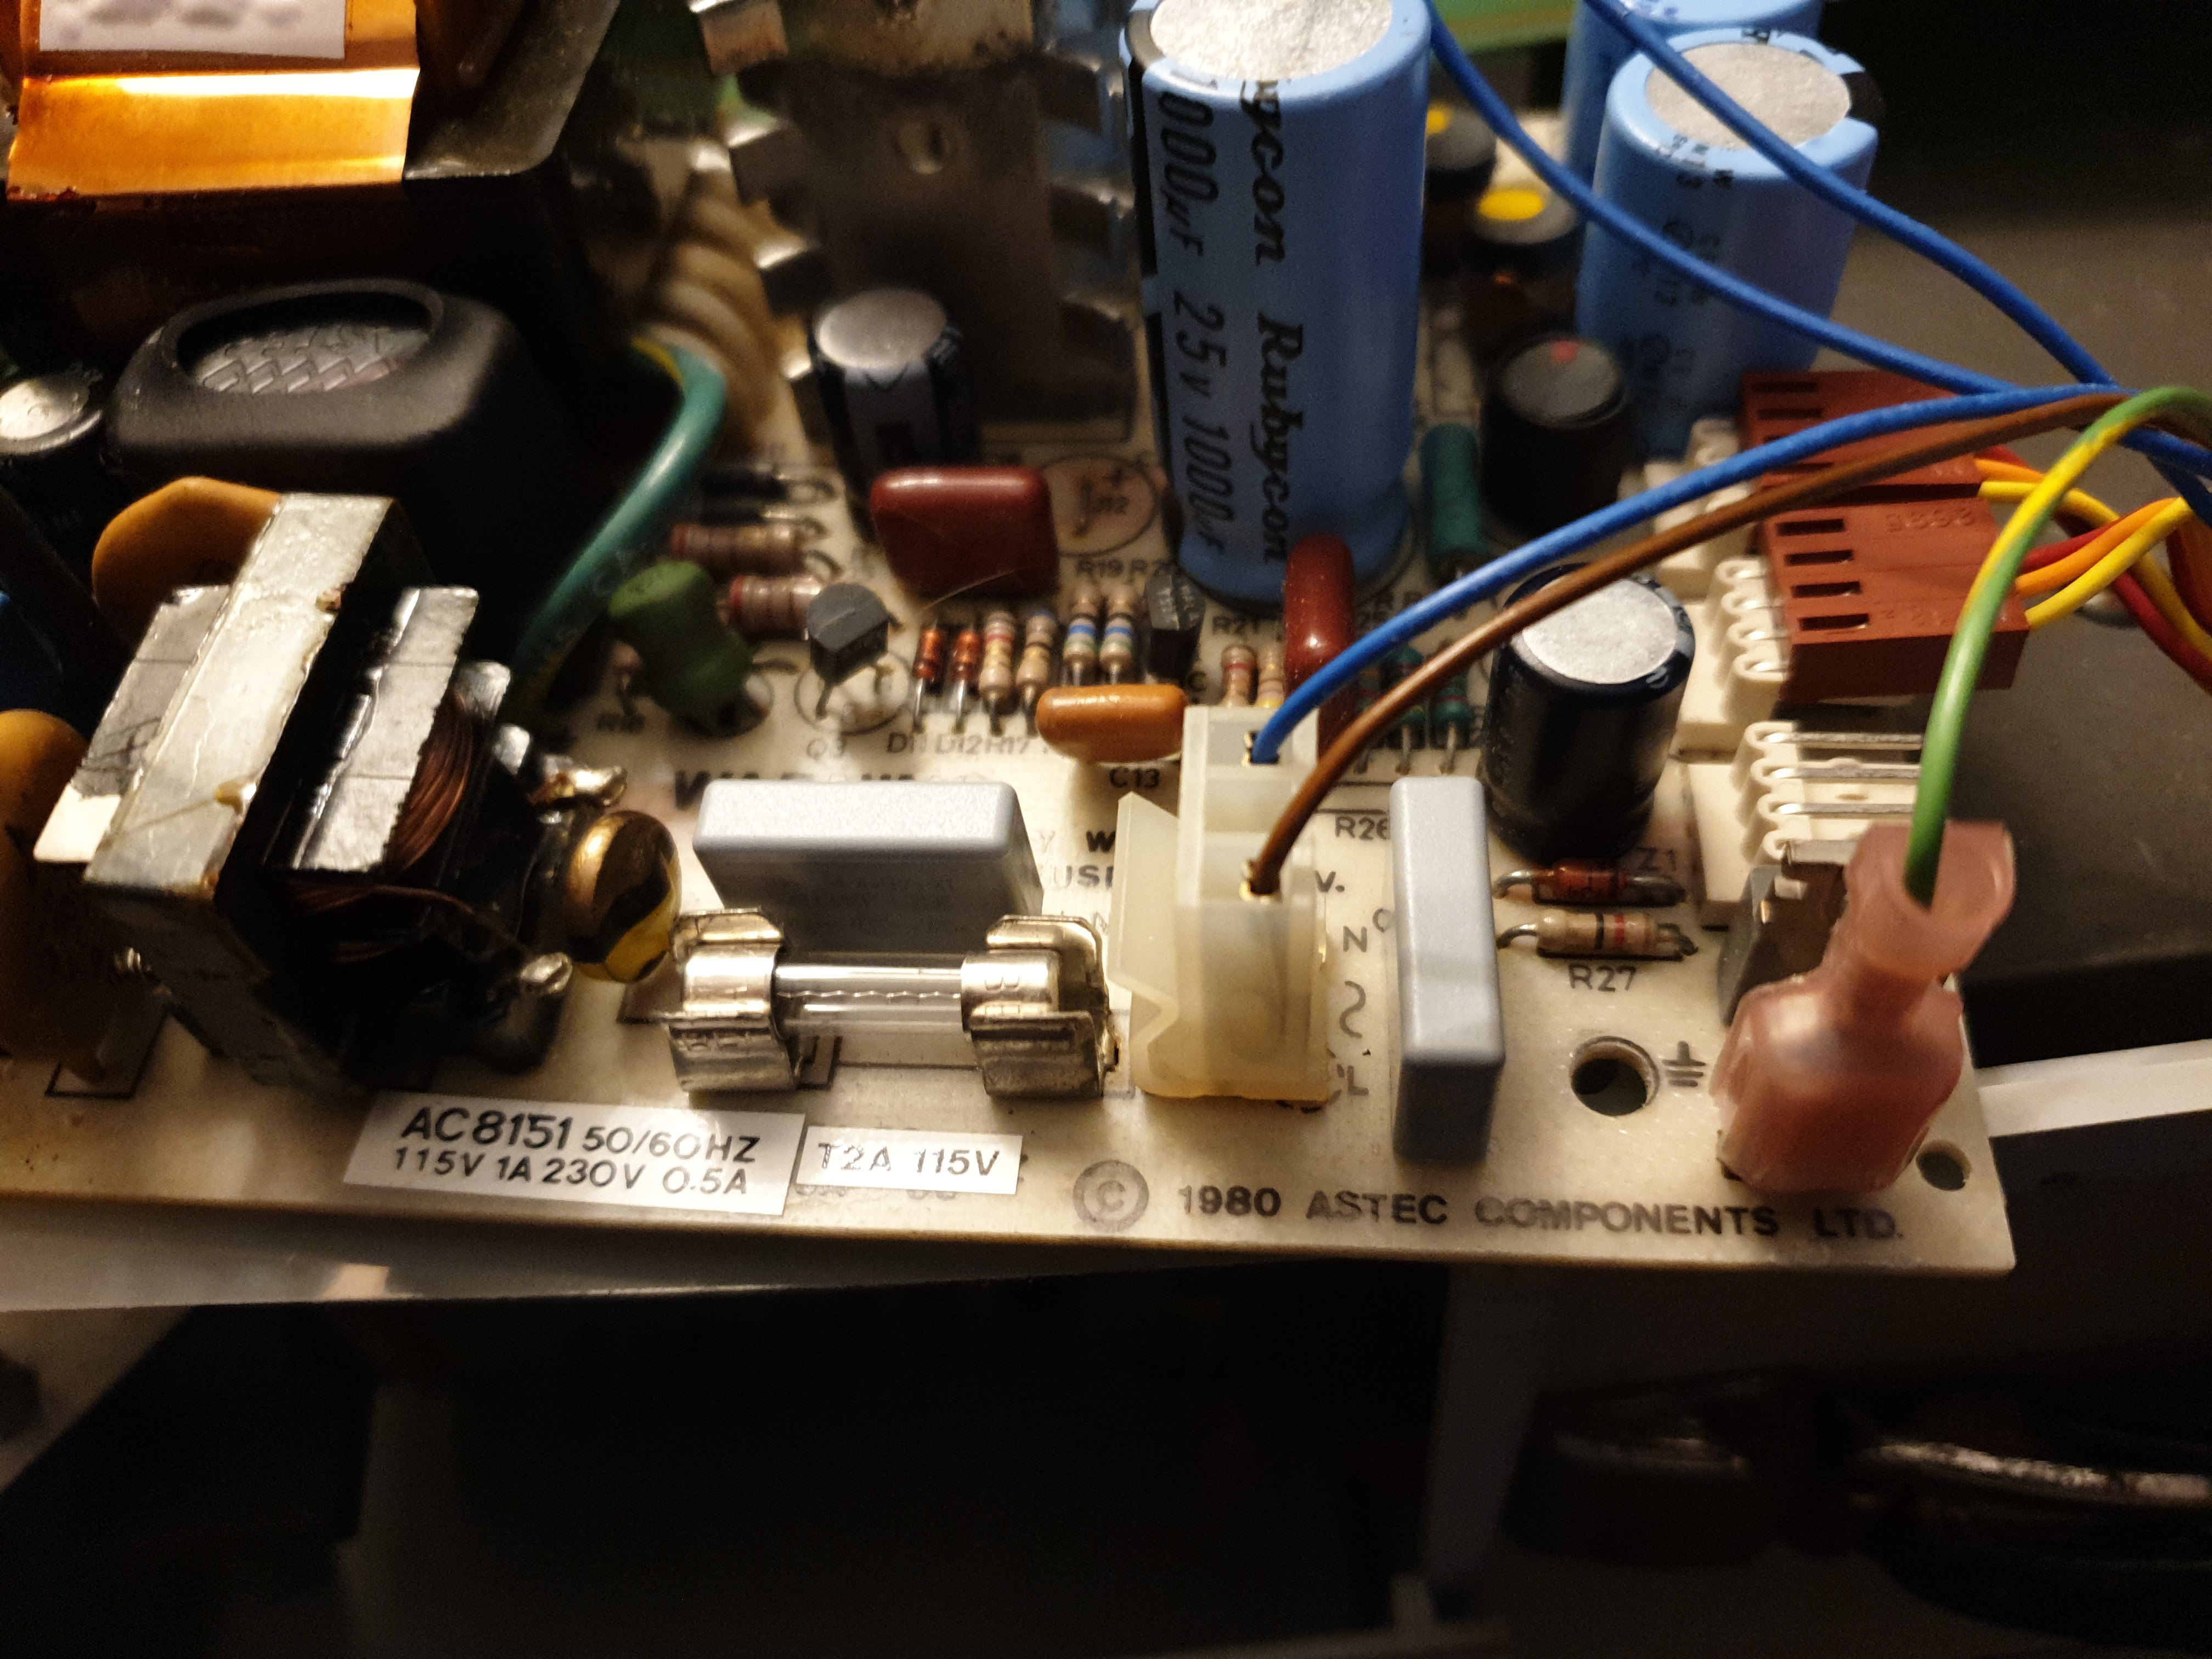
The Astec-branded power supply, removed from the Osborne 1 case
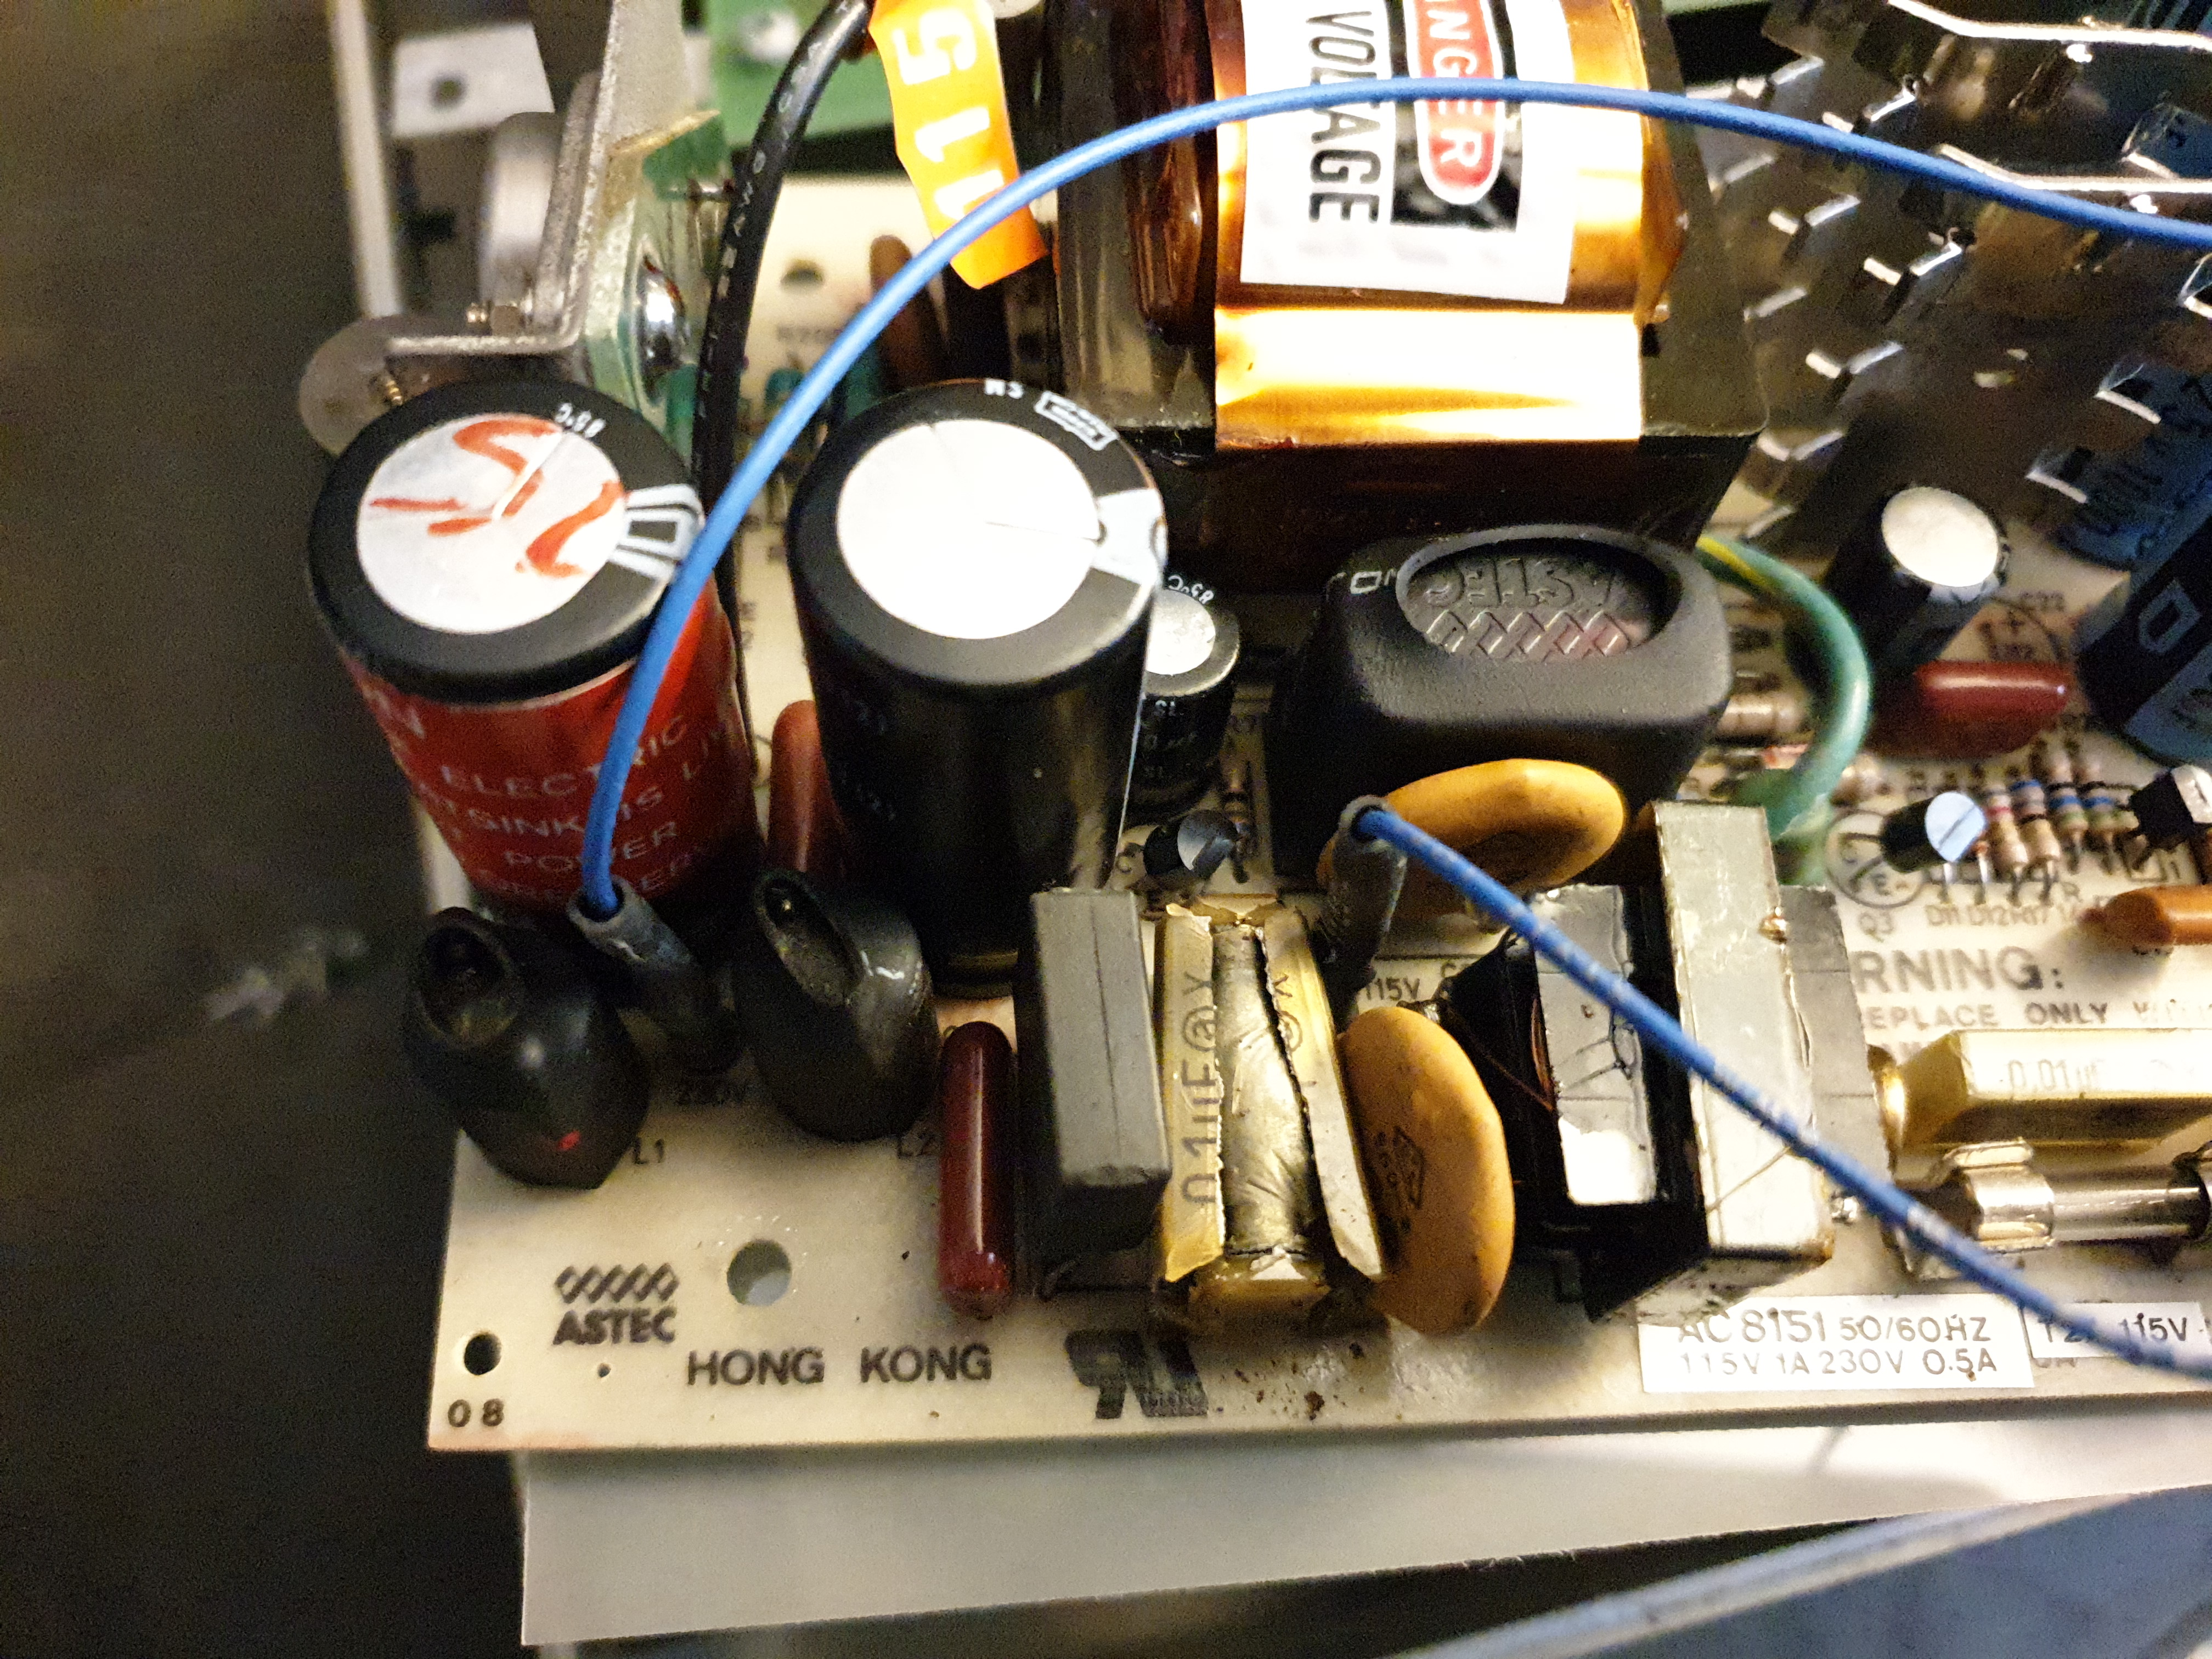
I noticed the power supply uses three safety filter capacitors, which are:
- a single 0.1uF 250VAC filter capacitor at C2
- two 0.01uF 250VAC filter capacitors at C1 and C11
The two 0.01uF caps are still intact, but it makes sense while I'm in there to replace these too.
I
ordered some replacements from Farnell Electronics, which were:
- one Epcos-branded B32912A5104M000 (0.1uF, 530VAC, X1 suppression, metalized polypropylene)
- two Vishay-branded BFC233810103 (0.01uF, 440VAC, X1 suppression, metalized polypropylene)
These are now installed and we're back in business, though the power supply still has that pretty loud buzzing sound coming from the transformer.
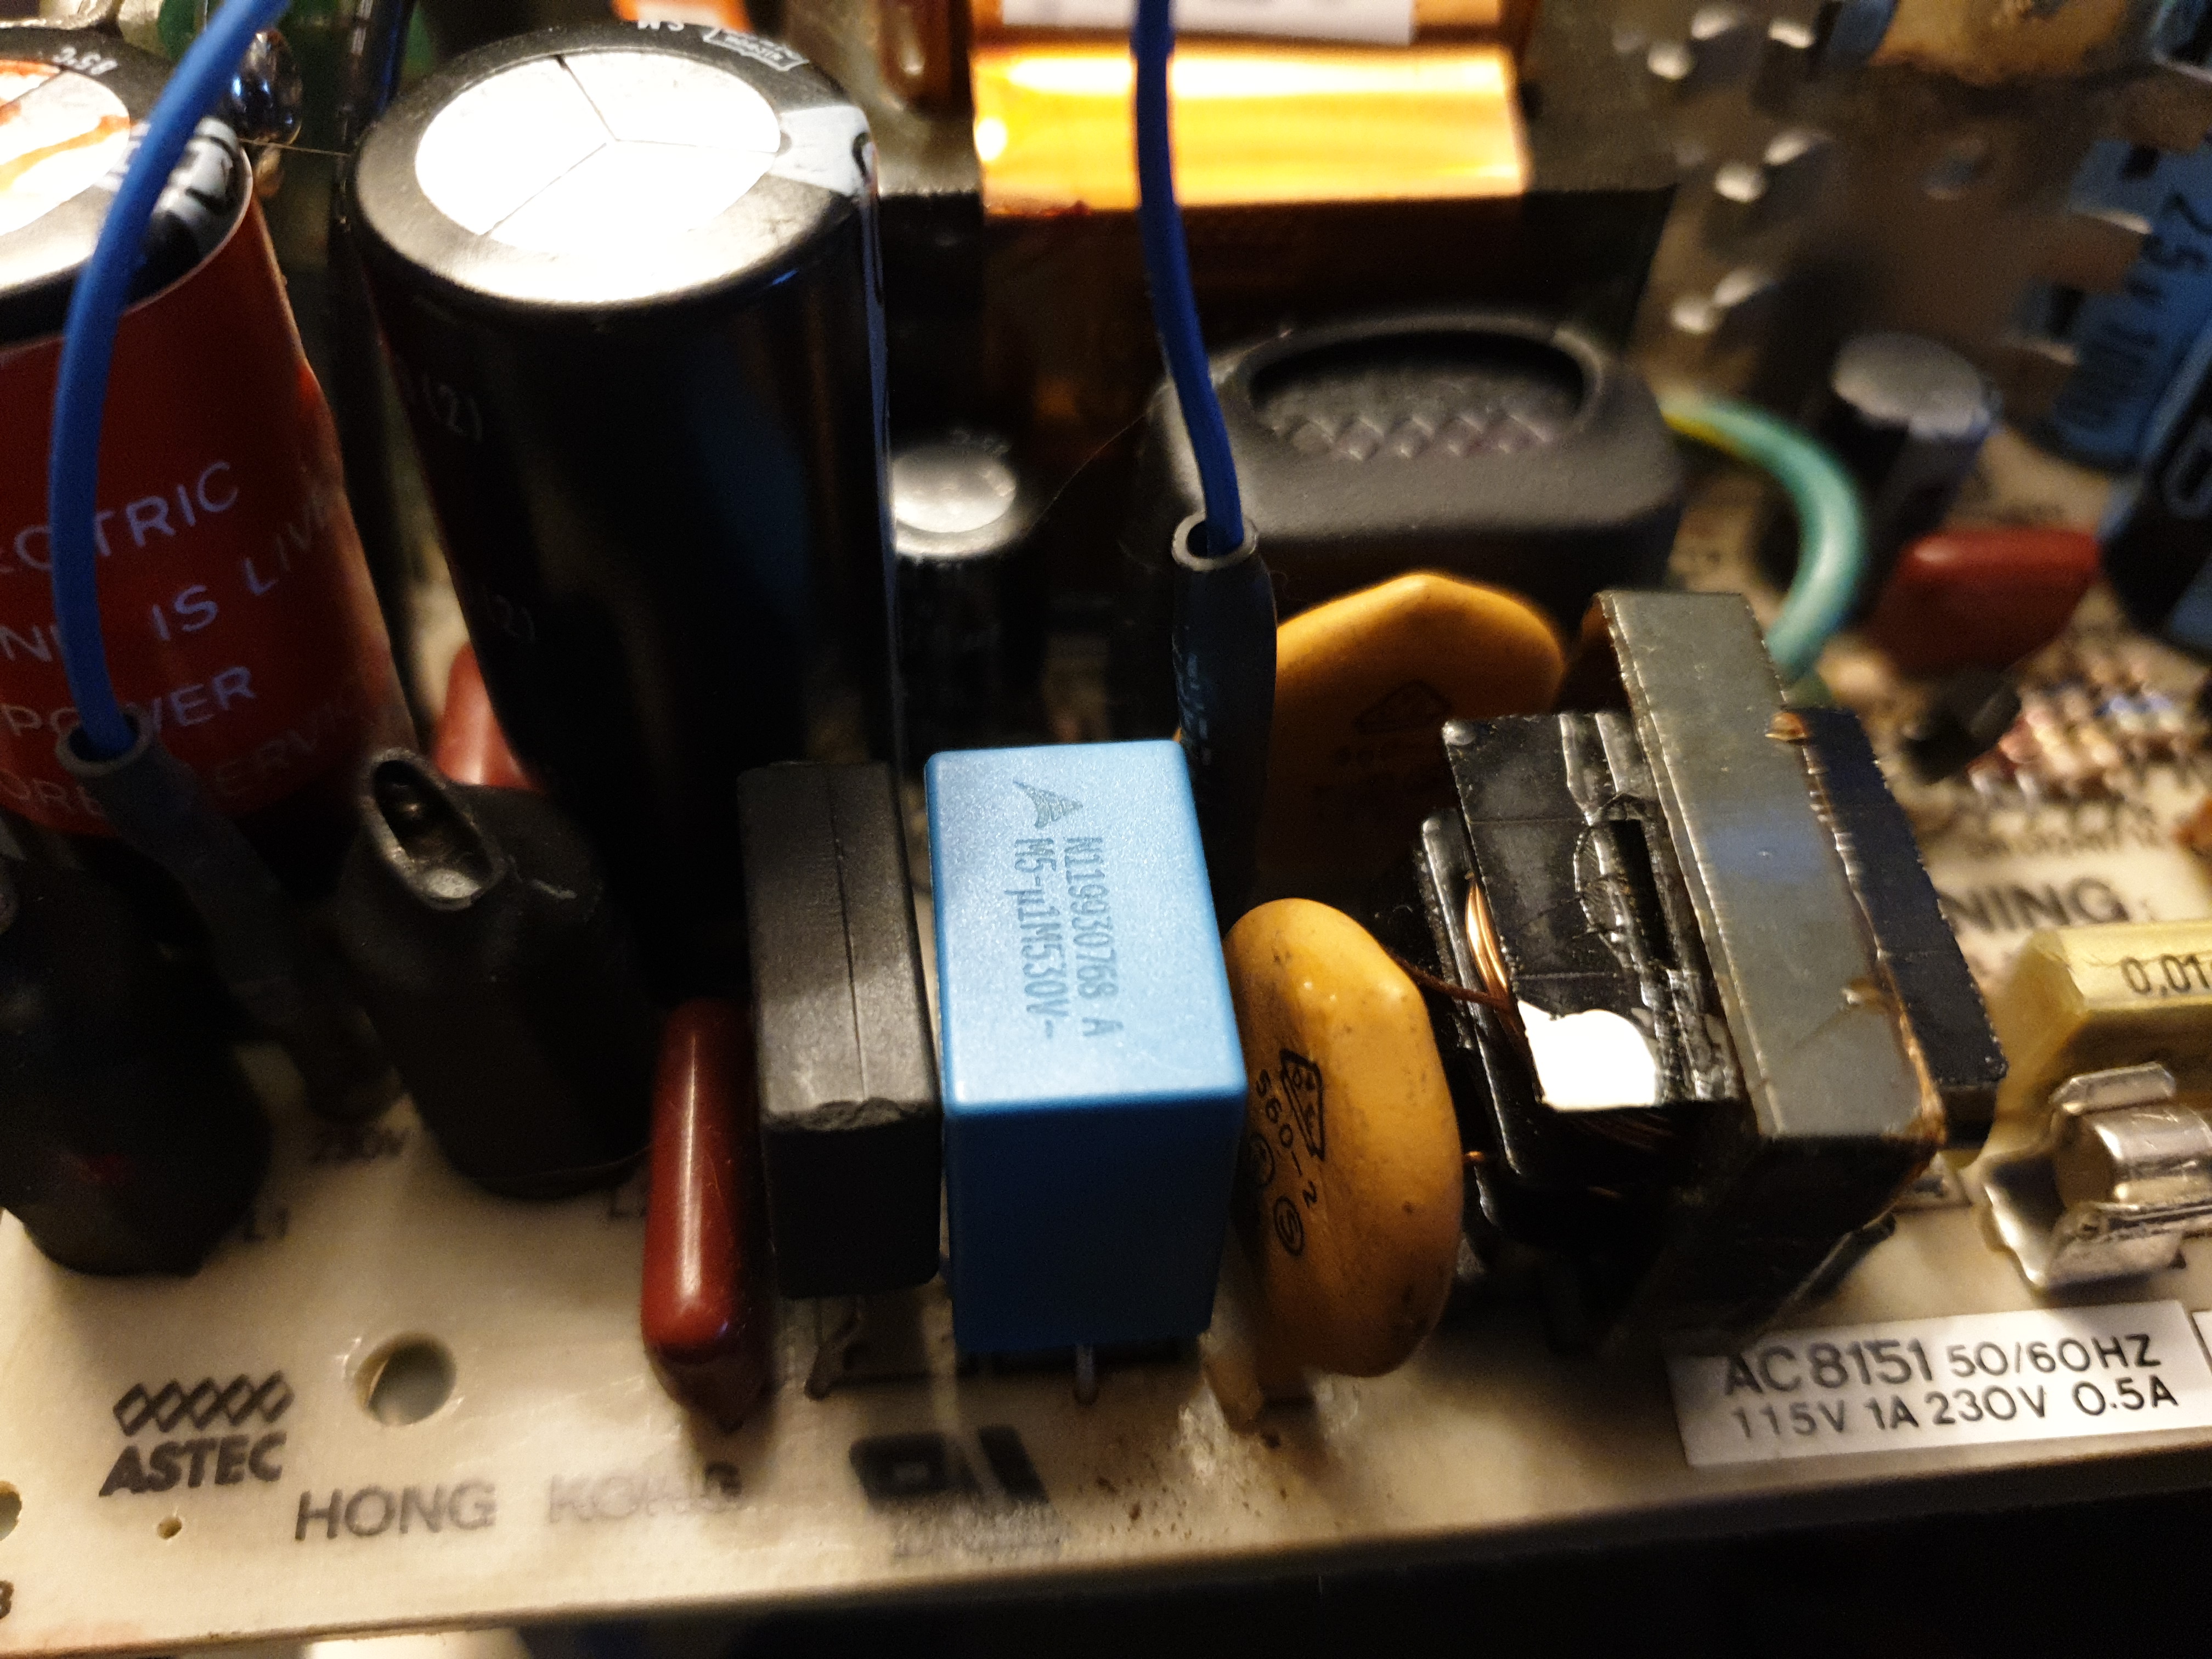
Top row: the blown filter cap and its blue replacement installed
Bottom row: the other two filter caps, and their grey replacments installed
Problem #2: Nothing on the display
Once the new caps were in, I was still getting nothing on powering-up from the built-in display. Now these computers have the option of sending their text to an external display, and if you wish to use the little 5" built-in CRT you must have what's called a "shunt" fitted to the external monitor connector on the front of the unit. The shunt basically shorts the pins on the top of the edge connector to the pins on the bottom of the connector - this is just a cheap way of telling the computer to direct its output to the built-in display - if this is missing, the video controller circuitry sends its video signals out of the edge connector's pins to whatever you have connected it to.
Software which is provided for free with the purchase of an Osborne I includes CP/M 2.2, CBASIC2, Microsoft BASIC, WordStar, MailMerge, and a new VisiCalc-like program, being readied by Sorcim, called SuperCalc.
In case you think the price printed above was a mistake, we'll repeat it: $1795. This is the retail price of the Osborne I, and when you consider that the software supplied retails for almost $1500 you begin to understand Adam Osborne when he talks about a "significant price/performance advantage"." InfoWorld, April 13, 1981
The problem I faced, however, was not a missing shunt - that was installed. I increased the brightness and contrast knobs on the front of the Osborne 1 to be sure this wasn't a simple case of low visibility - it wasn't.
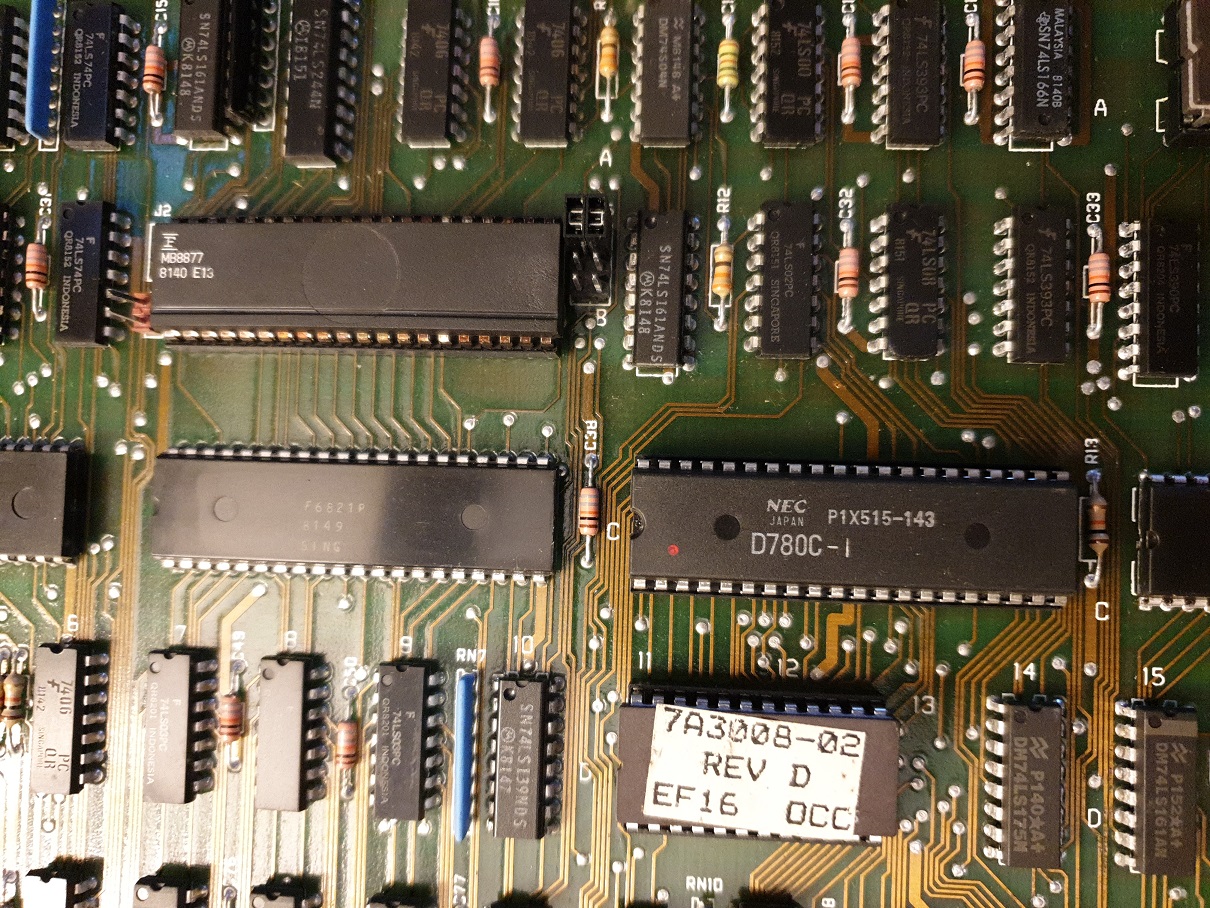
Further checks around the circuit board have led me to a faulty Z80 CPU.
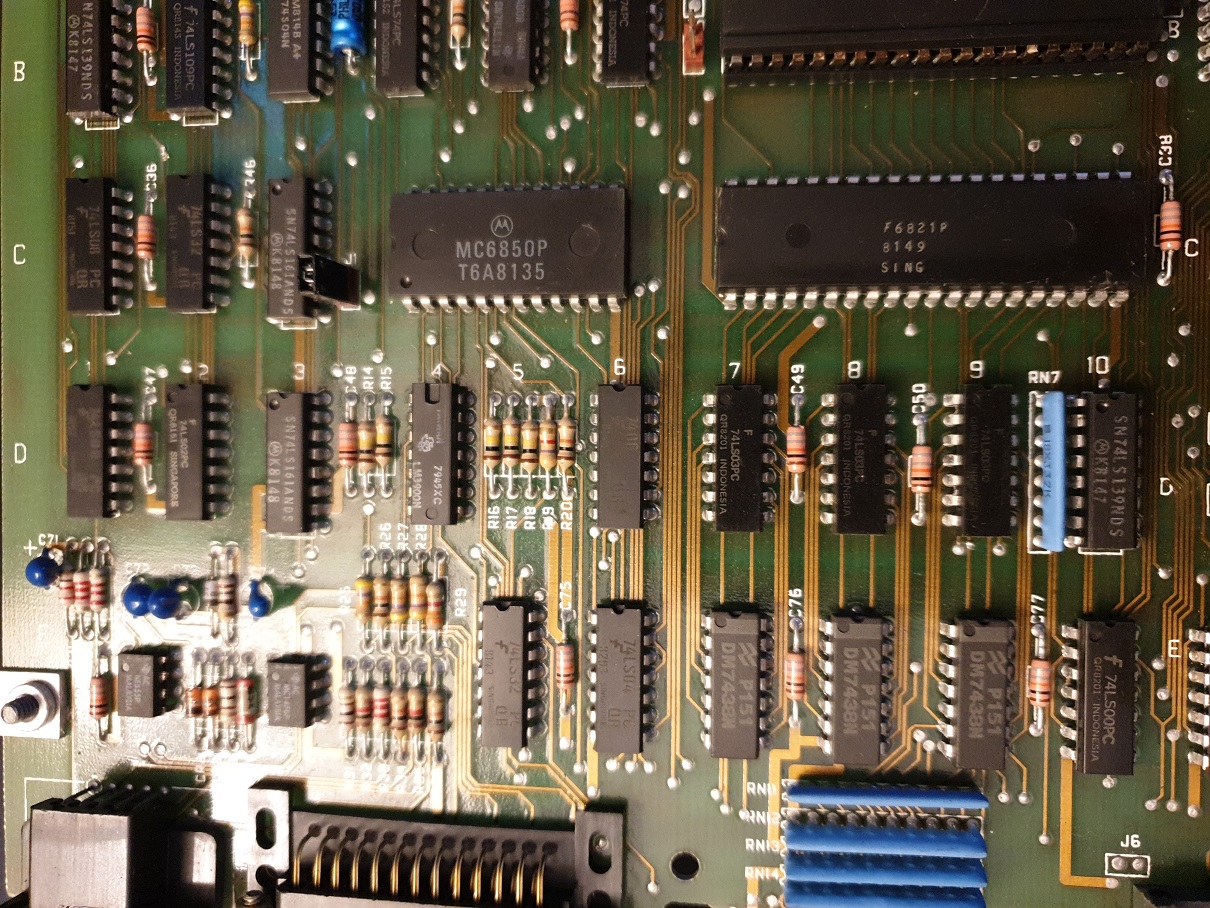
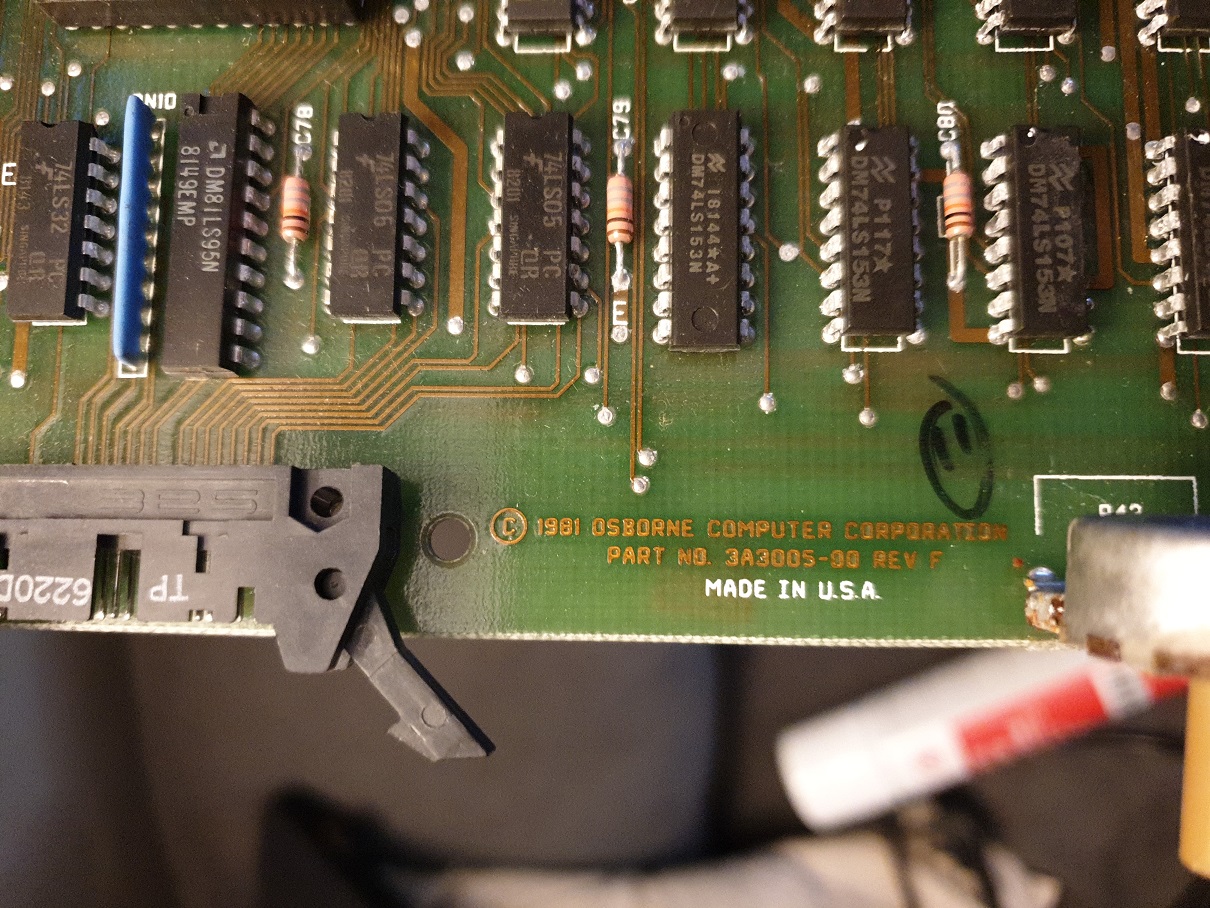
The main
computer circuit board
Fortunately, I do have a small collection of CPUs including Z80s - I found a suitable 4 MHz replacement Z80A that I knew was working, and...
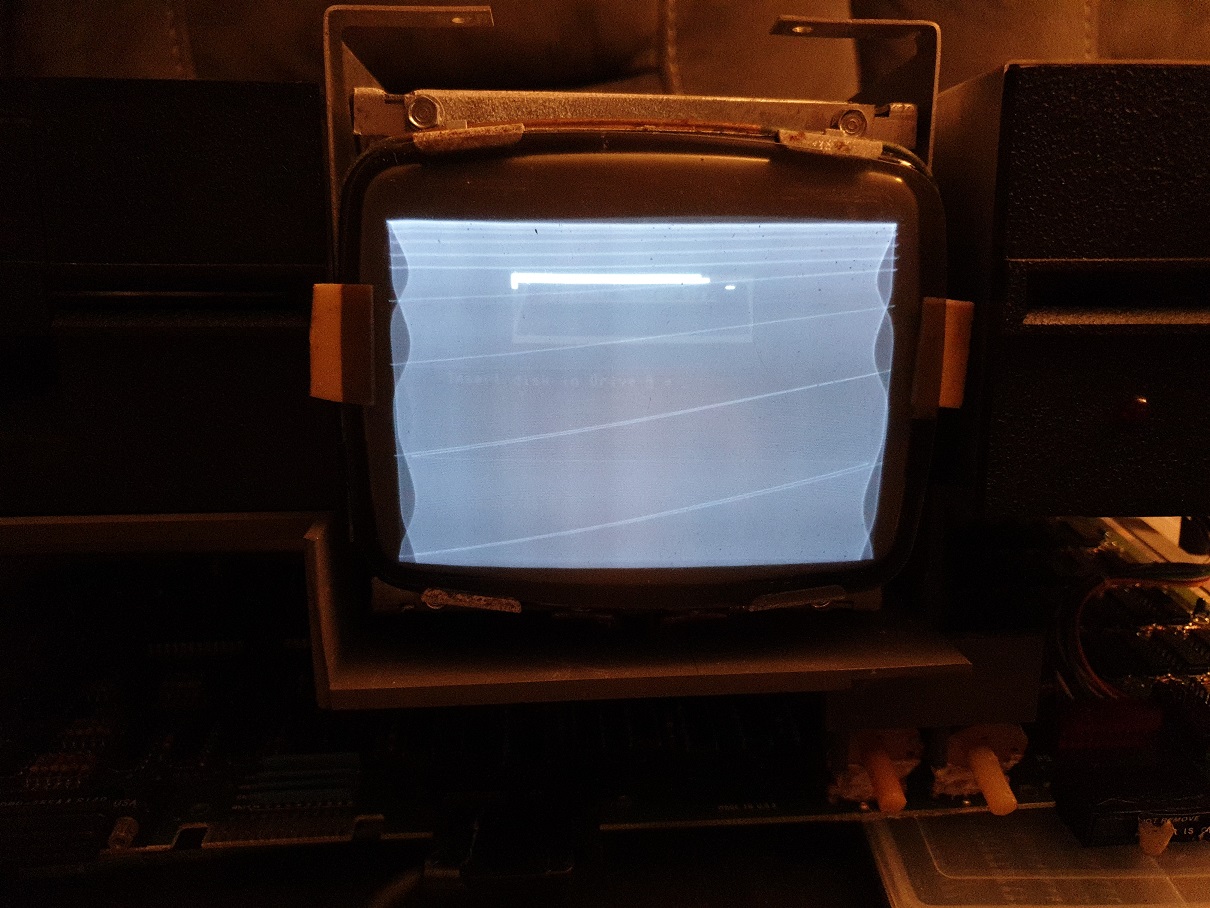
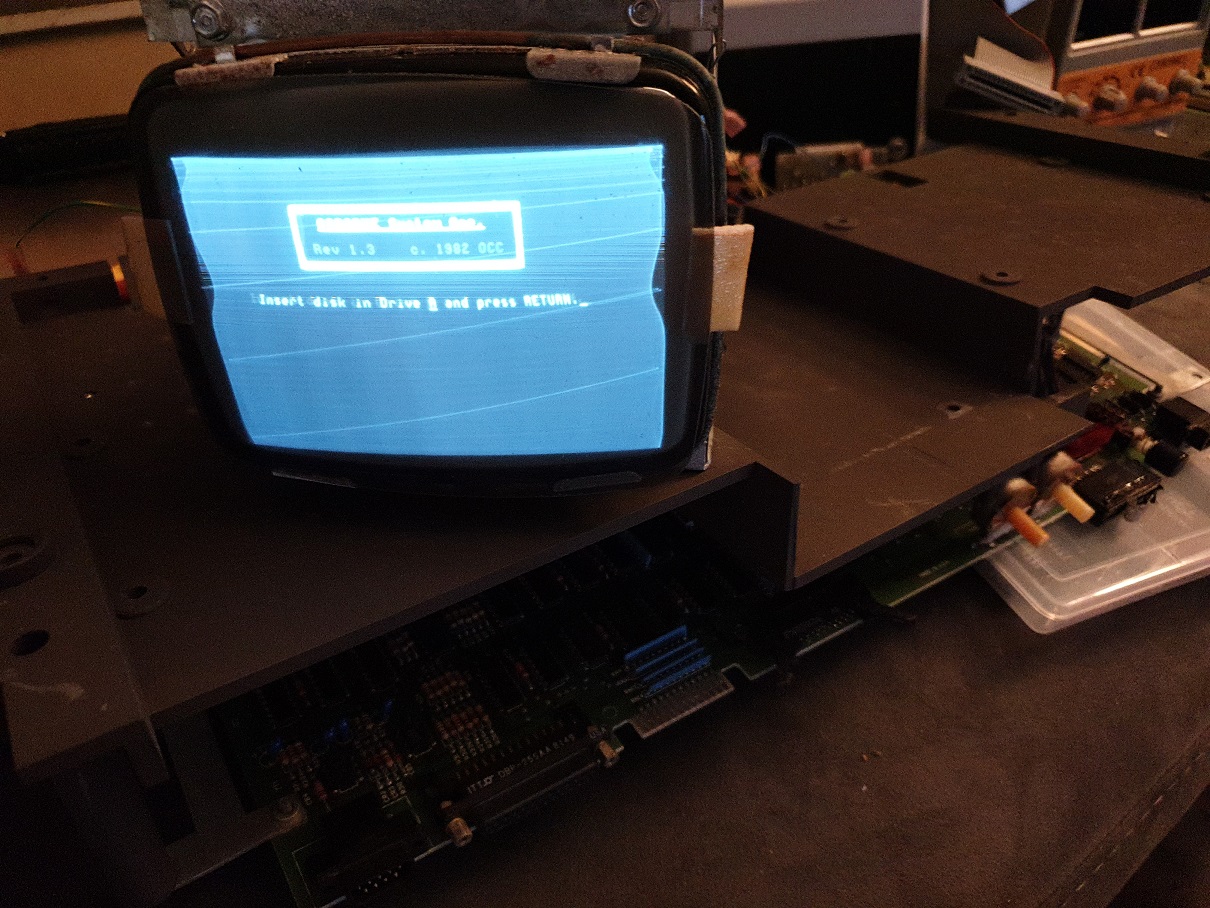
Progress...
We have a video signal! It's not great but it proves the main board is working, along with its video driver circuitry!
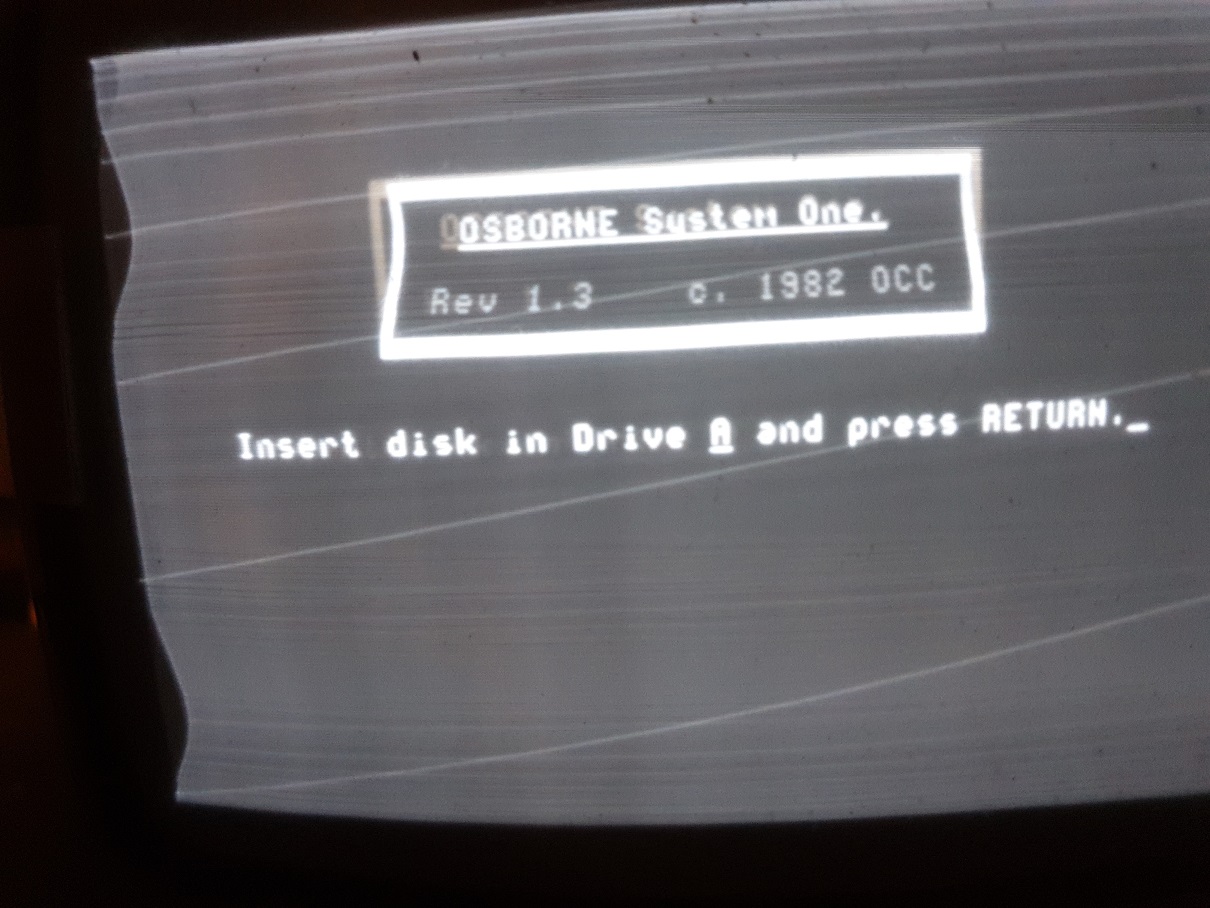
Problem #3: A jittery CRT
Well, the little 5" monitor is definitely showing some form of image but it's rather wavy and scrolling.
Cathode Ray Tube (CRT) monitors contain circuitry with extremely high voltages that can kill - EVEN AFTER BEING POWERED OFF OR DISCONNECTED FROM THE MAINS SUPPLY. Do not remove the cover of any computer monitor or operate it under any circumstances contrary to the manufacturer's intended use unless you are a qualified electrical engineer. Even if you are qualified, I take no responsibility if you read this article and suffer any loss, damage or other negative consequence to yourself, anyone around you or property - this site is not instructional - it is intended to be purely informative and to be taken as anecdotal in nature.
Checking around the CRT board for some variable resistors soon showed 3 such things in a row toward the rear of the board. The CRT has a metal frame around it that prevents easy access to the CRT, so I removed this frame and pulled the CRT out of the computer. The three resistors appear to be labelled VERT-HOLD, VERT-LIN. and VERT-HGT.
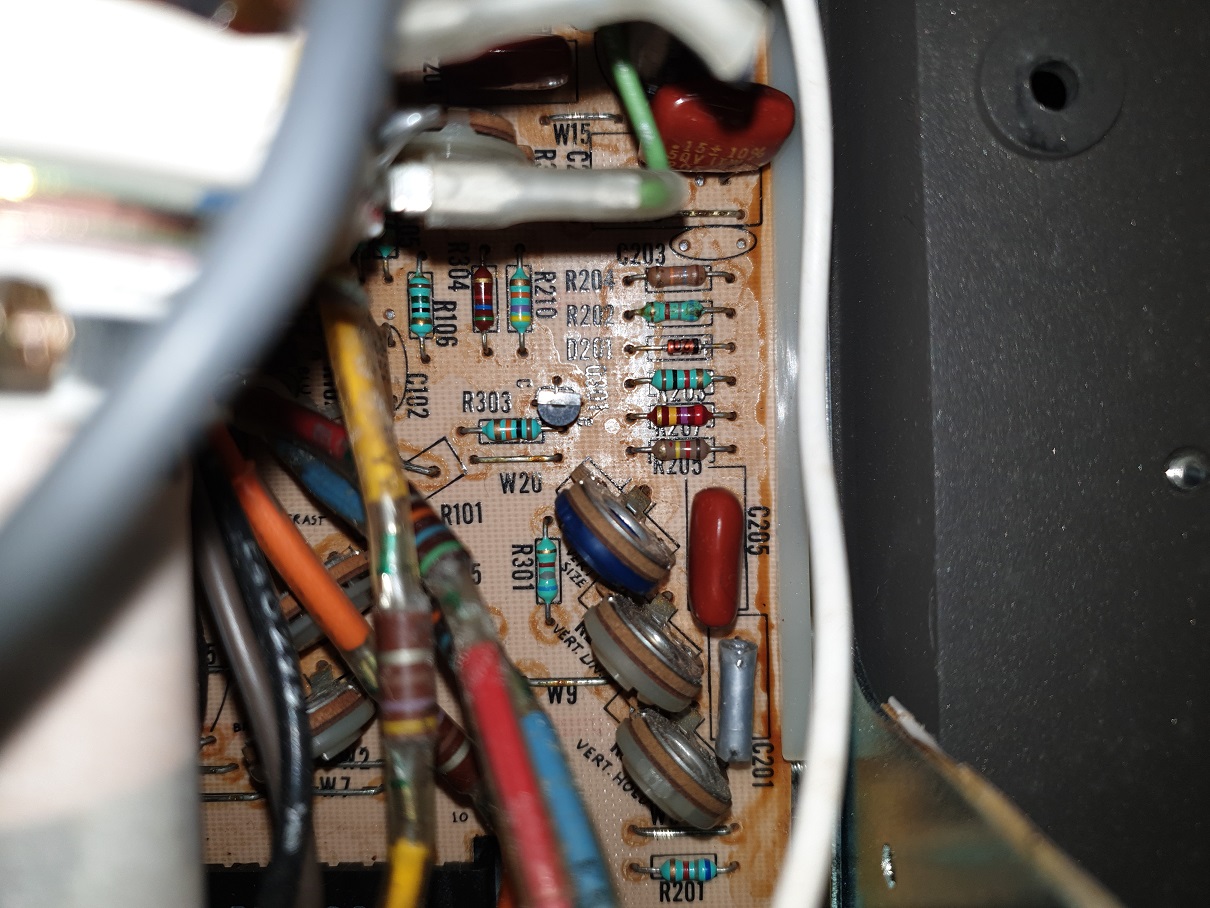
I powered the Osborne 1 up again, and while the display was jittery I adjusted the V-HOLD until I got a more steady picture. V-LIN. (vertical linearity) made very little difference to the quality of the image, and V-HEIGHT was already set up correctly - the image looks to be slighty below-centre, so increasing V-HEIGHT just took more of the image off the bottom of the screen - I readjusted it so that the bottom of the screen's image matched up to the bottom of the CRT's display area.
That's looking a bit better!
To those eagle-eyed among you, you may have noticed two more variable resistors to the left in the image - these are labelled BRITE and FOCUS. CONTRAST is also labelled on the board, though this, I think, is connected to the main board for control via the front panel's dial.
Operating System and Software
OK, we are definitely getting there. Now I know we have at least a semi-working computer, it's at this point that I needed to do some research on how to get the thing booted into CP/M.
There are several challenges to overcome here. as the Osborne 1's floppy disk drives are, unsurprisingly, not PC-compatible. Osborne used two manufacturers over its short lifetime: Siemens (early models) and MPI (later models). In both cases, the floppy manufacturer's controller circuits were removed and replaced with a custom Osborne one. There are also reports of half-height Chinon floppy drives being used right at the end of the Osborne 1's life.
1) They have a single read/write head and use single-density 5.25" disks (though double-density disks can be used if formatted as single-density).
2) They use a proprietary format of 10 sectors per track over 40 tracks, each sector being 256 bytes in capacity. This gives a soft-sectored floppy disk 10 x 40 x 256 = 102,400 bytes capacity (100 KB). The drive motor runs at 300 rpm and data is stored using the FM (Frequency Modulation) encoding scheme, a precursor to MFM (Modified Frequency Modulation) used on early PCs.
After much reading about using the IEE-488 serial port to transfer data, maybe pulling out my Commodore 128 (which can natively run CP/M), and more, I decided it would be the best approach to simply try and format a CP/M floppy and write a CP/M boot disk image to it.
In order to create a CP/M boot disk as a minimum, this would require even more old hardware...
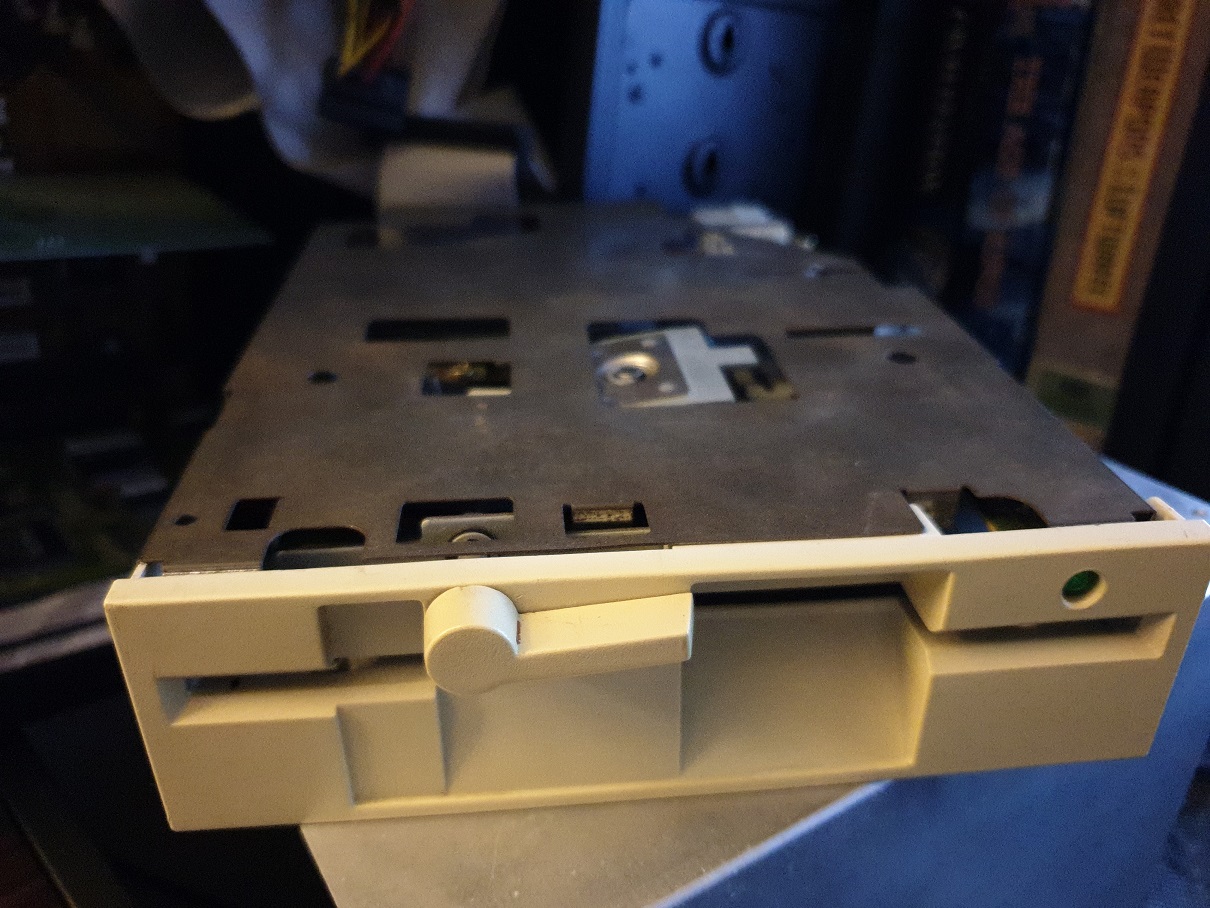
A Mitsumi 5.25" 360 KB Floppy Drive
This floppy drive was the one that came in my first ever PC - the Morgan Generic Base XT. Knowing that high-density 5.25" 1.2 MB drives don't play well with low-density media, this drive was the one to use. I connected it up to my Retro PC as drive B: (my Gotek with FlashFloppy 1.3 is drive A:), configured it in the BIOS and booted to DOS.
I unwrapped a brand new pack of 10 3M-branded DS/DD 5.25" floppy disks, and tried to format a brand new disk - no luck. It wouldn't even get past the first track before throwing a 'bad media' error. I seem to recall this drive not working several years ago, but never got around to fixing it. I wanted to get it to the point it could at least format, write and read in DOS before exercising it further.
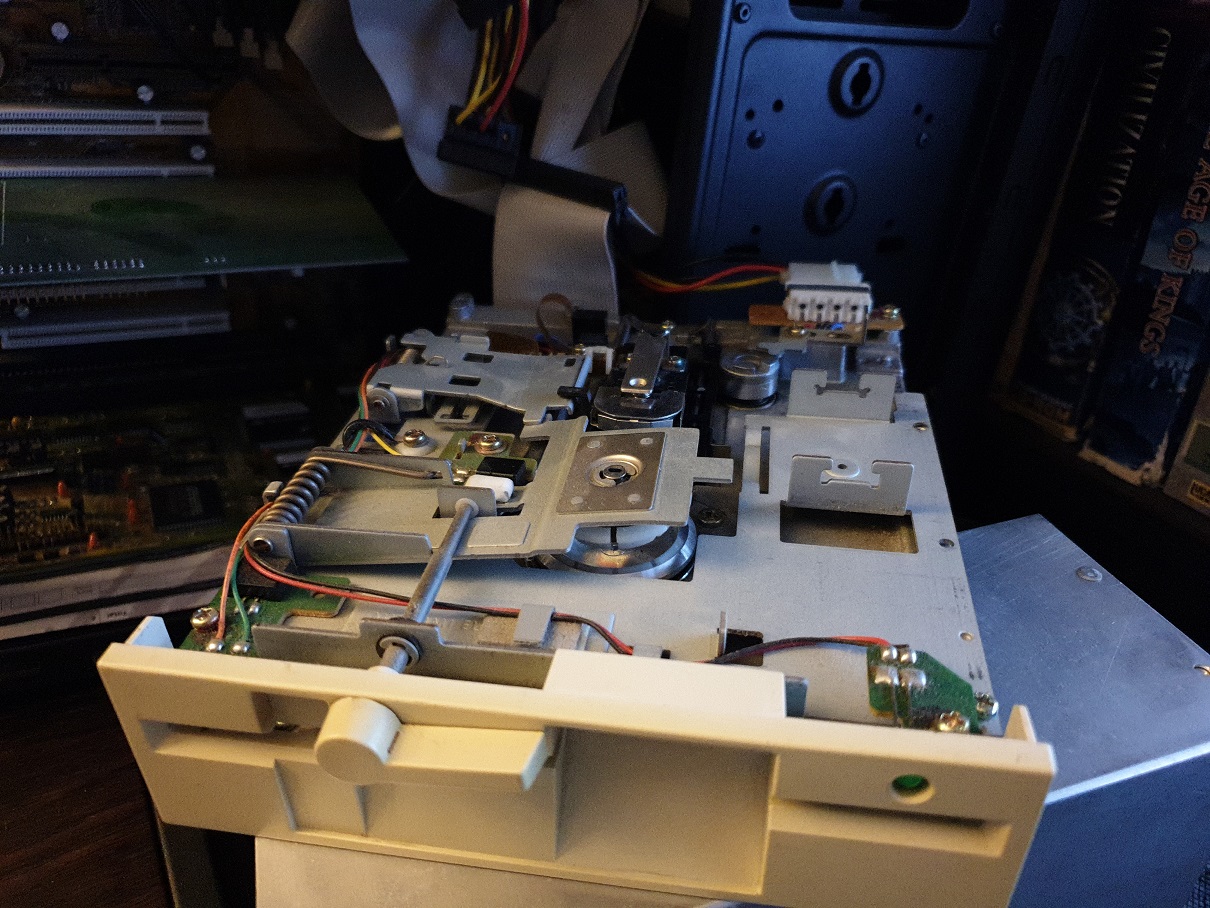
Taking the lid off...
I took the metal protective cover off the top of the drive, and proceeded to swab the drive's heads (top and bottom) with some isopropyl alcohol and a cotton bud. The drive's stepper motor was pretty noisy, though manually moving the head carriage back and forth seemed to do so without much friction. I applied a small amount of oil to the stepper motor and manually rotated it to work the oil in. Hoping this would fix my formatting issue, I retried - the same error presented itself. I then tried a third time but applied a small amount of downward pressure on the head assembly as it began its format, and incredibly it started to format the disk! The good news was that I didn't need to keep applying pressure - releasing my finger from the top of the drive's head assembly after Track 2 or 3 was formatted then allowed to keep going, formatting all the tracks without issue. I copied a few files to the disk and read them back - all good!
Now I had a working drive and I knew my "new/old" floppy disks were still ok.
In Part 2, I focus my attention on the tools I will use to get CP/M-readable content onto these disks!