Using a CF Card as a Hard Disk
These days it's becoming much more difficult to track down a workable and reliable hard disk for vintage computing use. Of course it depends on what era of vintage PC computing you're shooting for. But generally speaking, the older you go the tougher it is to find good hardware - especially hard disks.
For true authenticity, I'd love nothing more than to hear an old MFM or RLL hard disk spinning up and clattering when the heads are reading. But even if you can find a working one, it probably won't be long before it fails, and it will cost you quite a bit to purchase for that small privilege. These days we must be practical.
I've built numerous vintage PCs in the past decade - my current one's running a Pentium 233 MMX with an ATi Rage 3D Pro. Because the motherboard, a Microstar MS-5124, supports LBA mode (Logical Block Addressing) for hard disks, things like setting up hard disks are pretty painless. I use a combination of a Compact Flash - to - IDE adapter and an 8 GB Compact Flash (CF) and make it behave like a hard disk of old. This page provides you with instructions on how to do just that.
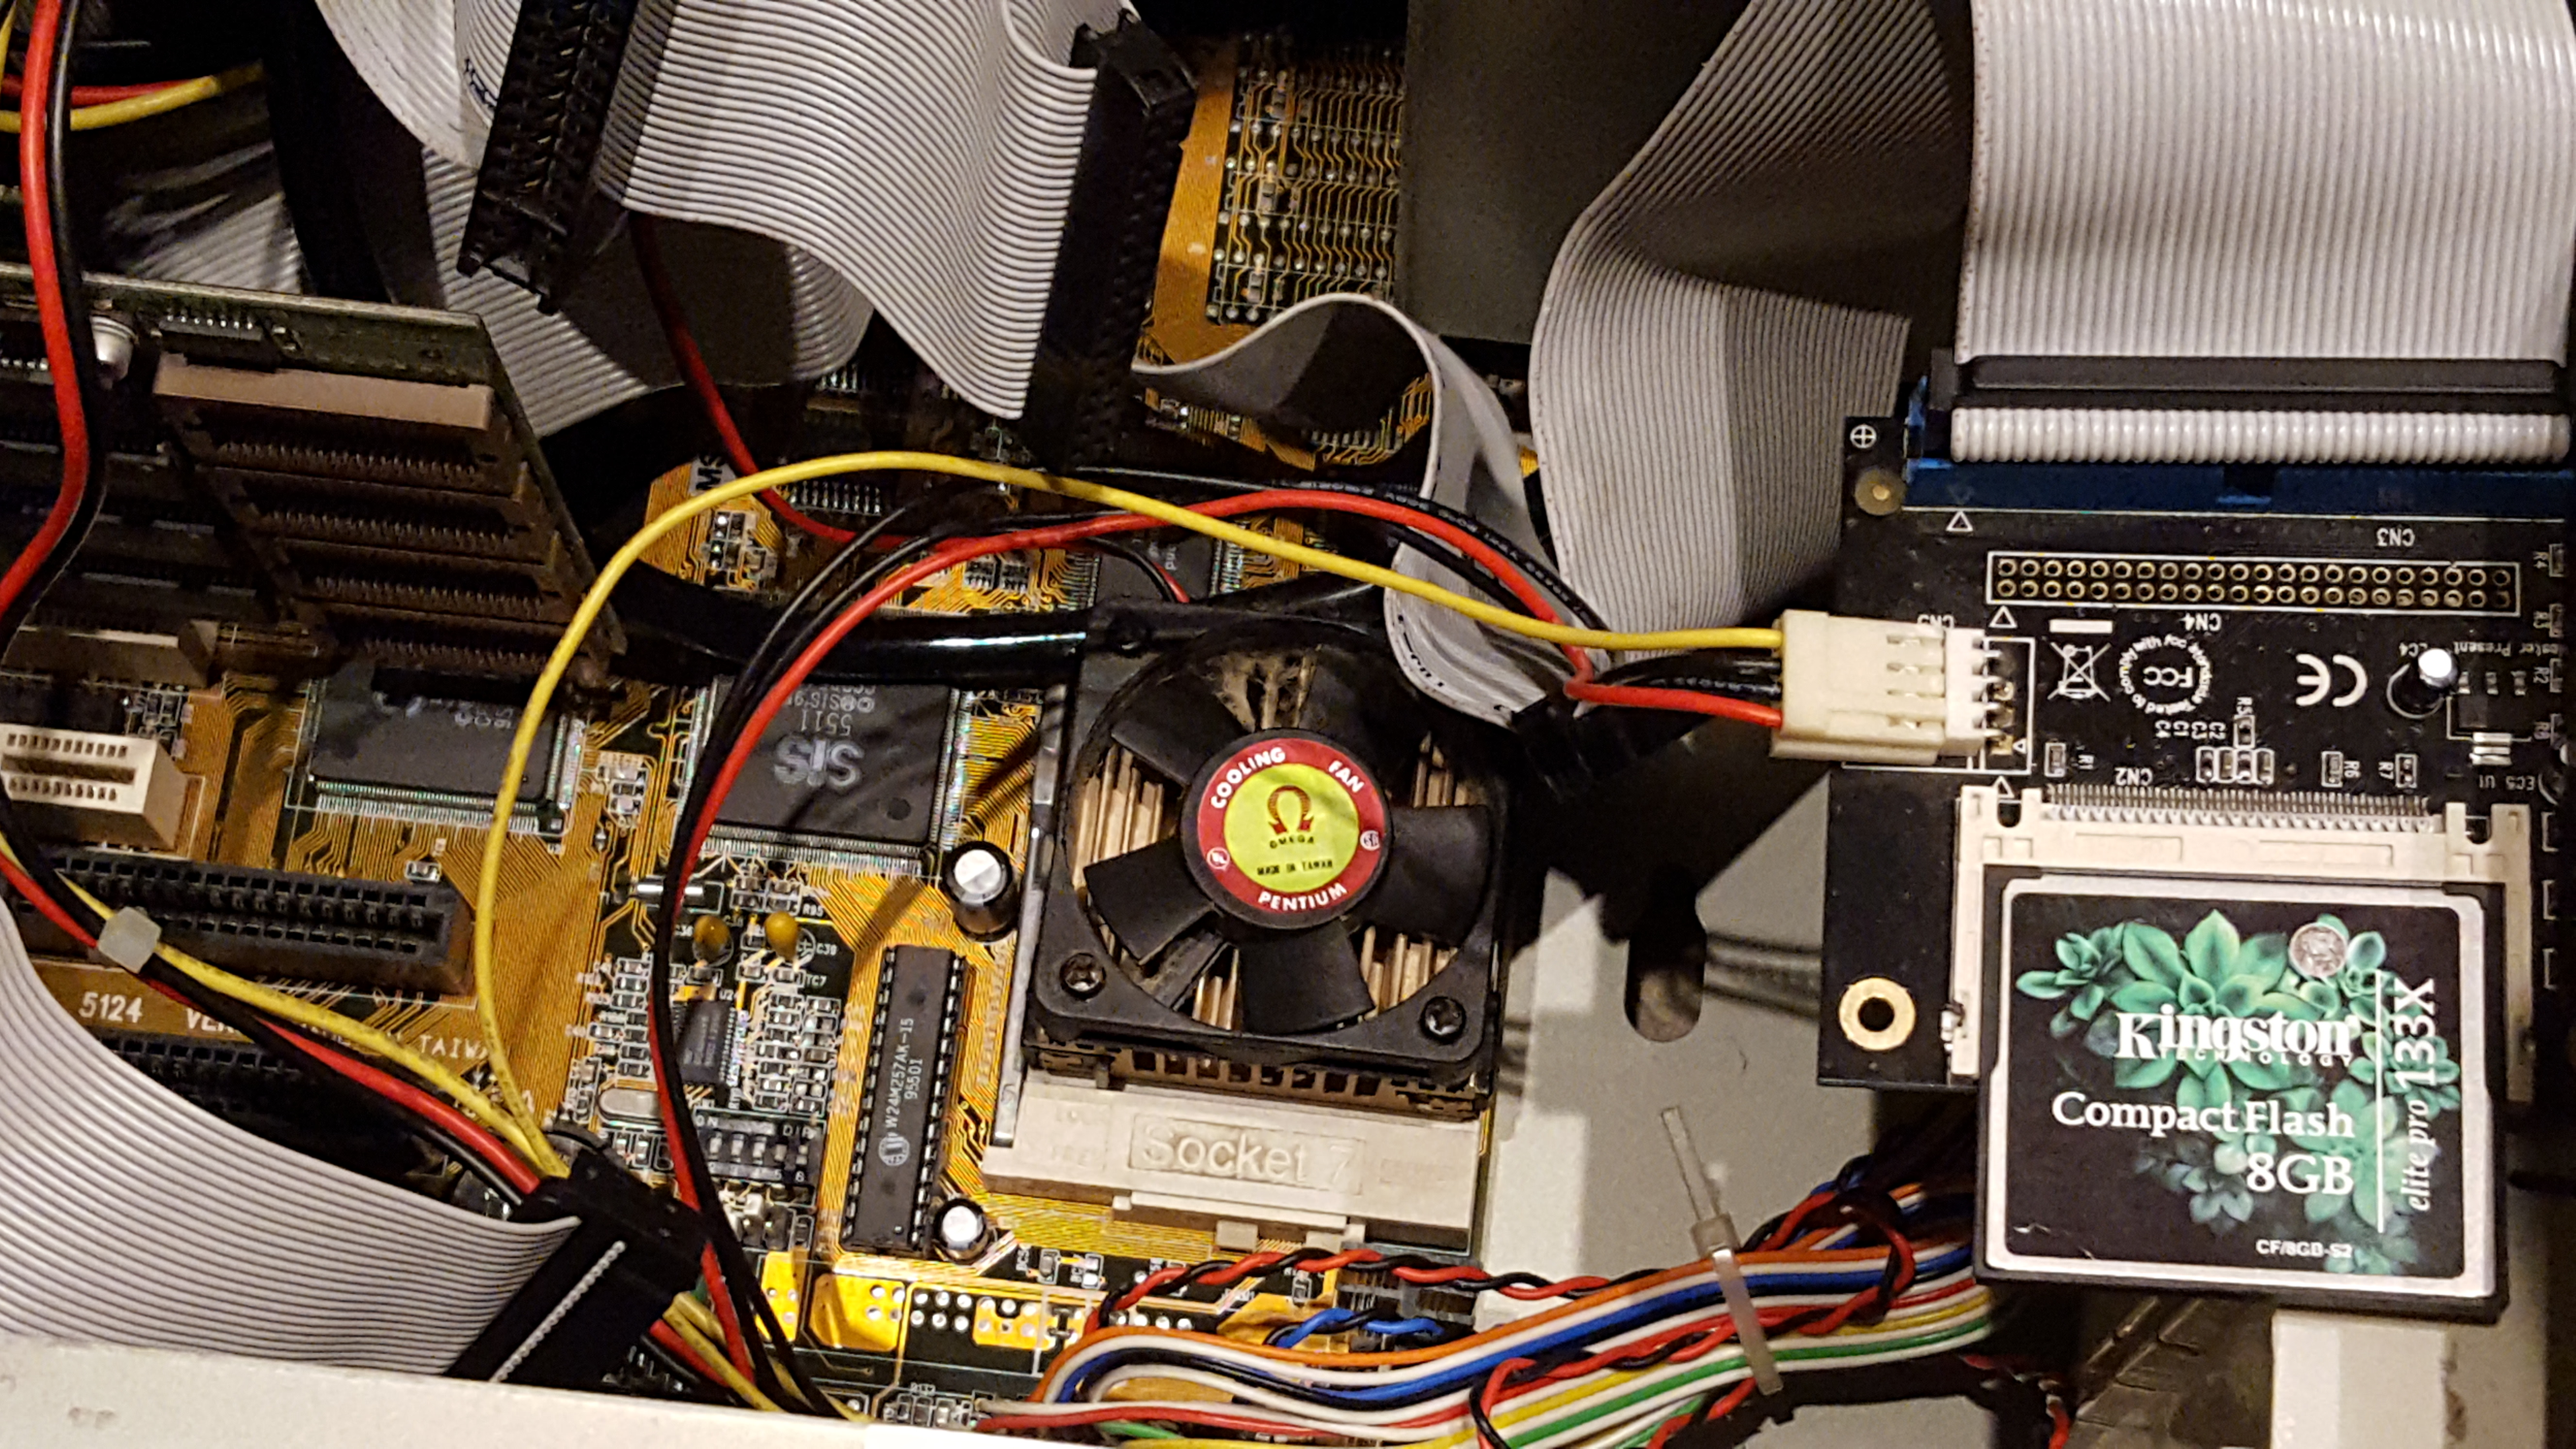
My "90s" vintage computer running an 8 GB Compact Flash card as its hard disk
Parts You Need
Our shopping list is pretty small for this project. It consists of:
- CF-to-IDE adapter
- CF card of suitable capacity (8 GB recommended for 90s/Pentium-era, 512 MB for 386/486-era)
- 40-pin IDE cable
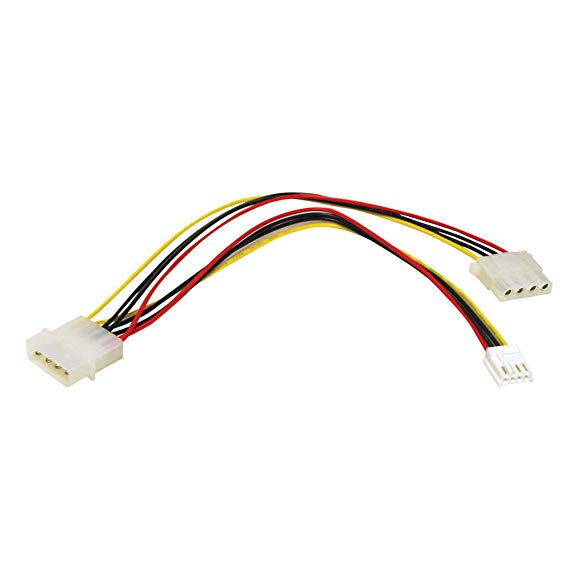
- Molex to floppy drive power adapter
- A bootable DOS floppy disk with FDISK and FORMAT utilities on it
CF-to-IDE adapters come in a few shapes and sizes. Some come with a 40-pin IDE socket which requires a standard IDE cable to connect the adapter to the PC motherboard or IDE interface card. Others plug straight into the motherboard's IDE socket. The most convenient onces are those that are mounted on an expansion card backplate so you can insert and remove the CF card from the back of your computer without taking it apart.
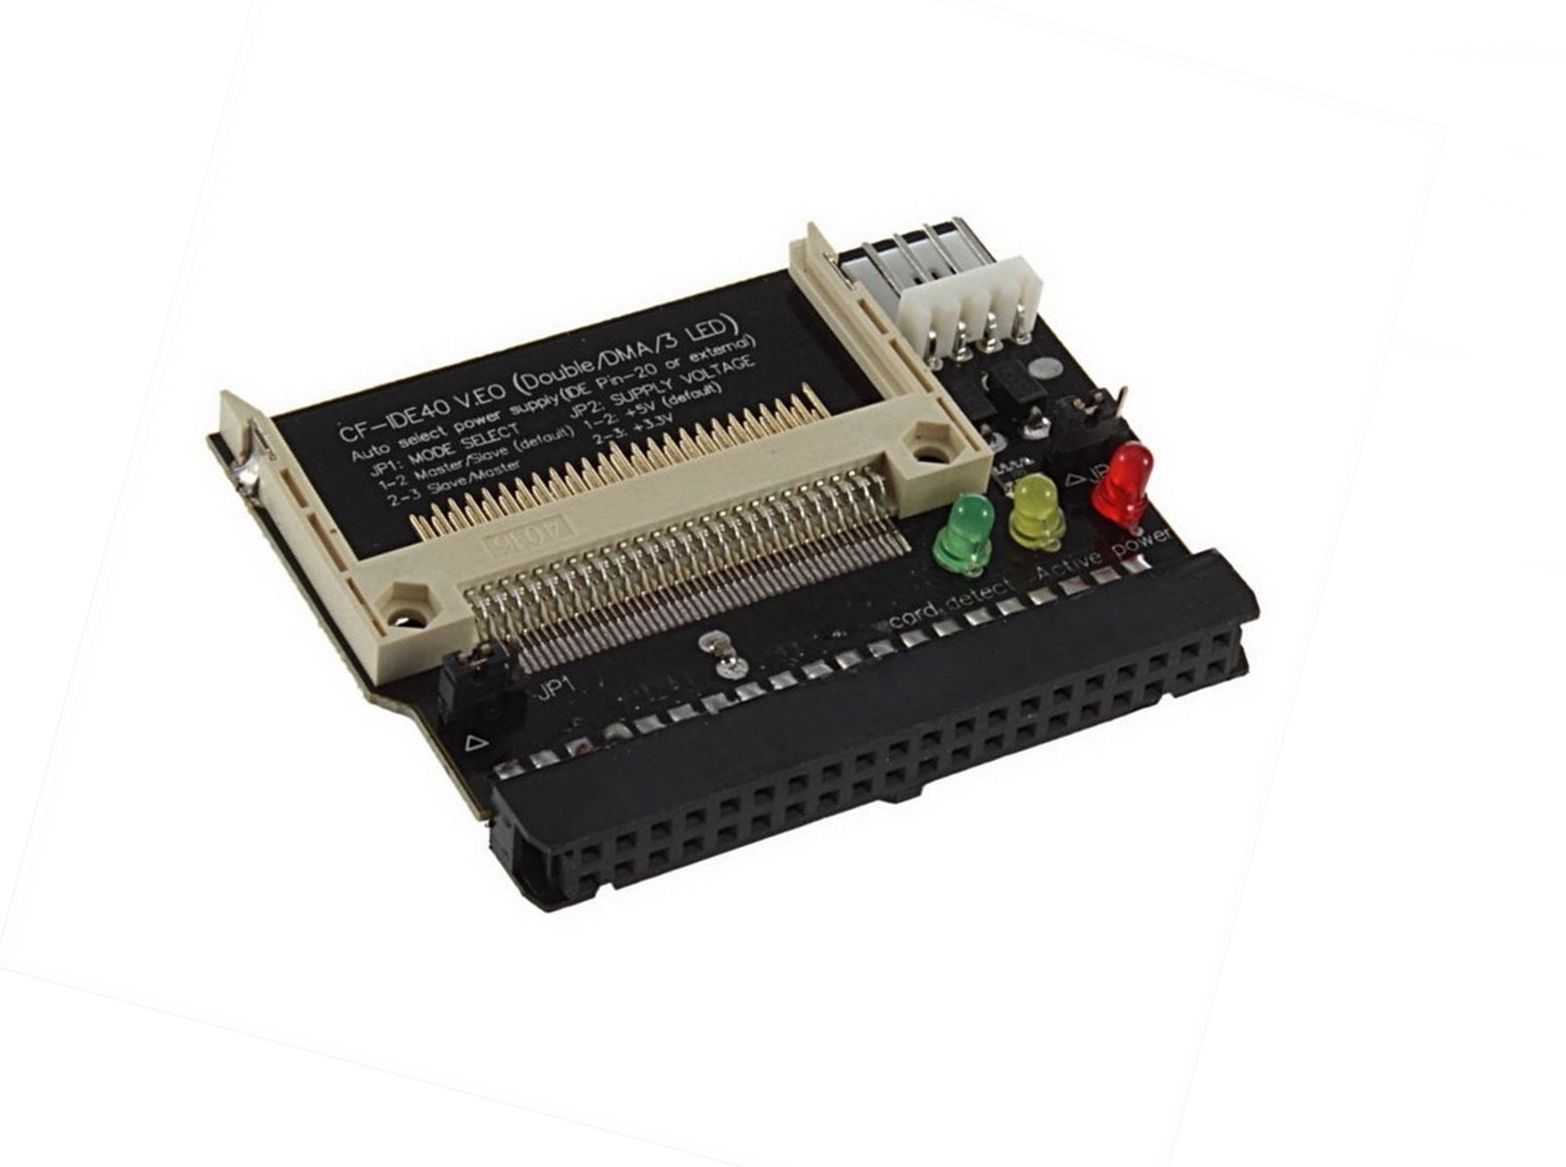
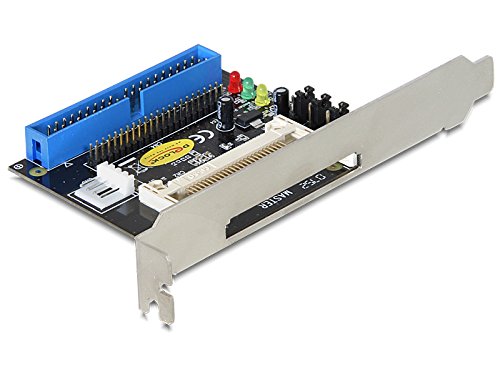
From left to right: (1) A loose adapter that requires an IDE cable to connect it to your motherboard,
(2) An adapter that plugs straight into your IDE motherboard socket,
or (3) The same as (1) but mounted on an expansion slot backplate.
Installation
Step 1) If the PC you'll be using the CF card on has a BIOS that supports LBA mode, you can go ahead and insert the CF card into the adapter (be careful to align both rows of pins to avoid damage) and connect the adapter to your PC's IDE socket. Remember that pin 1 on the ribbon cable is usually coloured/dotted red, so align it to pin 1 on the adapter's slot. If you have the first or third type of adapter shown above this will require a spare 40-pin IDE cable. In all cases, the adapter needs to be powered from a 3.5" floppy drive power 4-pin connector. If you don't have one of these available, you will also need to buy a Molex to floppy power adapter which converts the larger 4-pin translucent (or black) Molex power plug into the smaller 4-pin white one used by floppy drives.
Step 2) Power up your PC and on initial startup go into the BIOS by pressing <DEL> or <ESC> or other key when instructed.
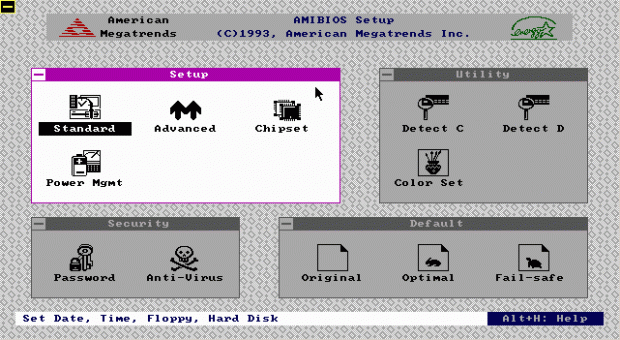
Step 3) Many modern CMOS setup utilities built into the BIOS have a Hard Disk Auto-Detect feature - choose this if available. In the AMI "WinBIOS" it's under the Utility section and is called either "Detect C" (1993 version) or "IDE Setup" (1994 version).
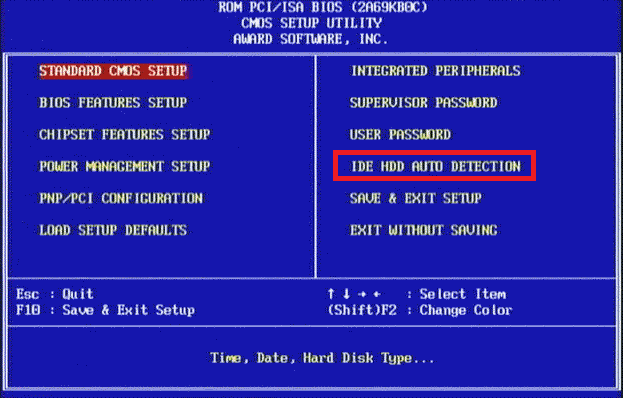
If it's not available go to this section to continue setting up. Basically your BIOS may still allow LBA mode (large hard disks), but regardless, we need to determine how many cylinders, heads and sectors per track your CF card has and input these into the BIOS otherwise the PC won't recognise it. These "CHS" values are what you can see in the BIOS hard disk type area (they are known as the disk's physical geometry).
Step 4) OK, if you're reading this you chose the "IDE HDD Auto-Detection" option in your BIOS and it automatically found your CF card, right? Great! Save and exit the CMOS setup and boot your PC from a DOS floppy disk. If it didn't detect your CF card, make sure your CF-to-IDE adapter is installed correctly, that the IDE cable (if required) is connected the right way around, and that you're feeding it with 5V from the floppy disk drive power connector. On some adapters they have their own little power LED so you can tell if it's receiving power or not. Then double-check to be sure the CF card is inserted correctly in the slot - it's hard to get this wrong as they are 'keyed' to only slot in nicely in one direction. Move to step 5 once you have it detected and saved in your BIOS.
Step 5) We now need to create at least one partition on the CF card. At this stage I recommend disconnecting any other hard disks in your system to ensure we cannot possibly do harm to the wrong drive! It takes seconds to do and may save you a lot of hassle later. Then boot your PC from a DOS floppy disk and run the DOS FDISK utility (this is found on the DOS boot disk). Once loaded you should see something like this:
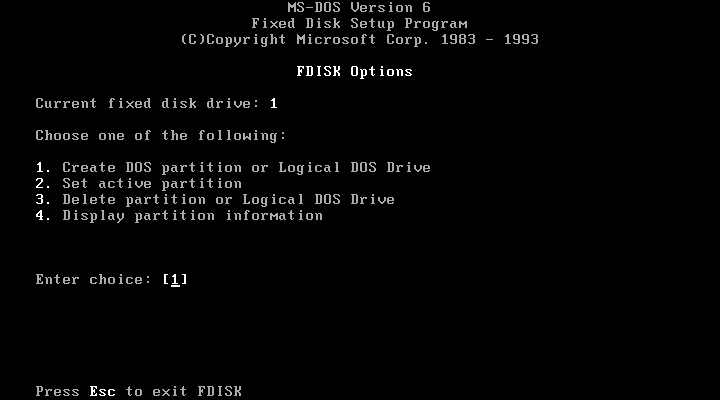
I'm assuming your CF card is currently not formatted, but choose option 4 first to see what's on there. It should show no partitions. If it does show any partitions at all, go back to the main menu and use option 3 to delete them - note that some Windows CF card formatting utilities create a Non-DOS partition the same size as the CF card - this too needs to be deleted now. Once all partitions have been deleted, choose option 1 to create a new DOS partition. This is where you have a choice to make regarding the size of your drives.
Remembering there is a limit in DOS of 2 GB for each partition in DOS 5.0 or higher (you can't have a drive letter like C: or D: with a capacity of greater than 2 gigabytes), choose how you want to split up a larger CF card into smaller chunks. It's fine to leave a chunk of the CF card unpartitioned, it just won't ever be used by your retro PC. If you want your CF card to work on really old PCs, you might want to keep each partition to below 504 MB in size. But if you know your retro PC supports LBA, you might choose a configuration like this if you have a 4 GB Compact Flash card:
Partition 1: SYSTEM. Size = 1 GB
Partition 2: GAMES. Size = 2 GB
Partition 3: APPS. Size = 1 GB
To set up the first partition, SYSTEM, choose option 1 then option 1 again to create a "Primary DOS Partition". When asked if you want to use the maximum available size, choose "N" and hit enter. Choose a size of 1024 (the value is entered in MB) and hit enter. The partition will now be created.
To setup the second partition, GAMES, choose option 1 followed by 2 to create an "Extended DOS Partition". It will show you the partitions currently setup, i.e. Partition 1, at the top of the screen and tell you how much disk space remains. Now enter a value of 2048 (for 2 GB) and hit enter.
You now need to create two logical drives - one for Partition 2 and one for Partition 3 - so from the main menu, choose option 1, "Create DOS Partition or Logical DOS Drive" and then choose option 3 "Create Logical DOS Drive(s) in the Extended DOS Partition". It will then tell you the total size of your extended partition, and you'll be asked what size you want the logical drive size to be. Input "2048" and hit enter. The first of our logical drives in the extended dos partition will now be created. Go back into main menu option 1 followed by 3 to create another logical DOS Drive, this time choosing 1024 as the size and hit enter.
You're now done creating all the partitions and drives. Your primary partition will be assigned C: as a drive letter, with D: and E: assigned in the extended partition. Go back to the main menu and choose option 4 again to view what you've created. Logical DOS drives are shown after the first screen if you want to view those.
Now from the main menu, select option 2 and set the primary partition as active. This basically means "I want this particular partition to be my boot drive". If you skip this option the hard disk will never be bootable, even if you format it and put system files on it.
Step 6) Reboot your PC from floppy disk, and at the DOS prompt, type format C: /s
This will format the primary DOS partition and copy the system files from your boot floppy disk onto the C: drive. Once complete, give the C: drive a volume label - something like SYSTEM or BOOT is the norm.
Step 7) Now format any other drives you created by typing format D: and format E: and so on (without the /s parameter, since we don't want to copy the system files onto these non-booting drives).
Step 8) When done, reboot your PC without the floppy disk in the drive and it should boot from the CF card's C: drive. If it doesn't boot from the C: drive, you might need to boot from the floppy again, and run:
FDISK /mbr
This overwrites the C: drive's Master Boot Record with the one from the floppy disk. Then reboot again with no floppy disk in the drive. If all is well, you should end up at the C: prompt.
Your next steps will most likely be to copy some programs onto the CF card. This is usually done by removing the CF card from your retro PC and reading it on a modern PC using a CF card reader. You can then copy whatever you want onto the CF card and transfer it back to the retro PC when you're done. If using a modern version of Windows with a CF card reader, always be sure to use the 'Eject' option [and wait for the notification that you can safely remove it] before pulling the CF card out of the reader - you can easily corrupt a CF card if this is not done.
Using a CF Card in a PC with a Really Old BIOS
During my revival of a Chips & Technologies 80386 motherboard things were rather painful. As you can imagine, a typical hard disk that would be paired to a 386DX-20 PC in 1989 was around 40 MB. In those days, the BIOS would have you choose from one of 46 "fixed disk" settings or a "type 47" to enter custom values for the number of cylinders, heads and sectors per track your hard disk had. Simply put, the BIOS could only detect hard disks up to 504 MB, because only 1024 cylinders are physically accessible and LBA mode (basically "large hard disk" mode) was something not even dreamt of at this point in history.
So what's the solution for these really old PCs that don't support LBA mode? You have two options, one of which is more possible than the other:
1) Get a BIOS upgrade that supports LBA - this is the less probable scenario for you, but again, it depends on the era of computer you're trying to make work. If you are using a motherboard that was launched just before the time 500 MB hard disks were starting to appear, the motherboard manufacturer would probably have issued a BIOS update to support LBA (larger hard disks). In our case of the 80386, no chance! The same would be true of almost any PC motherboard up to around 1994.
2) Use a small Compact Flash card that is sufficiently low in capacity (or format it as such). This is entirely possible. I purchased a few CF cards off EBay to try them out, with mixed results....
These are all "Type 1" CF cards which require 3.3V and are 3.3mm thick. Later "Type 2" CF cards are thicker, at 5mm thick. Most CF-to-IDE adapters support both Type 1 and Type 2 cards.
At this point we need to identify how many cylinders, heads and sectors per track our CF card has. This is because the Compact Flash interface is virtually identical to the ATA (IDE) interface for hard disks, and since hard disks have a specific number of cylinders, read/write heads and sectors on each track, a PC will treat your CF card in the same way - as a bunch of virtual cylinders, heads and sectors.
Probably the best way to do this is to use your modern PC's BIOS to auto-detect the card, and write down its values. For this the modern PC you use must still have a PATA (Parallel ATA) IDE port, otherwise your adapter won't work - you can buy more modern SATA CF-to-IDE adapters which would allow a modern PC to detect, read, and write to your CF card.
My WinBIOS from 1994 auto-detected my 8 GB Kingston Elite Pro 133X compact flash card as follows:
| Cyls | Hd | WP | LZ | Sec | Size |
|---|---|---|---|---|---|
| 15490 | 16 | 65535 | 15490 | 63 | 972 MB |
Another compact flash card, a ProSpec UDMA 1 GB 305X card, was detected like this:
| Cyls | Hd | WP | LZ | Sec | Size |
|---|---|---|---|---|---|
| 1974 | 16 | 65535 | 1974 | 63 | 972 MB |
Here are a few more that I checked:
| CF Card | Cyls | Hd | WP | LZ | Sec | LBA Mode | Blk Mode | PIO Mode | Size |
|---|---|---|---|---|---|---|---|---|---|
| Memory Technology Co. 4GB card (2003) | 7745 | 16 | 0 | N/A | 63 | On | On | 4 | 3997 MB |
| ProSpec 1GB card | 1974 | 16 | 0 | N/A | 63 | On | On | 4 | 1019 MB |
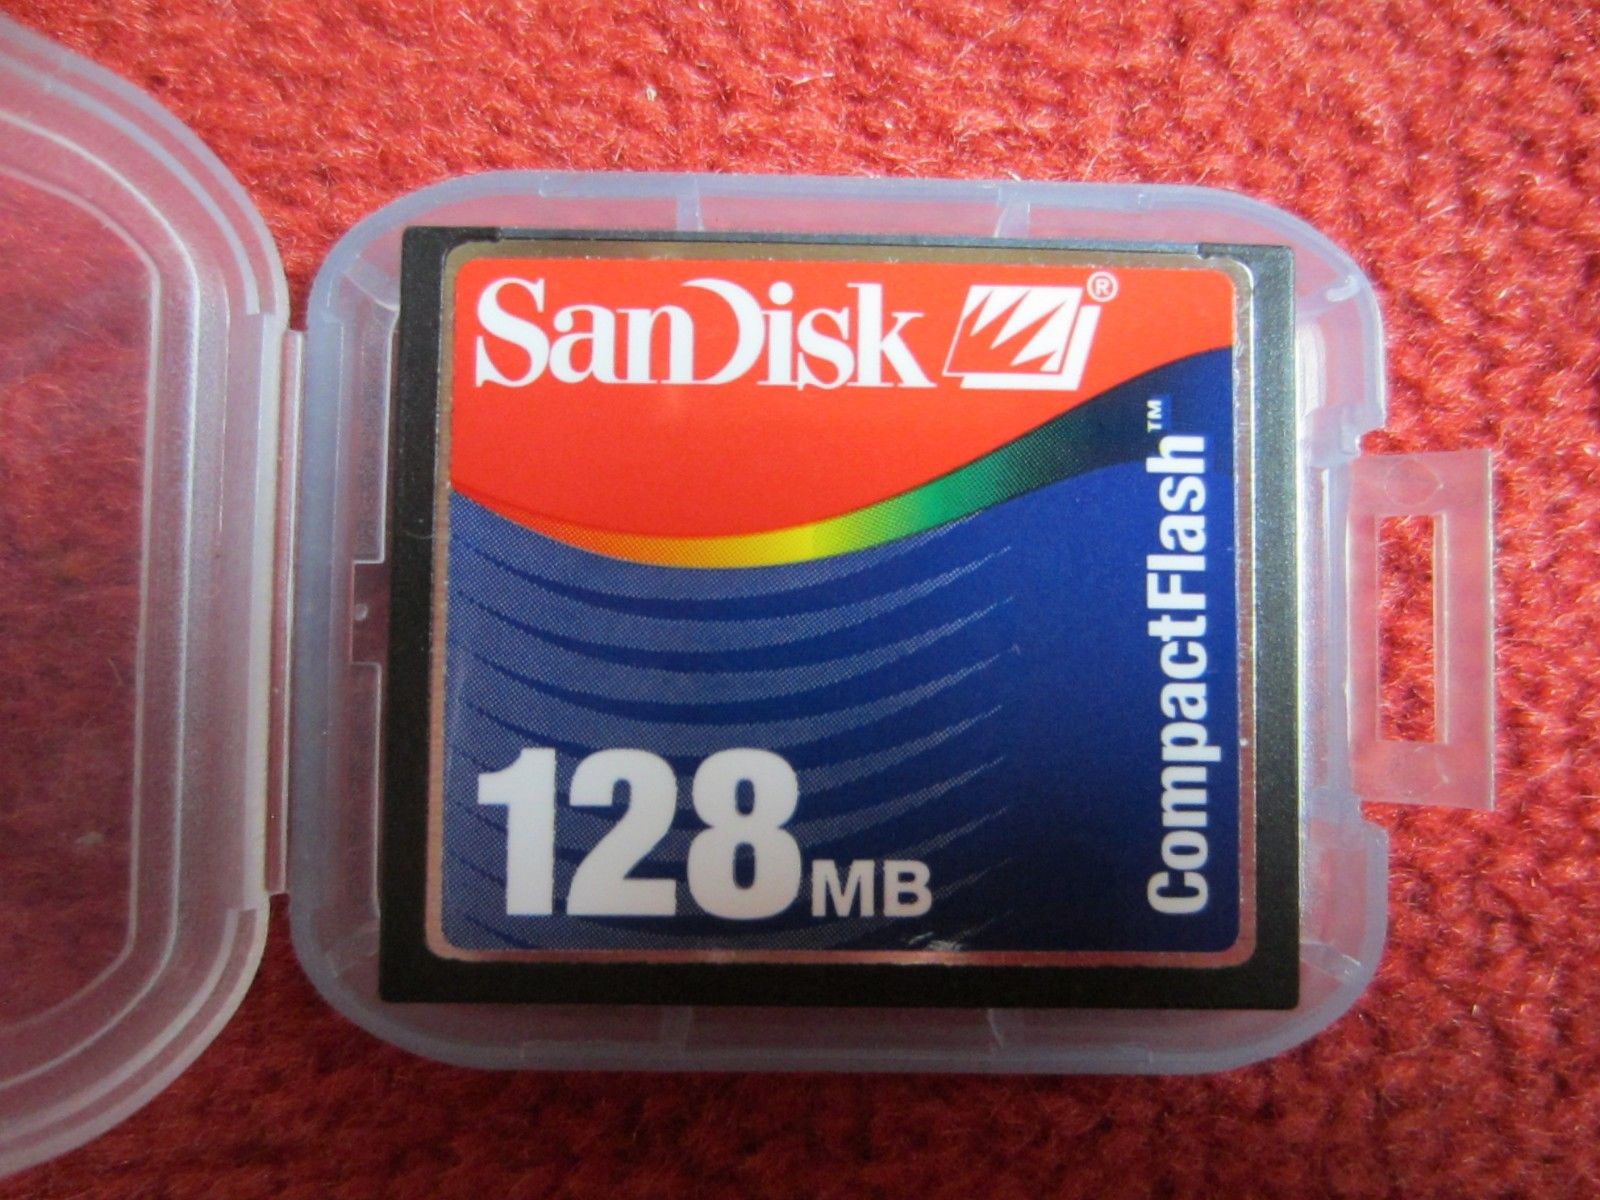
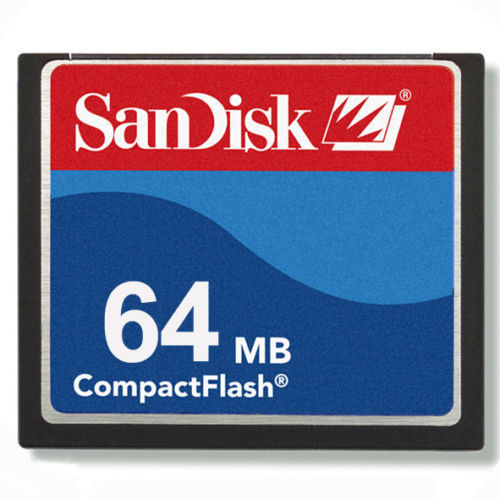
| SanDisk 64 MB card |
Write down all these values, then move your CF-to-IDE adapter back into your really old PC, start it up and enter the CMOS setup utility. Choose "Type 47" (or it's called "USER" in some BIOSes). You can then enter the values you wrote down, save it and reboot. It should now boot from the CF card.
Strangely, I discovered something when preparing the Memory Technology Company cards (I have two of them). For the first card, I used FDISK to create a single 4 GB primary partition, then rebooted using a floppy disk and ran format /s. This then allowed me to boot from the CF card. All good so far. For the second card, I wanted to create a primary DOS partition of 500 MB and an extended DOS partition for the remainder with lots of 500 MB logical (on letters D: through J:) drives - it failed to boot properly. It hung saying "Searching for Boot Record from IDE-0..OK". The primary partition was set to 'Active', so I'm not sure what went wrong. I then removed all the logical drives and the extended DOS partition and reformatted the 500 MB primary partition. No change. I then used FDISK to have one full-sized partition the same as the first card, and still the same issue.
I then booted again from floppy, and ran:
fdisk /mbr
and rebooted, and it then booted off the CF card just fine! So it seems FDISK sometimes struggles to write the Master Boot Record to the CF card.
Is My CF card seen as Removable or Fixed Disk?
Basically the CF card must have the capability of identifying itself as a fixed disk instead of removable media. Without this, it won't be detected as a boot drive. You could still use the CF card, but only as a non-bootable second "hard disk". If you really need to use your CF card to boot from, there is a possible way around this: It's almost impossible to know whether the CF card you're using is capable of this or not - I've just learned over time through trial and error with different manufacturers' cards and capacities.
An old utility that was originally provided by SanDisk, the originators of the Compact Flash interface, called ATCFWCHG.COM ("Athens Configuration Word Change") can be used to change the 'Type' bit of a CF card to 'Fixed Disk'. These days SanDisk won't provide you with this utility but it can be found for download at various places (try Google). An older version of this utility by SanDisk called NDCFWCHG (NAND Configuration Word Change) can work for cards older than Month 1, Year 2003 - check the date code stamped on the side of your CF card. It should be something like "AR" + YYMM, such as AR0301.
You will need to boot into DOS from a floppy disk that contains this utility and run it with the CF configured as either the master on the primary IDE interface or the master on the secondary IDE interface. It will not work if the drive is attached as a slave.
Now run the utility. To set a SanDisk Extreme adapter attached to the primary IDE interface to Fixed disk
ATCFWCHG.COM /P /F
To set a SanDisk Extreme adapter attached to the secondary IDE interface (Ultrabay) to Fixed disk
ATCFWCHG.COM /S /F
What Speed of Compact Flash Do I Need?
For modern PCs, I would recommend a CF card whose speed is 266X or better, but if you're building a retro PC for old DOS gaming, I would say any speed will do (do you remember how long your hard disk took to load games? Have patience and remember the days before hard disks!)
Back to the Cards...
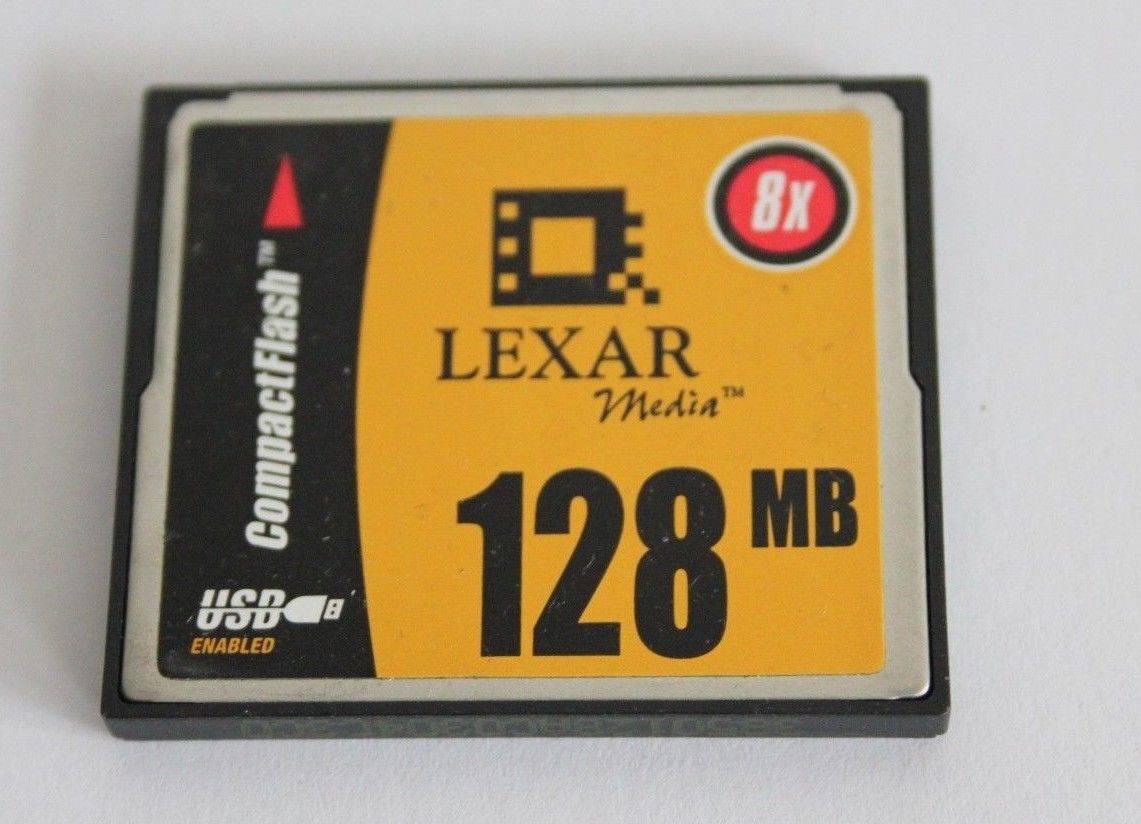
The first card I used, the Lexar CF128-231 is 128 MB in capacity. The speed is indicated as being 8x (a CF card's maximum speed uses the same 'x' rating as CD-ROMs, where 1x was 150 KB per second. So this being 8x means its maximum transfer rate is 1.17 MB per second (8 x 150 KB = 1200 KB = 1.17 MB).
Fake Card?
OK, there's also an unfortunate issue in that numerous fake cards have flooded the market, whereby the little chip on the card that identifies its size and speed is overwritten with fake numbers, so what you think is an 8 GB card might only be a 1 GB card. You won't notice this until you fill the card past the 1 GB mark when it will most likely corrupt the data or overwrite the data at the start of the drive again. I've had big issues in this area, with cards bought from EBay, but also from Amazon - it appears nobody is immune.
To test my cards, I initially formatted them using the SD Card Formatter, then used H2TestW v1.3 which performs a data write to the entire card followed by a verify operation on that same data. This tool also tells you how fast the data write and read is. With my 8 GB Kingston 133x card it showed a write speed of 15.4 Mbyte/sec, and a Verifying (read) speed of 27.3 MByte/sec. a 133x card means it has a theoretical maximum transfer speed of 133 x 150 KB per second, which is 19,950 KB/sec, or 19.48 MB/sec. This is the manufacturer's speed rating - the reality could be higher or lower depending on a number of factors.
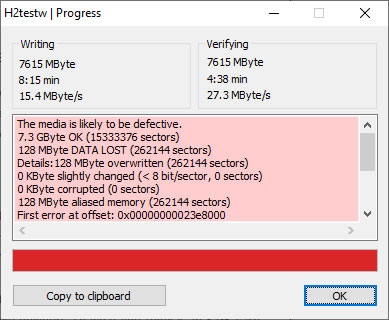
In my limited knowledge, just because it showed its first failure almost as soon as its "Verifying" cycle began doesn't tell me much, only that the data did not write to a certain part of the disk correctly. Due to "wear levelling" the first portion of data being written to a blank card doesn't necessarily go to sector 1 - it could be any sector on the entire disk! What is important is that it wrote to all 7615 MB (about right for an 8GB card after formatting, allowing for a 32 KB FAT32 cluster size).
I then used Flash Drive/Card Tester v1.14. This showed it writing to the card at 13.6 MByte/sec
Disadvantages
It's worth pointing out that there is one disadvantage to using Compact Flash (or any other NAND-flash technology)... there is a limited number of write cycles (currently about 100,000) to each address block on the CF card. Your CF-to-IDE card controller should be implementing something called "wear-levelling" which effectively ensures that each write operation chooses a different block on the CF card to write to, so the overall life expectancy of your CF card is as high as possible.
I'm not sure which adapters implement wear-levelling and which don't, but I recommend you identify and read up on the adapter's controller chip for more information on this.