Retro Review: Sound Blaster 16 Value (CT2770)
October 24th 2021
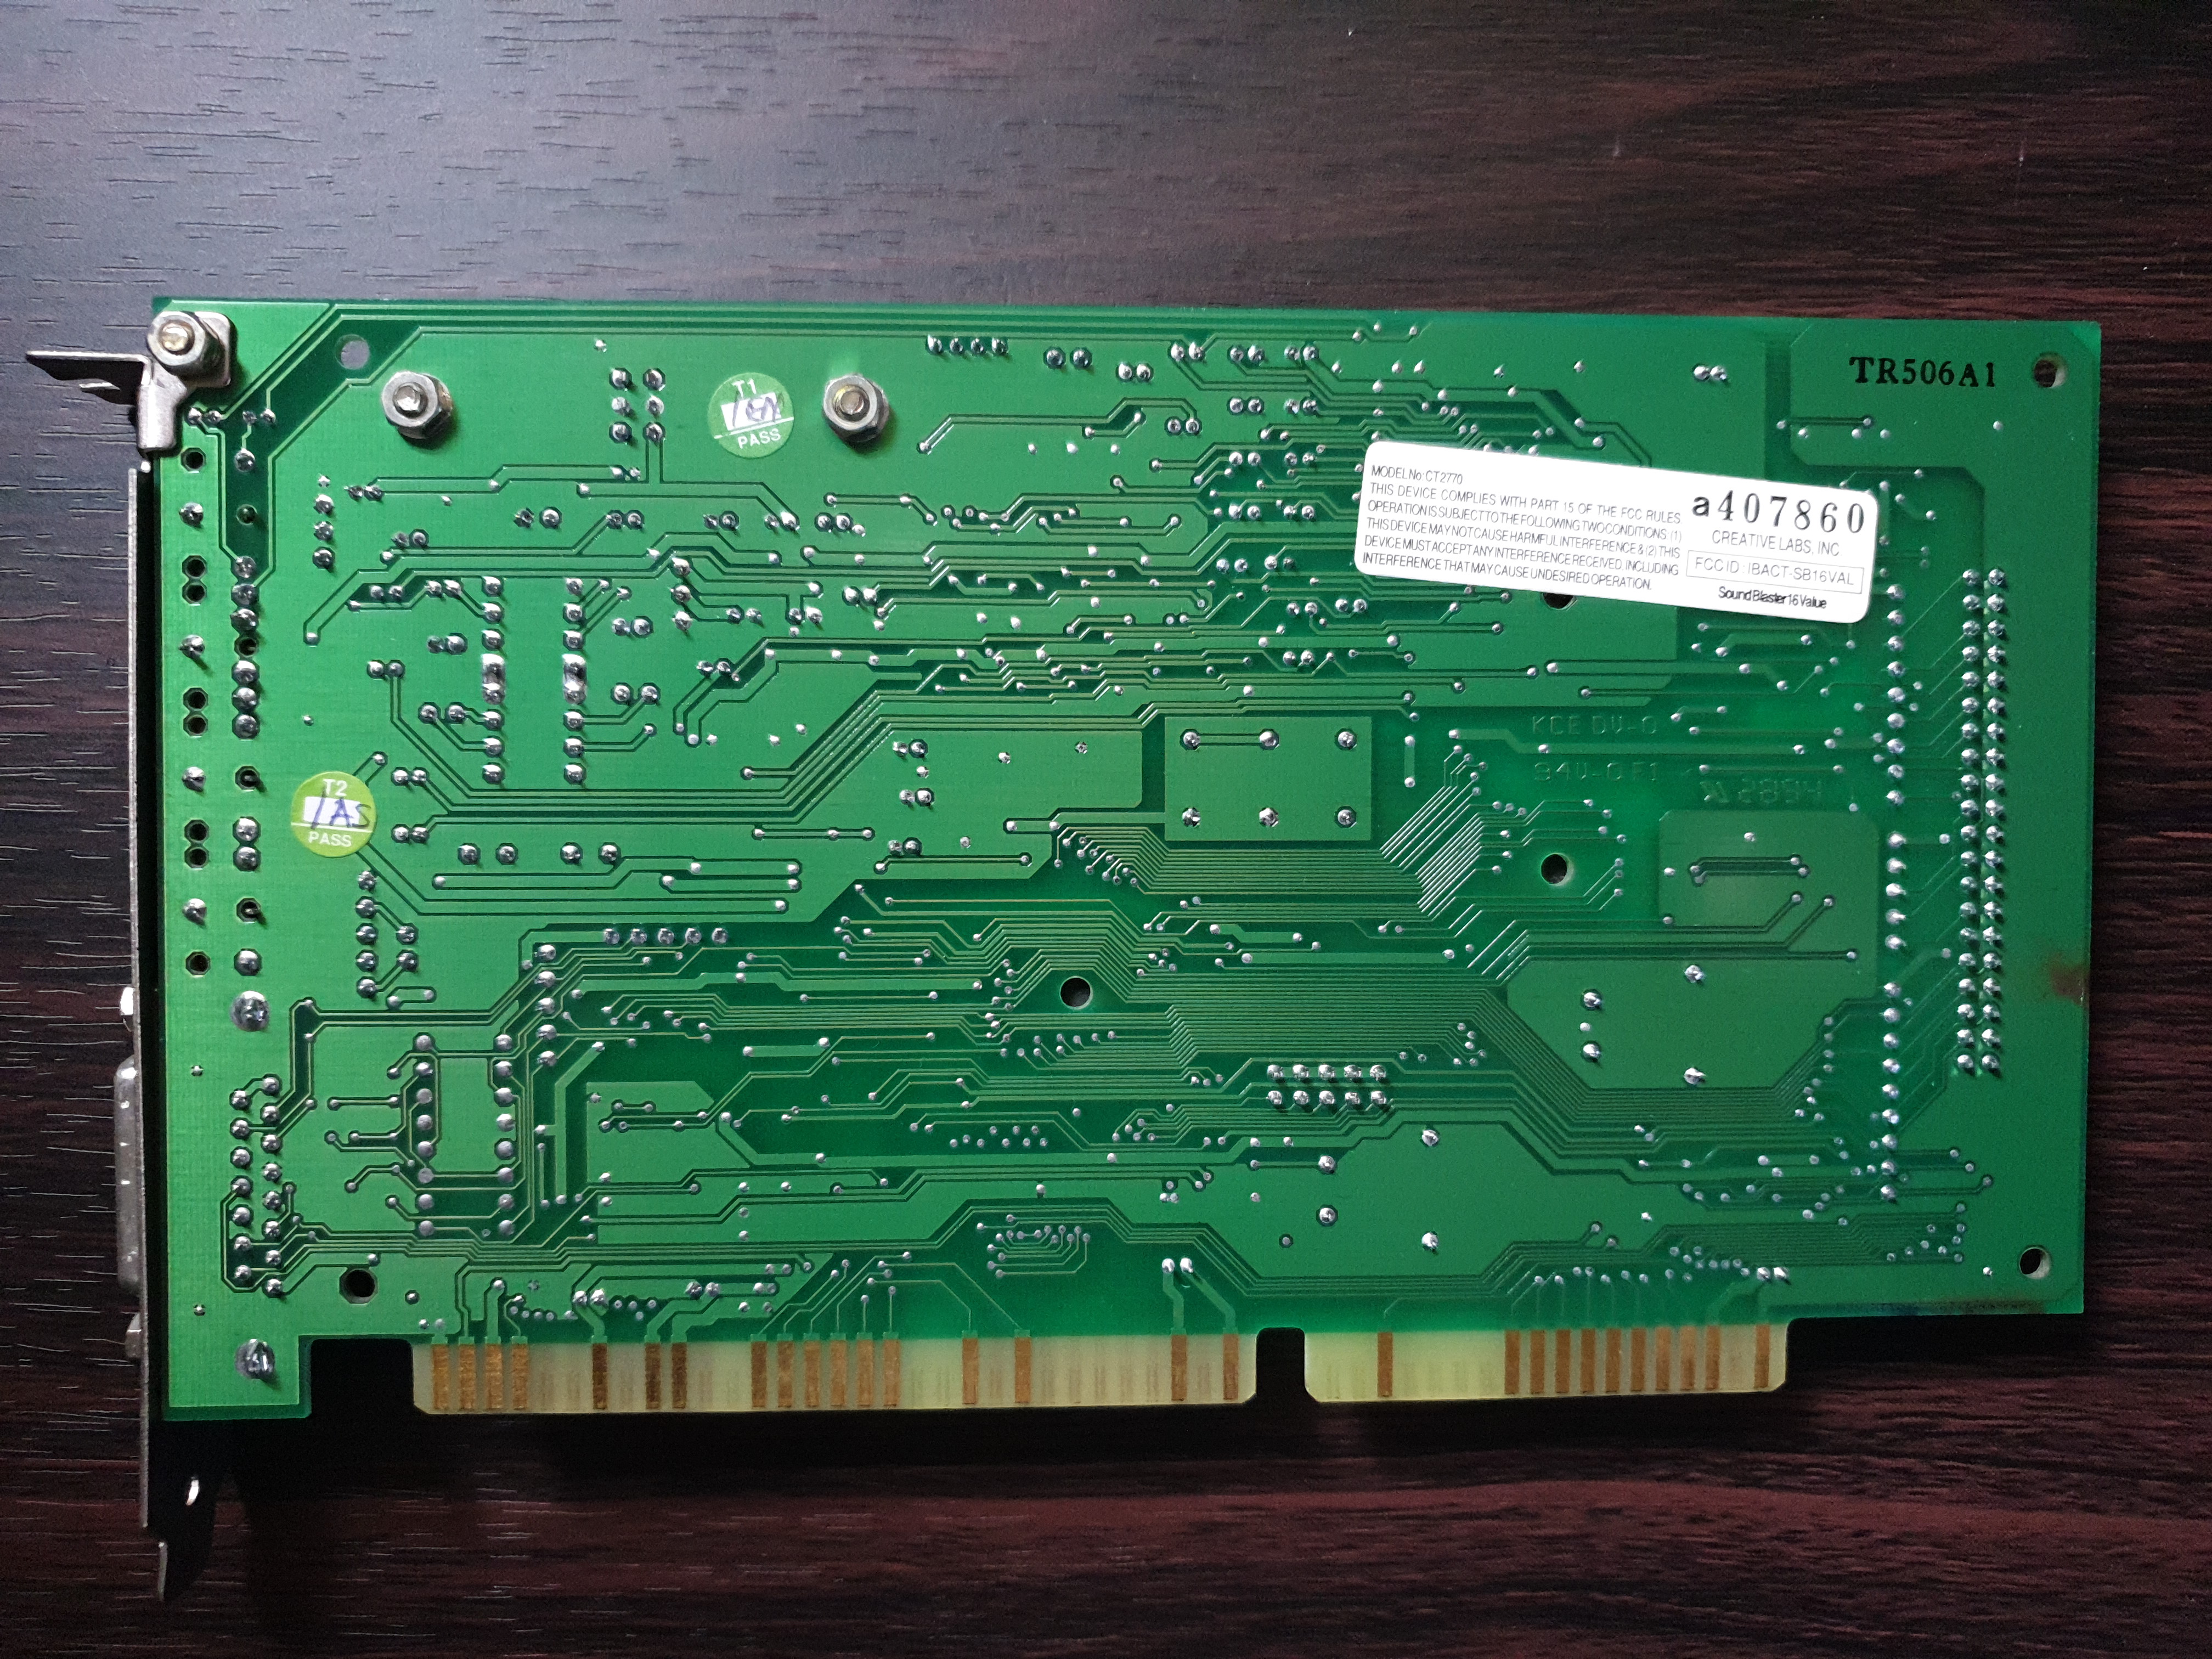
Welcome to another retro review, today we cover a sound card from Creative Labs - it's my very own Sound Blaster 16 "Value", this particular specimen being model CT2770 in Creative's nomenclature, with board revision 019423.

Sound Blaster 16 Value (ca. 1994)
Bought as part of a bundle including an ABIT AB-BH6 mobo, AWE64 Value, S3 Trio, and much more in September 2019 for £63
This was thrown in as part of a bundle auction where the main 'prize' for me was actually a Slot 1 motherboard, but bundled into the deal were several graphics cards, a Pentium II CPU, some memory, a Sound Blaster AWE32 Value, and this little chap.
So let me summarise... What was the SB16 Value? Well, there were many cards that got this less-than-spectacular bit of branding, but I will focus on this specific one - the CT2770. Arriving around two years after the first Sound Blaster 16, and coinciding with the introduction of their new flagship AWE32, Creative were keen to continue selling into the budget end of the sound card market. This meant cost-reducing the SB16 to make a card that was still up-to-date (16-bit) but without the frills.
The Sound Blaster 16 succeeded the Sound Blaster Pro which itself had introduced stereo FM synthesis, but only had 8-bit digital audio. SB16 took it one step further with its 16-bit digital audio (CD quality) capability. Unfortunately, all SB16s have a flawed Sound Blaster Pro emulation mode which means it only plays back in mono, thus causing it to really just be like a basic Sound Blaster when run in this mode.
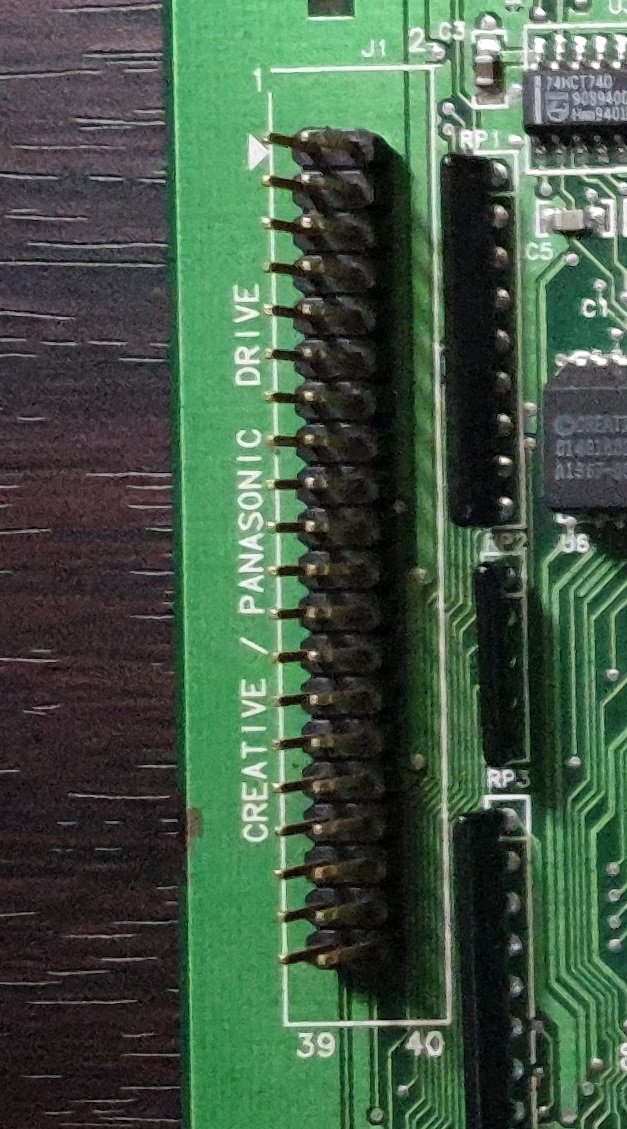 The CT2770 got the now useless Creative/Panasonic CD-ROM header (useless unless you have a matching CD-ROM drive!), though it didn't take long for most of us to start daisy-chaining our CD-ROM drives onto the IDE cable from the motherboard anyway, or use the secondary IDE header. As you can see from the main pics above the "Value" label that Creative slapped on this board appears to mean one key thing: the lack of a Wave Blaster header. Despite that, it looks like a nice clean board, almost brand new, and is a good compact size.
During the CT2770s life they produced four board revisions: 019423 (rev.1, week 23 of 1994), 029409 (rev.2, week 9 of 1994), 039416 (rev.3, week 16 of 1994) and 049434 (rev.4, week 34 of 1994). It seems odd to me that the earlier board revisions came out earlier than the later ones - can anyone explain this? Get in touch if you know! The 029409 board revision of CT2770 still had solder pads for the ill-fated CSP/ASP chip as well as a plethora of CD-ROM interfaces for Mitsumi and Sony too. These were removed on some of the other board revisions, including this one which is 019423.
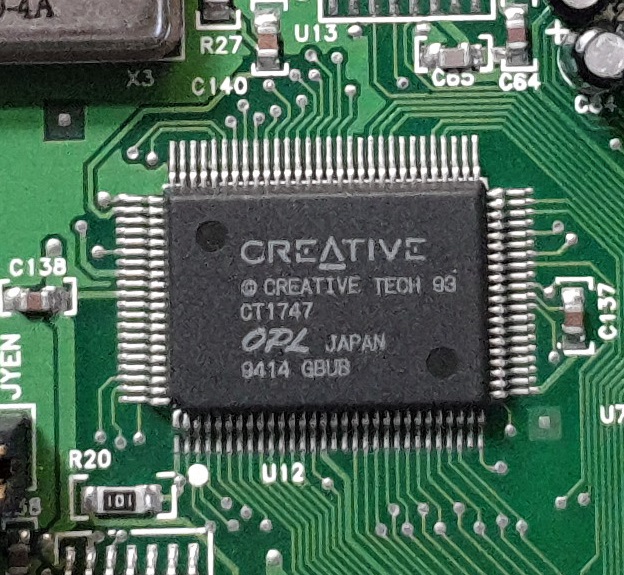 On the plus side, my card here does have a true Yamaha OPL3 chip - it's just embedded inside the chip near the middle of the board, CT1747, with the OPL logo printed on it. This card came out about a year before Creative began pushing their inferior CQM FM emulation onto cards like this one, so it's good to know this is still a real Yamaha "under the hood". I believe that also, any cards that have the CT1747 do not suffer from the "hanging note" bug, despite the fact that its DSP chip is version 4.12, which normally means it would have the issue.
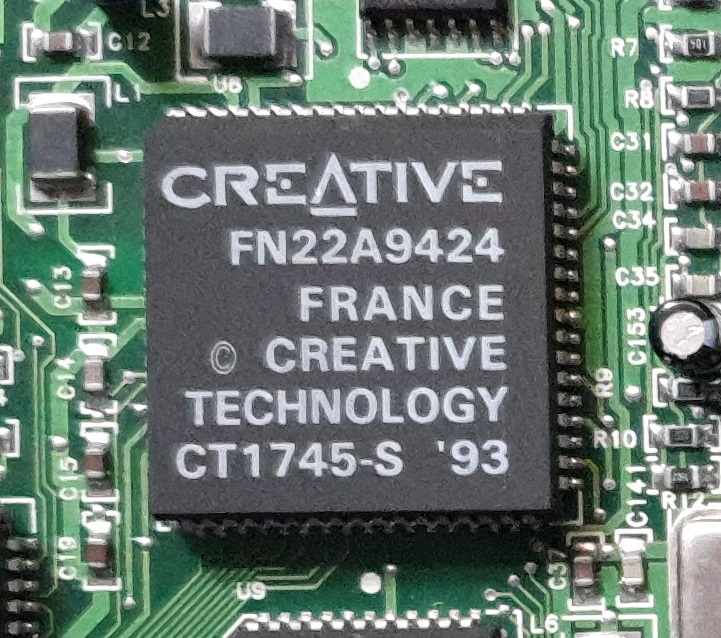 Another positive note is that this card got a later iteration of the Creative mixer chip, CT1745 - this is the 'S' model, which expanded on their earlier mixer chips by providing 32 independent levels of software volume control on both left and right channels for Master, Voice, MIDI, CD and Line-In sources.
Only this revision and the earlier revision got a Line Out socket, so I'm happy as it seems I have the best of the three revisions. By the way, this Line Out takes signals from the Voice, MIDI, CD, Line-In, Microphone and PC speaker sources and mixes them together.
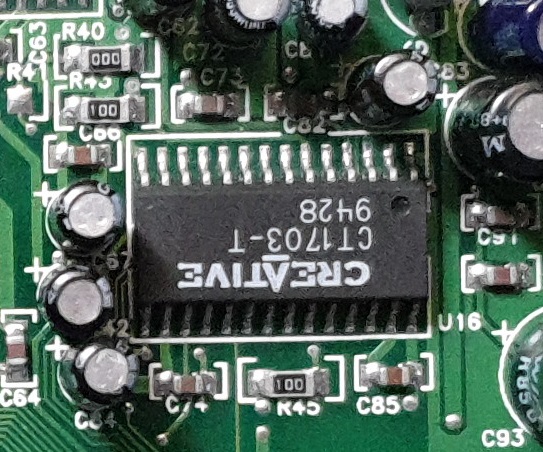 The DAC chip, sadly, is a noisy one. This card has the CT1701-T. According to my research it's not the worst - that honour goes to the CT1701 (no suffix). It would be better if it had the CT1703 which was much quieter (electrical noise-wise), but that didn't come out until the following year, 1995.
Anyway, enough of the rambling... there's no time to waste! Lets get this thing installed and working....
Setting Up the Sound Blaster 16 Value
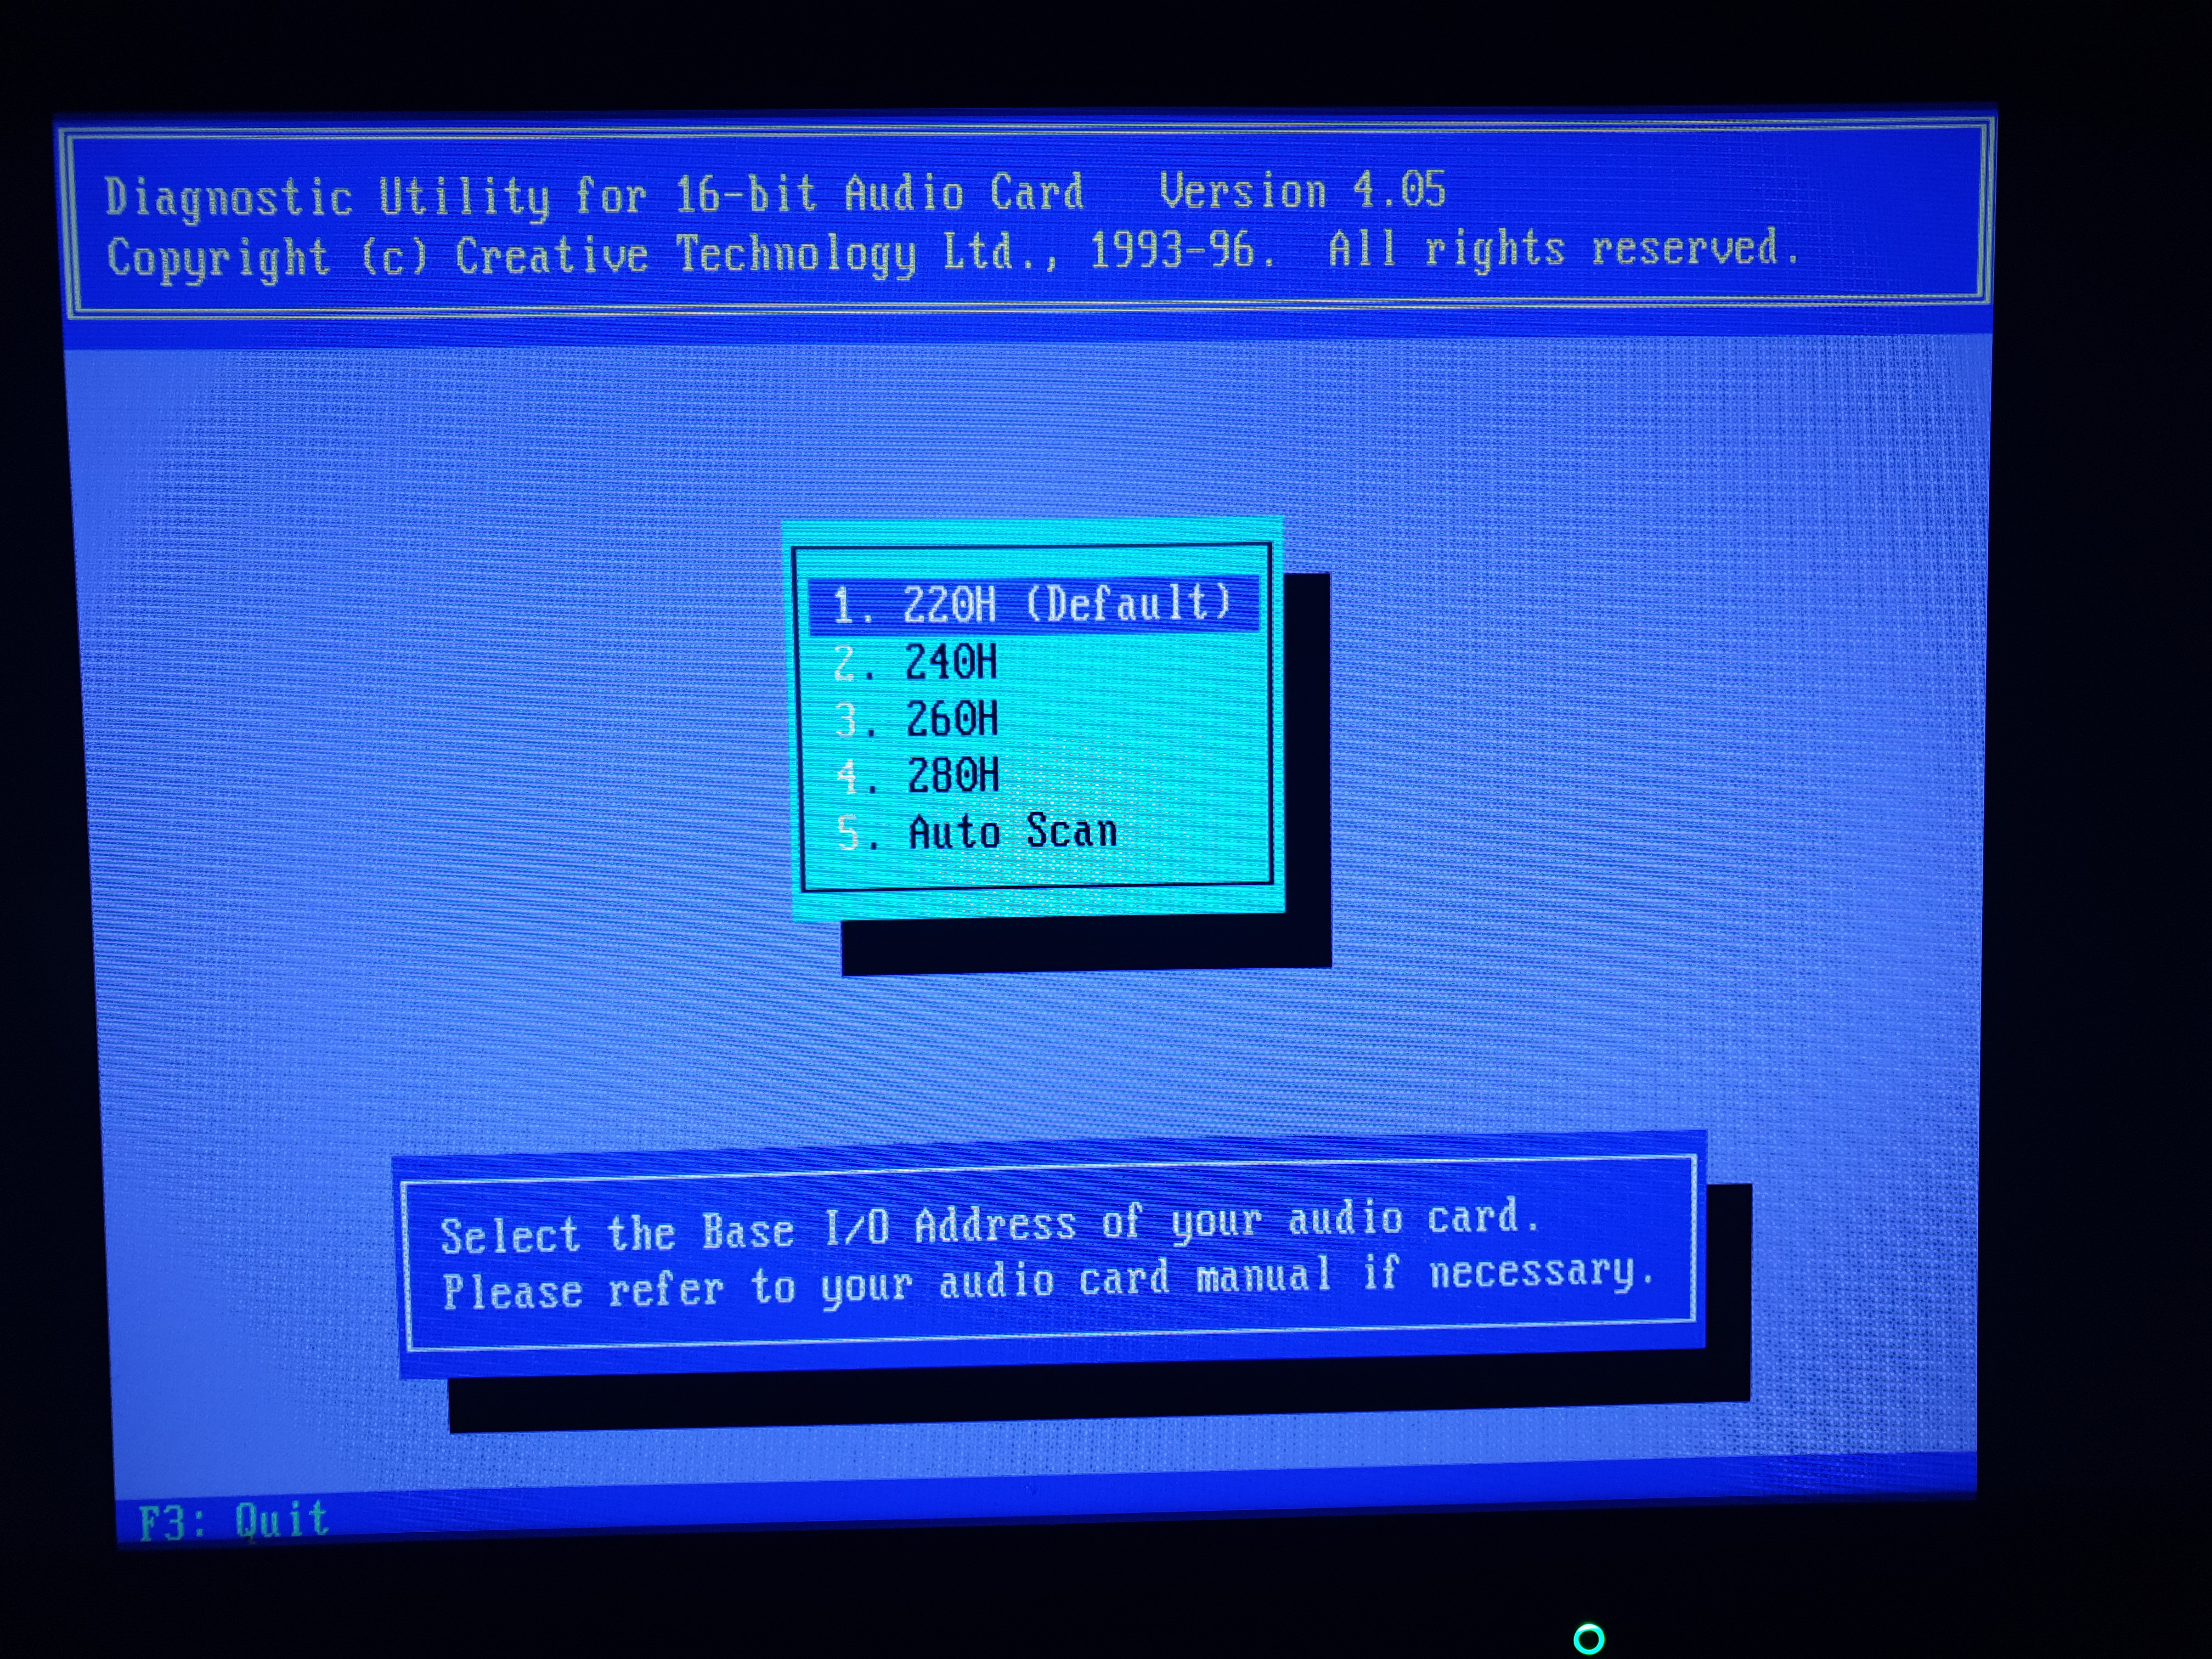
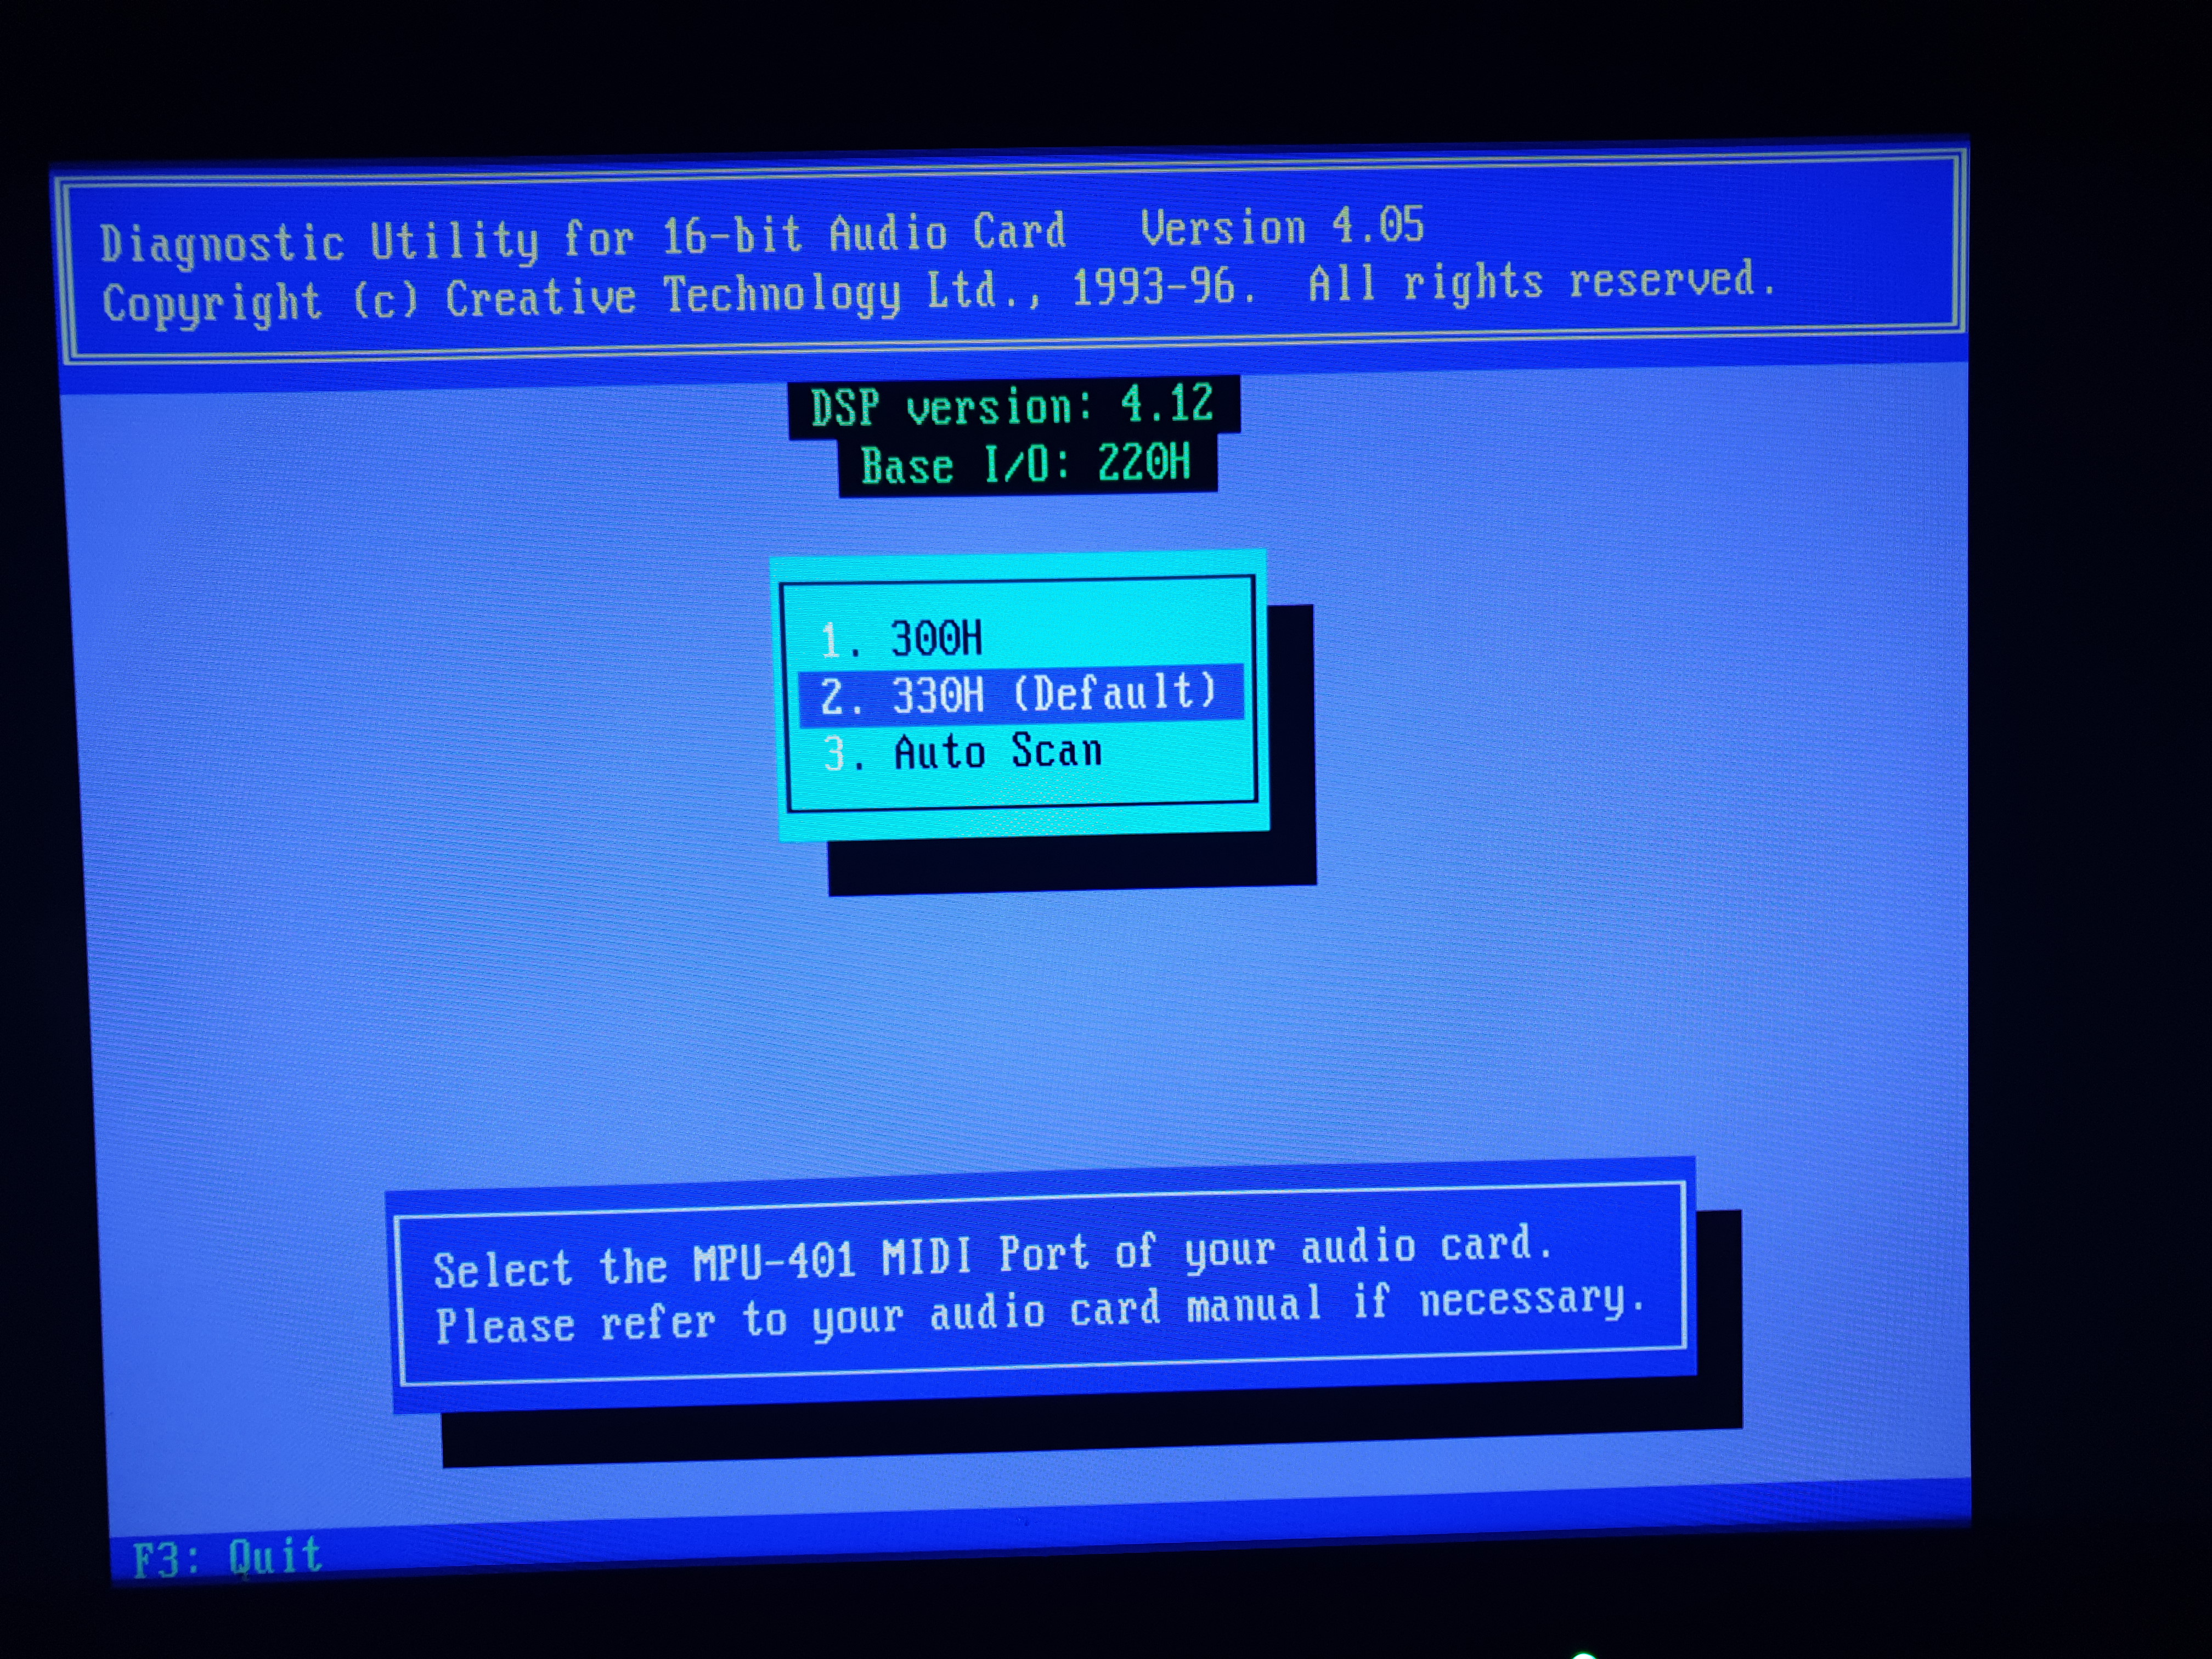
The Sound Blaster 16 Value CT2770 is what I would consider "semi Plug & Play" - that is, you set jumpers for the I/O addresses the card will use, both for the digital audio part and the MPU-401 (MIDI) interface part. The choices for the former are set via jumpers IOS0 and IOS1 in the lower-middle of the card, with choices of 220h (closed/closed), 240h (open/closed), 260h (closed/open) or 280h (open/open). Right next to these jumpers is another one, MSEL. If closed this uses the default MPU-401 address of 330h, but if open it will use 300h.
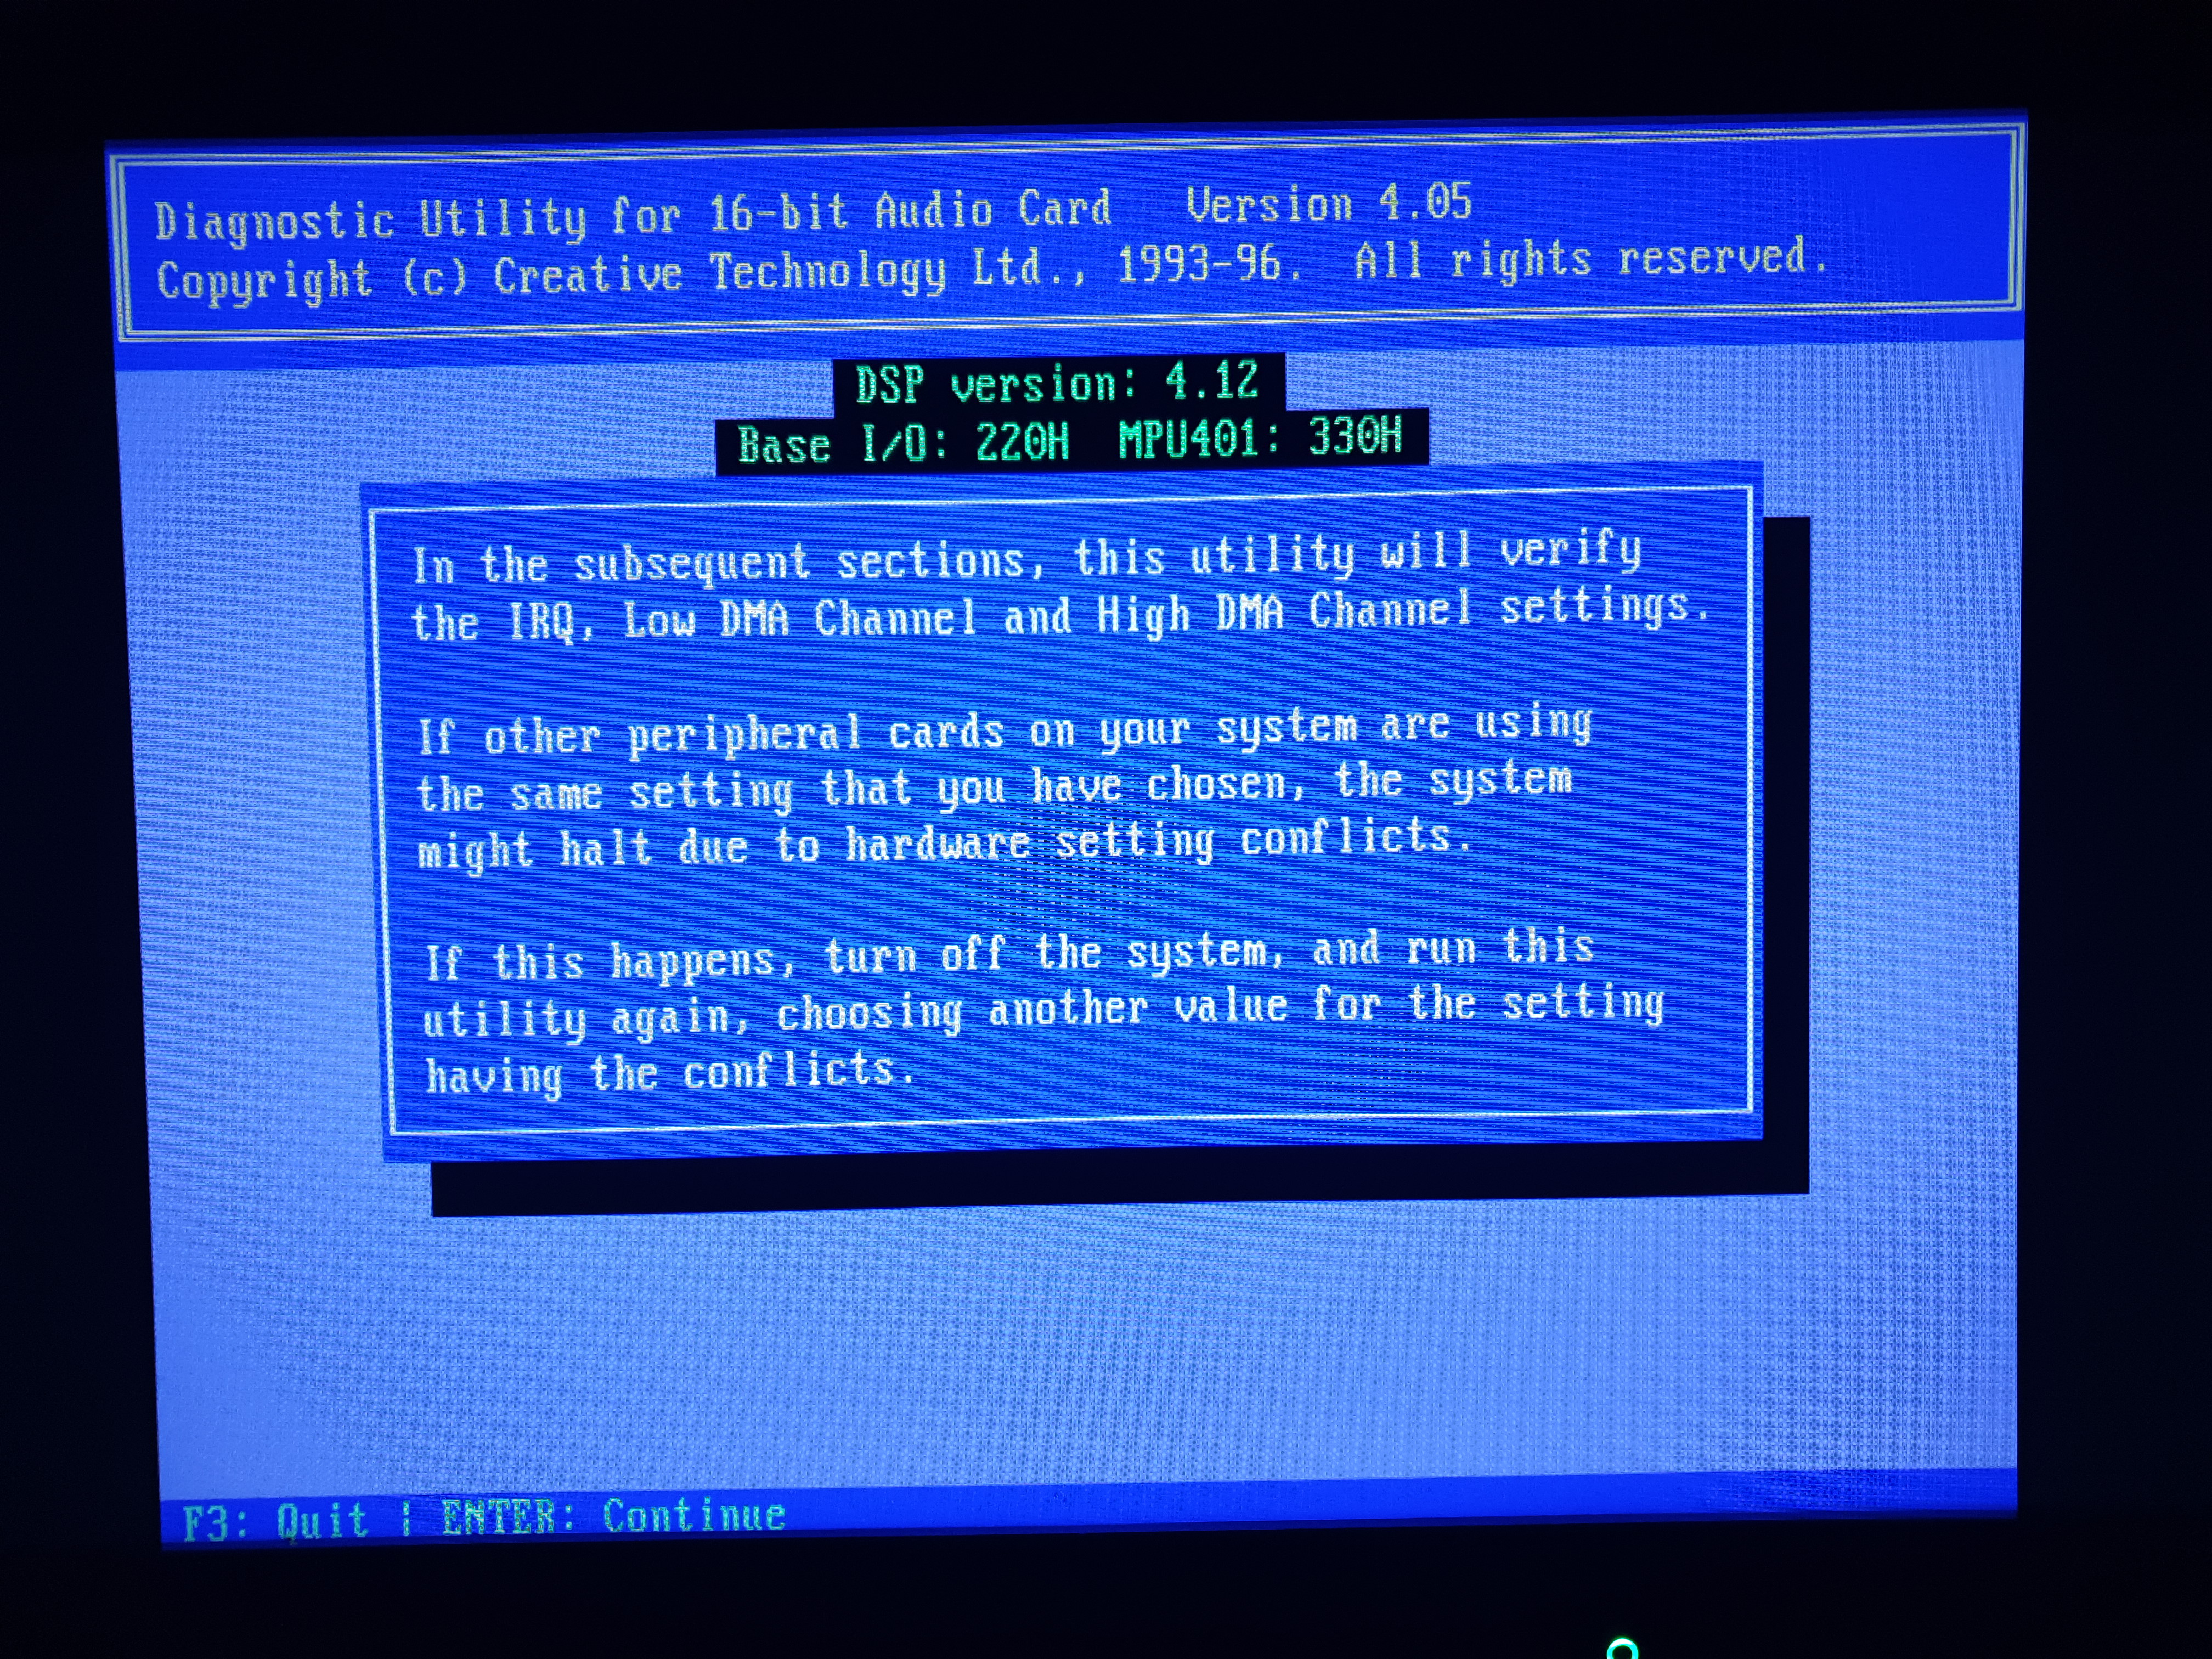
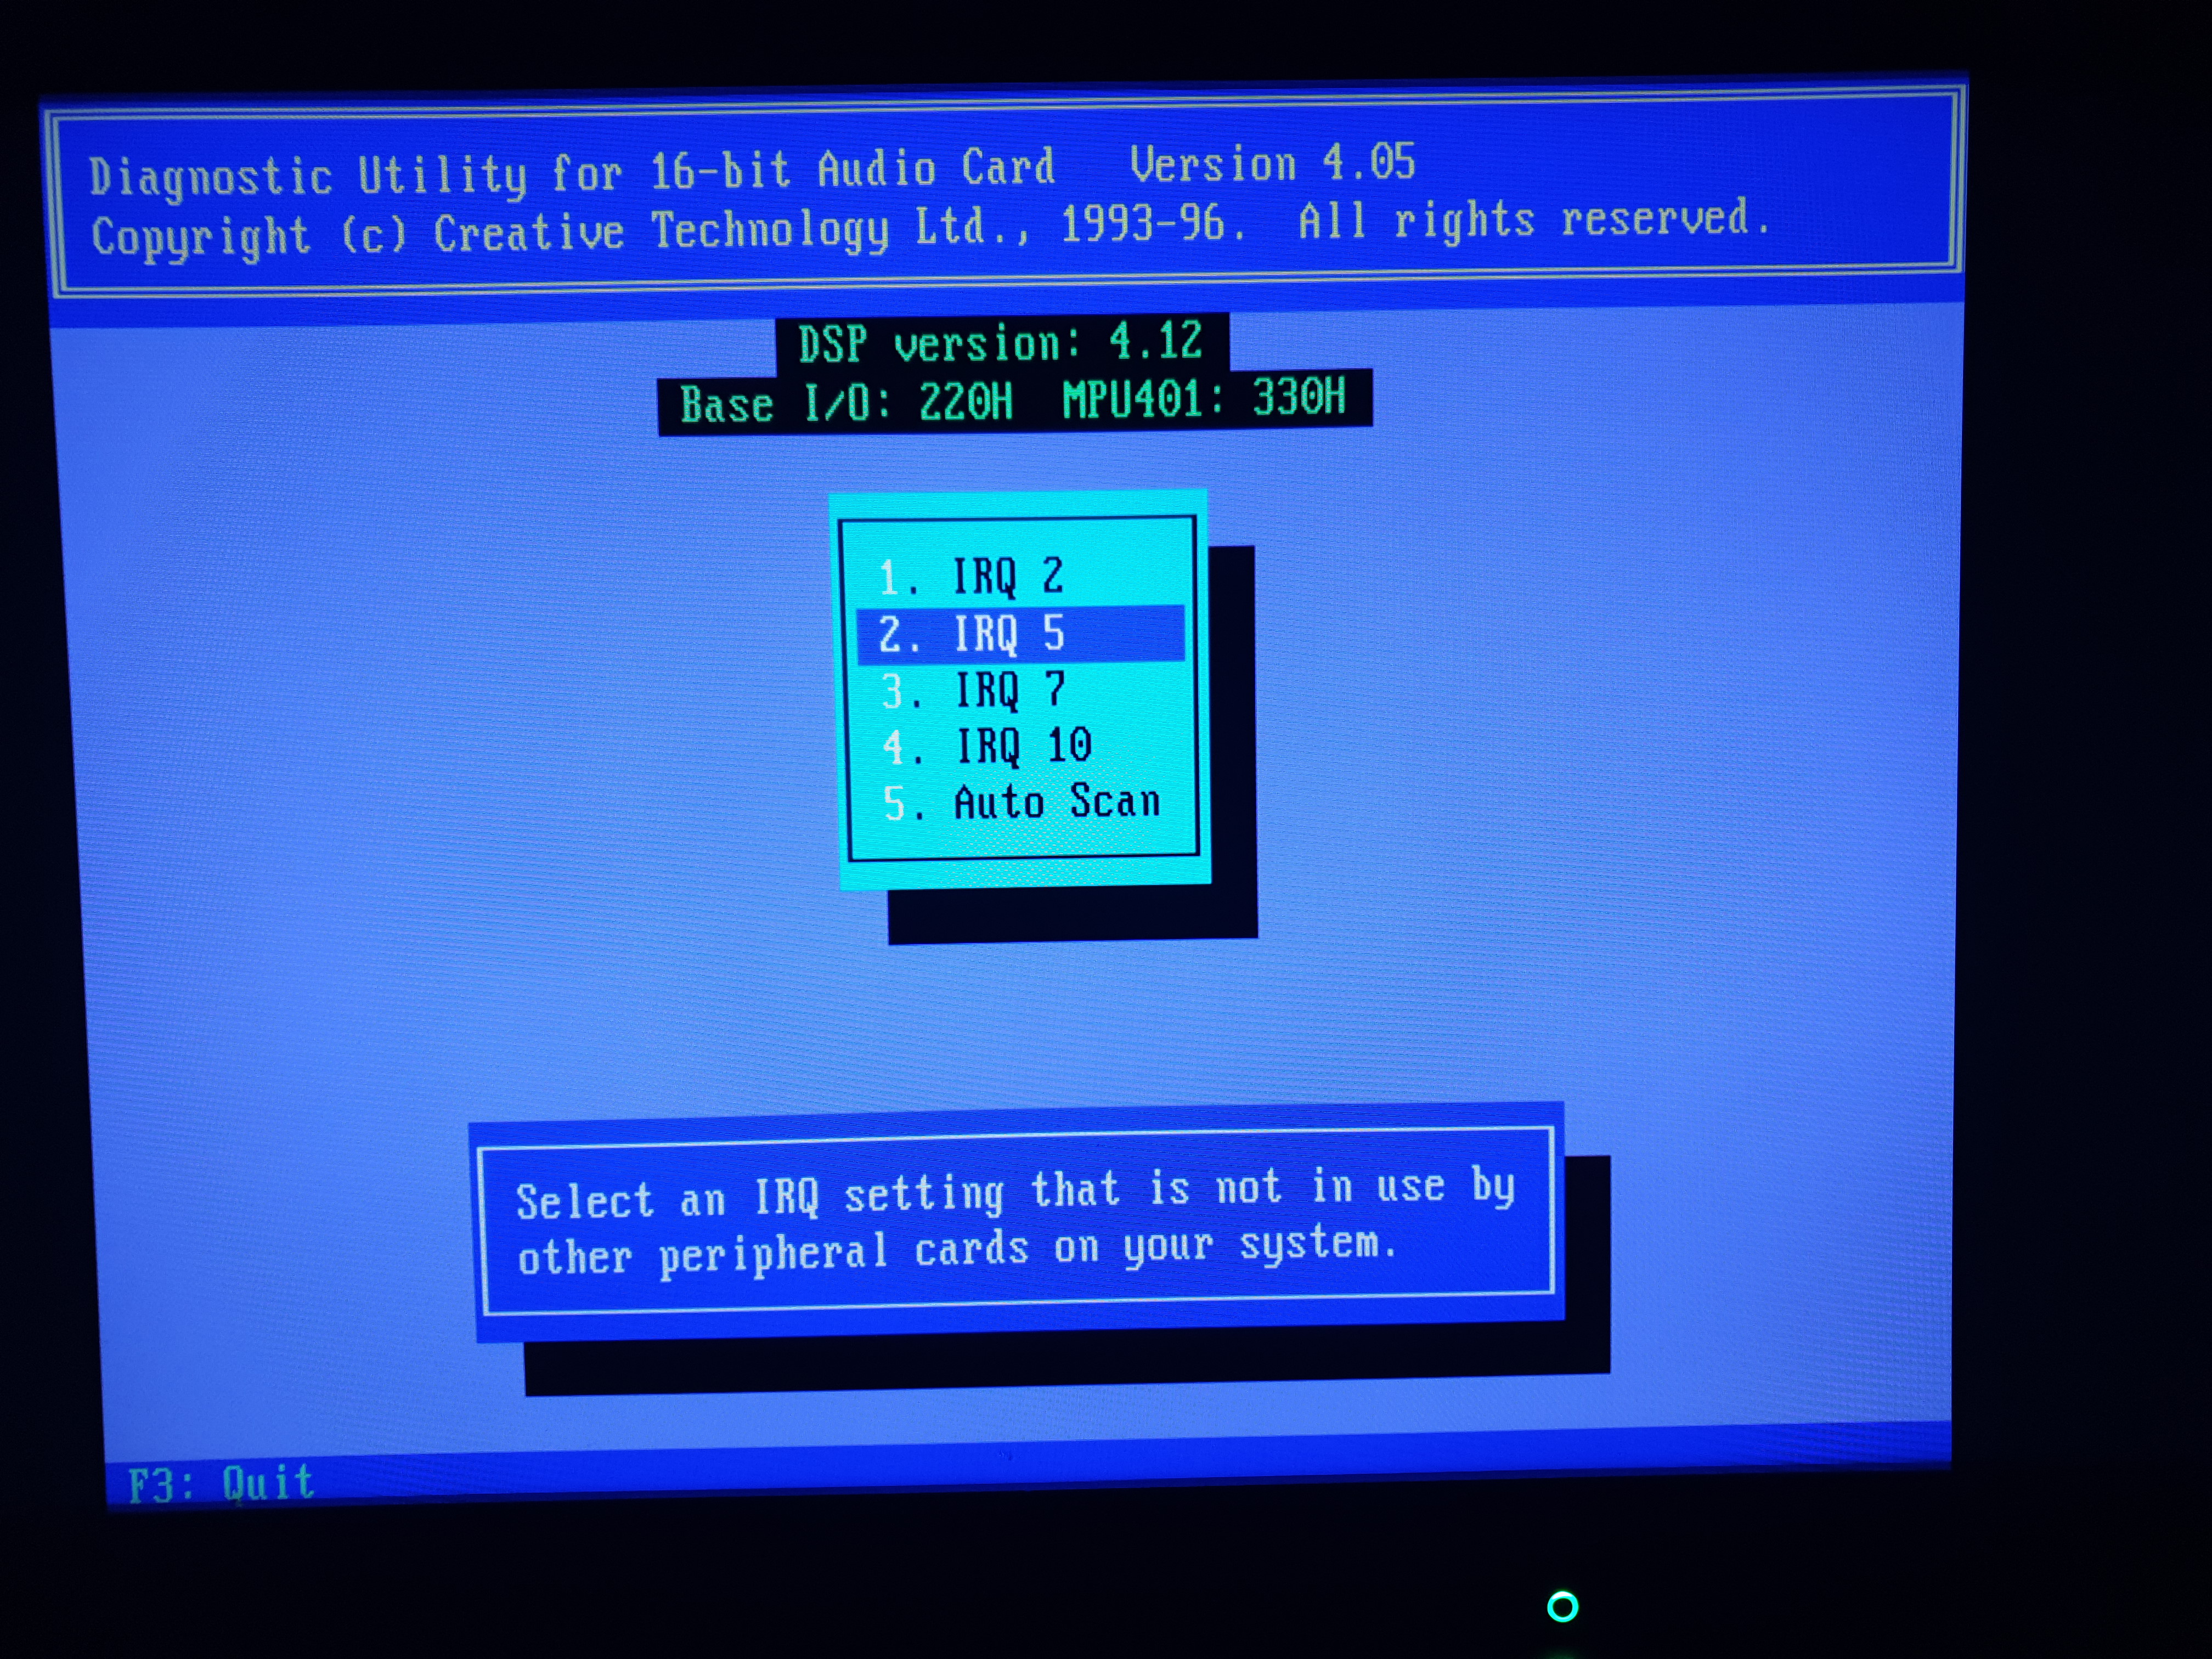
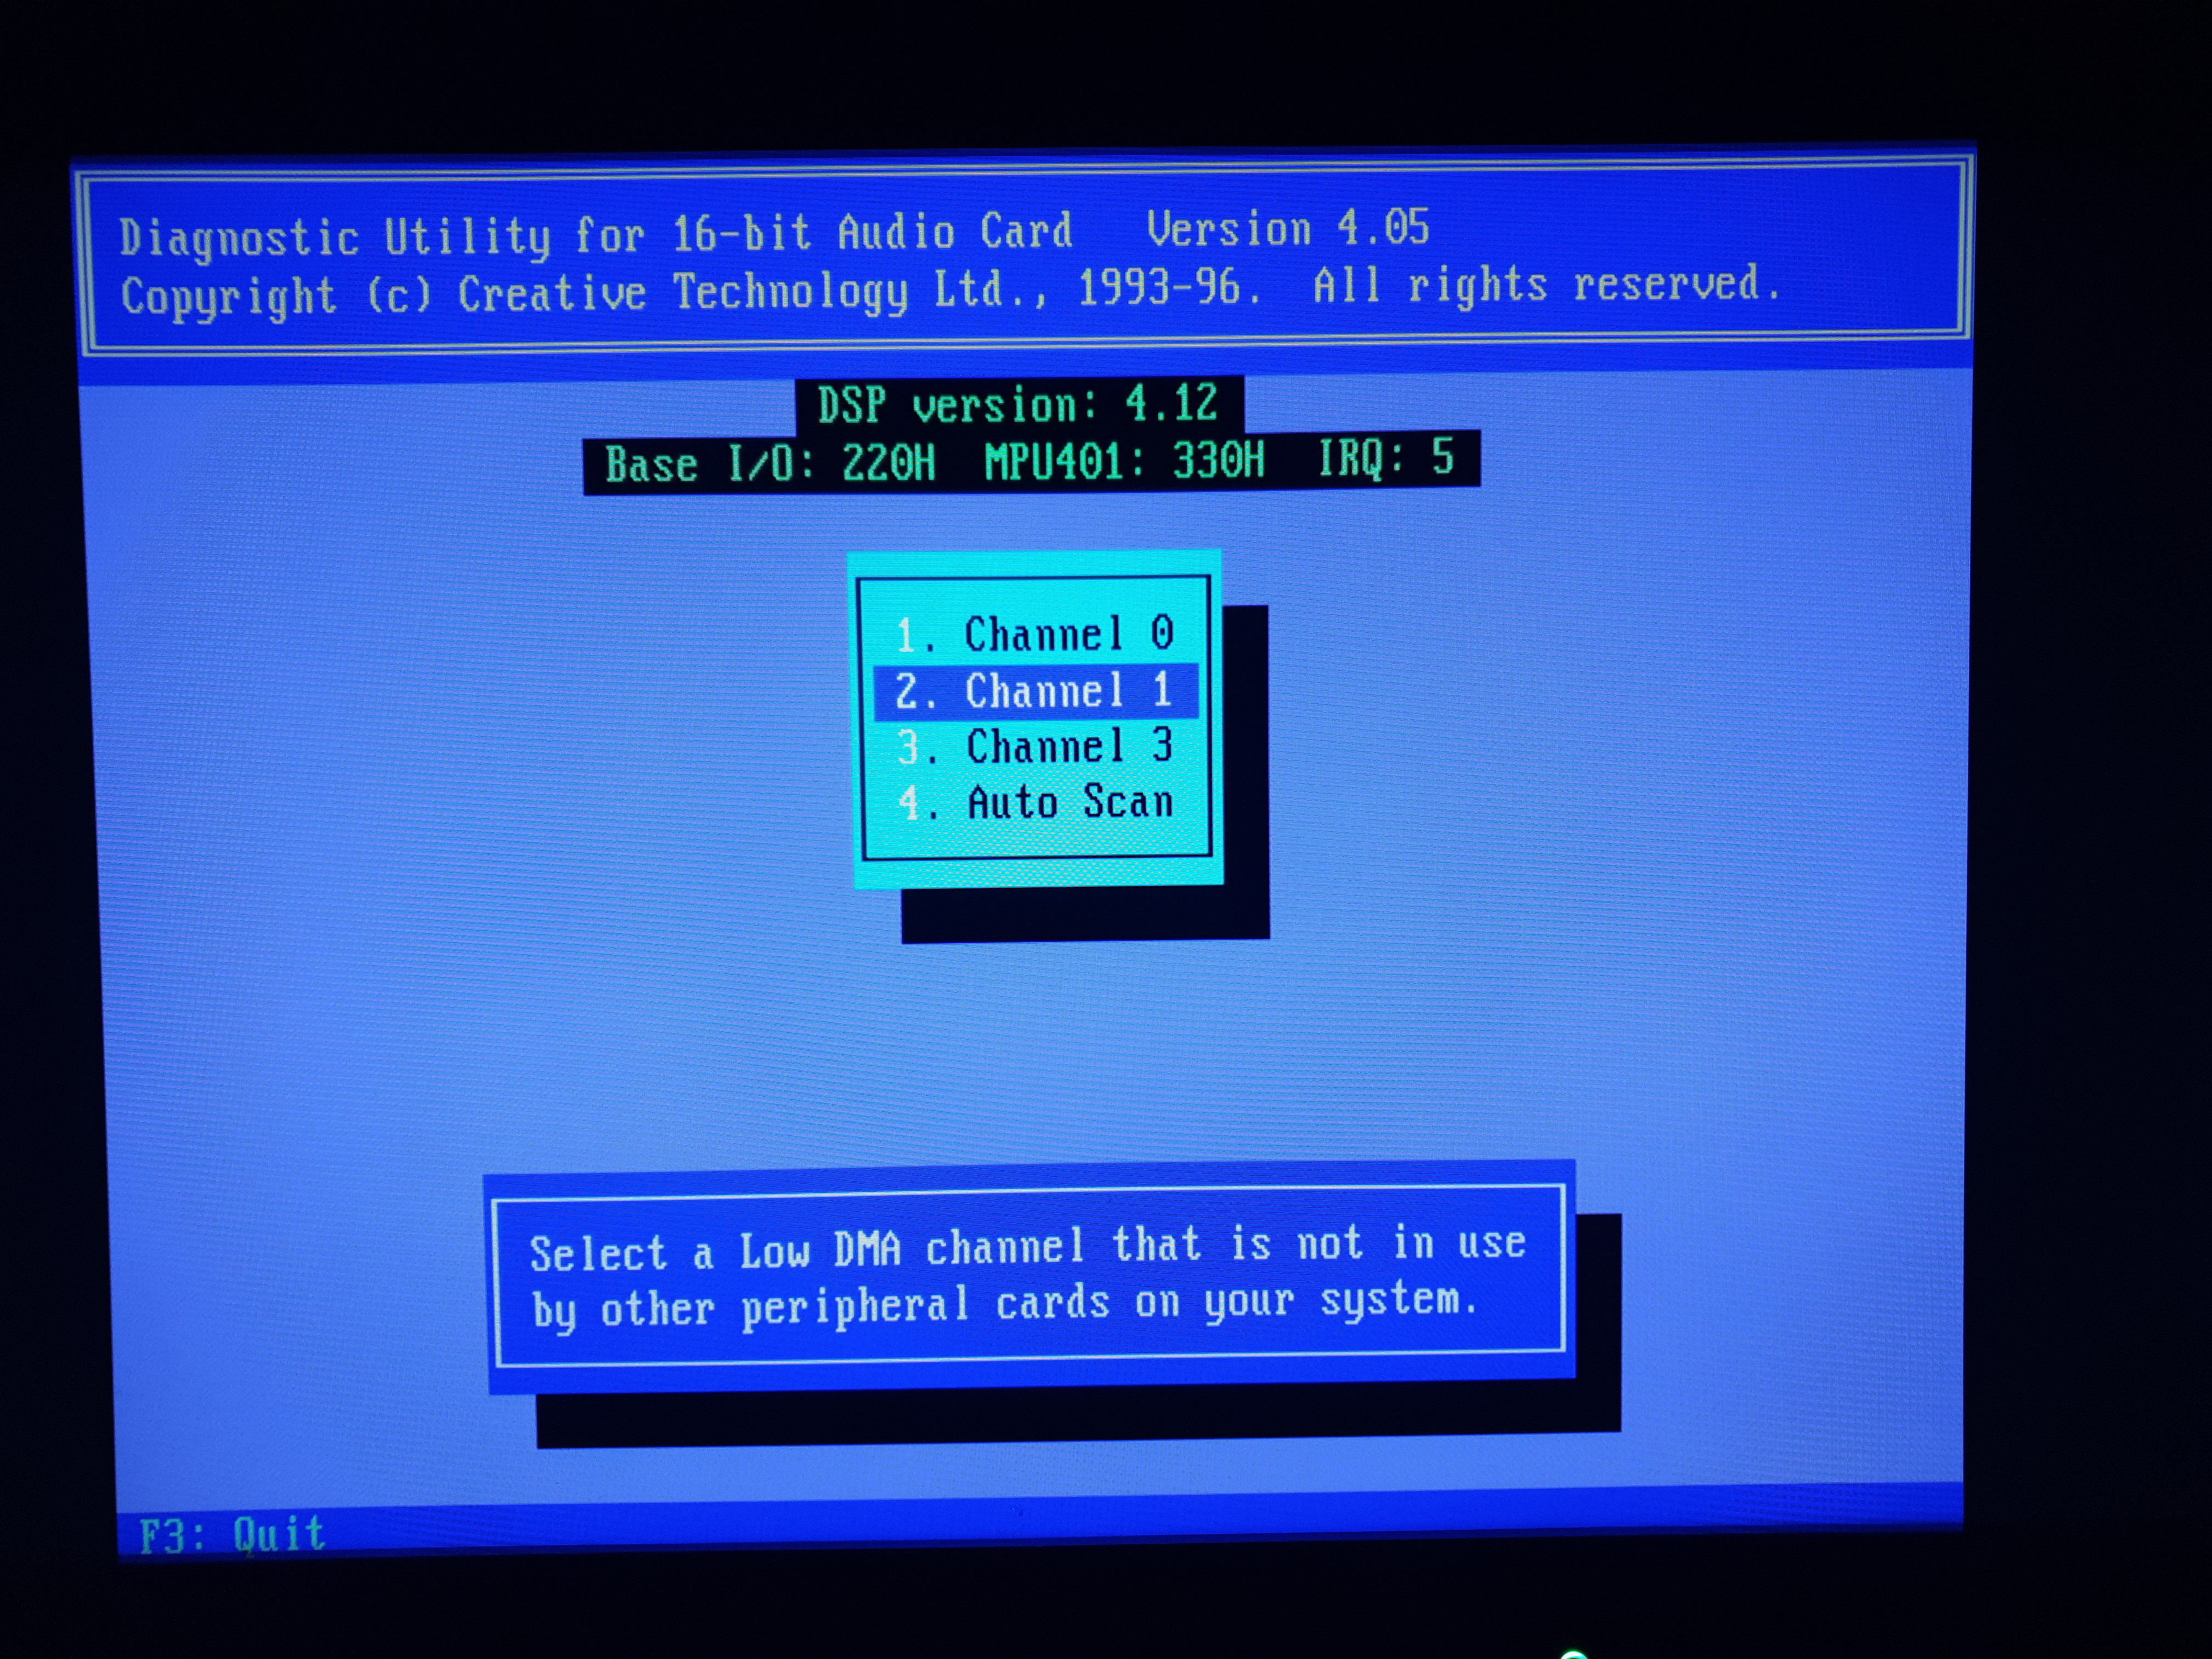
For the other settings necessary for the card to work (IRQ number and DMA channel) these are set using one of the tools the INSTALL program puts onto your hard disk, called DIAGNOSE, which we'll come onto in a bit. .
Software Installation
Before we jump too far ahead, let's cover the driver installation process. I don't have the original disks that came with the CT2770, so I am using this ZIP file which contains 3 floppy disks in folders, which I got from Vogons Drivers. They are:
- Sound Blaster Basic Disk for DOS/Windows 3.1 SDR-31STD-1-US (Revision 1) Install disk
- Advanced Signal Processor Upgrade Disk
- Configuration Manager Software CTCM-31BBS-1-US (Revision 4) Installation Disk
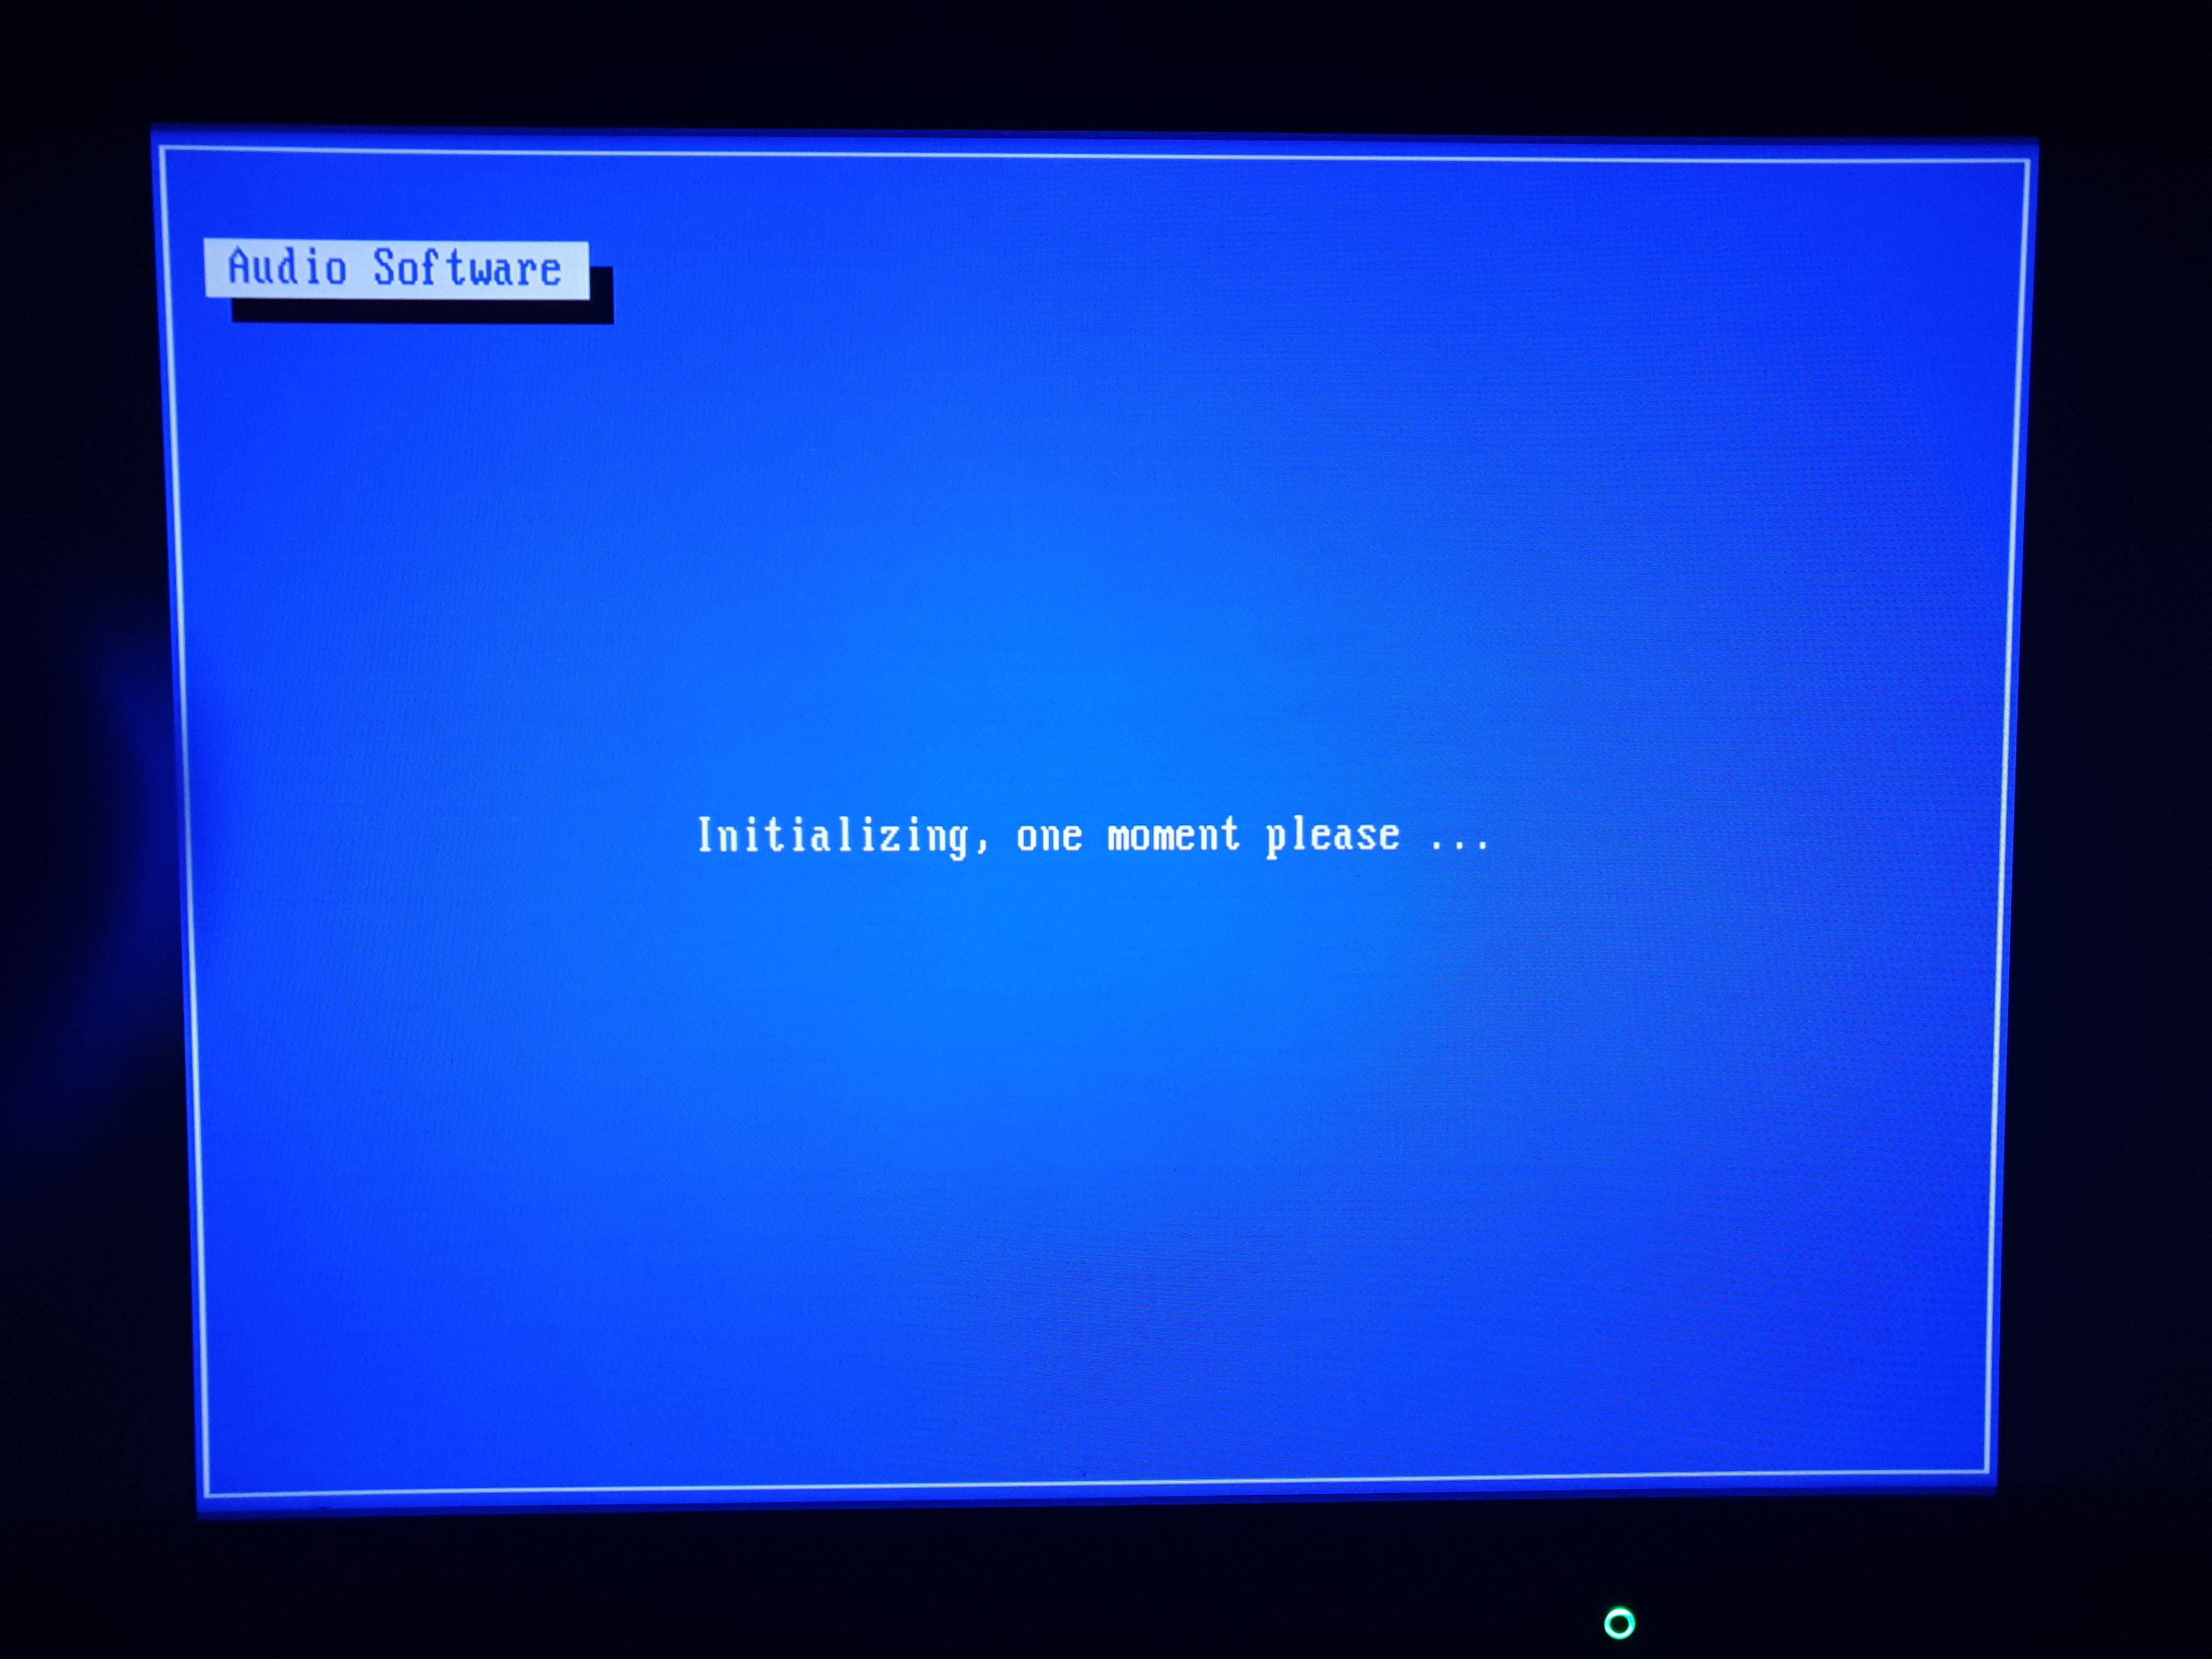
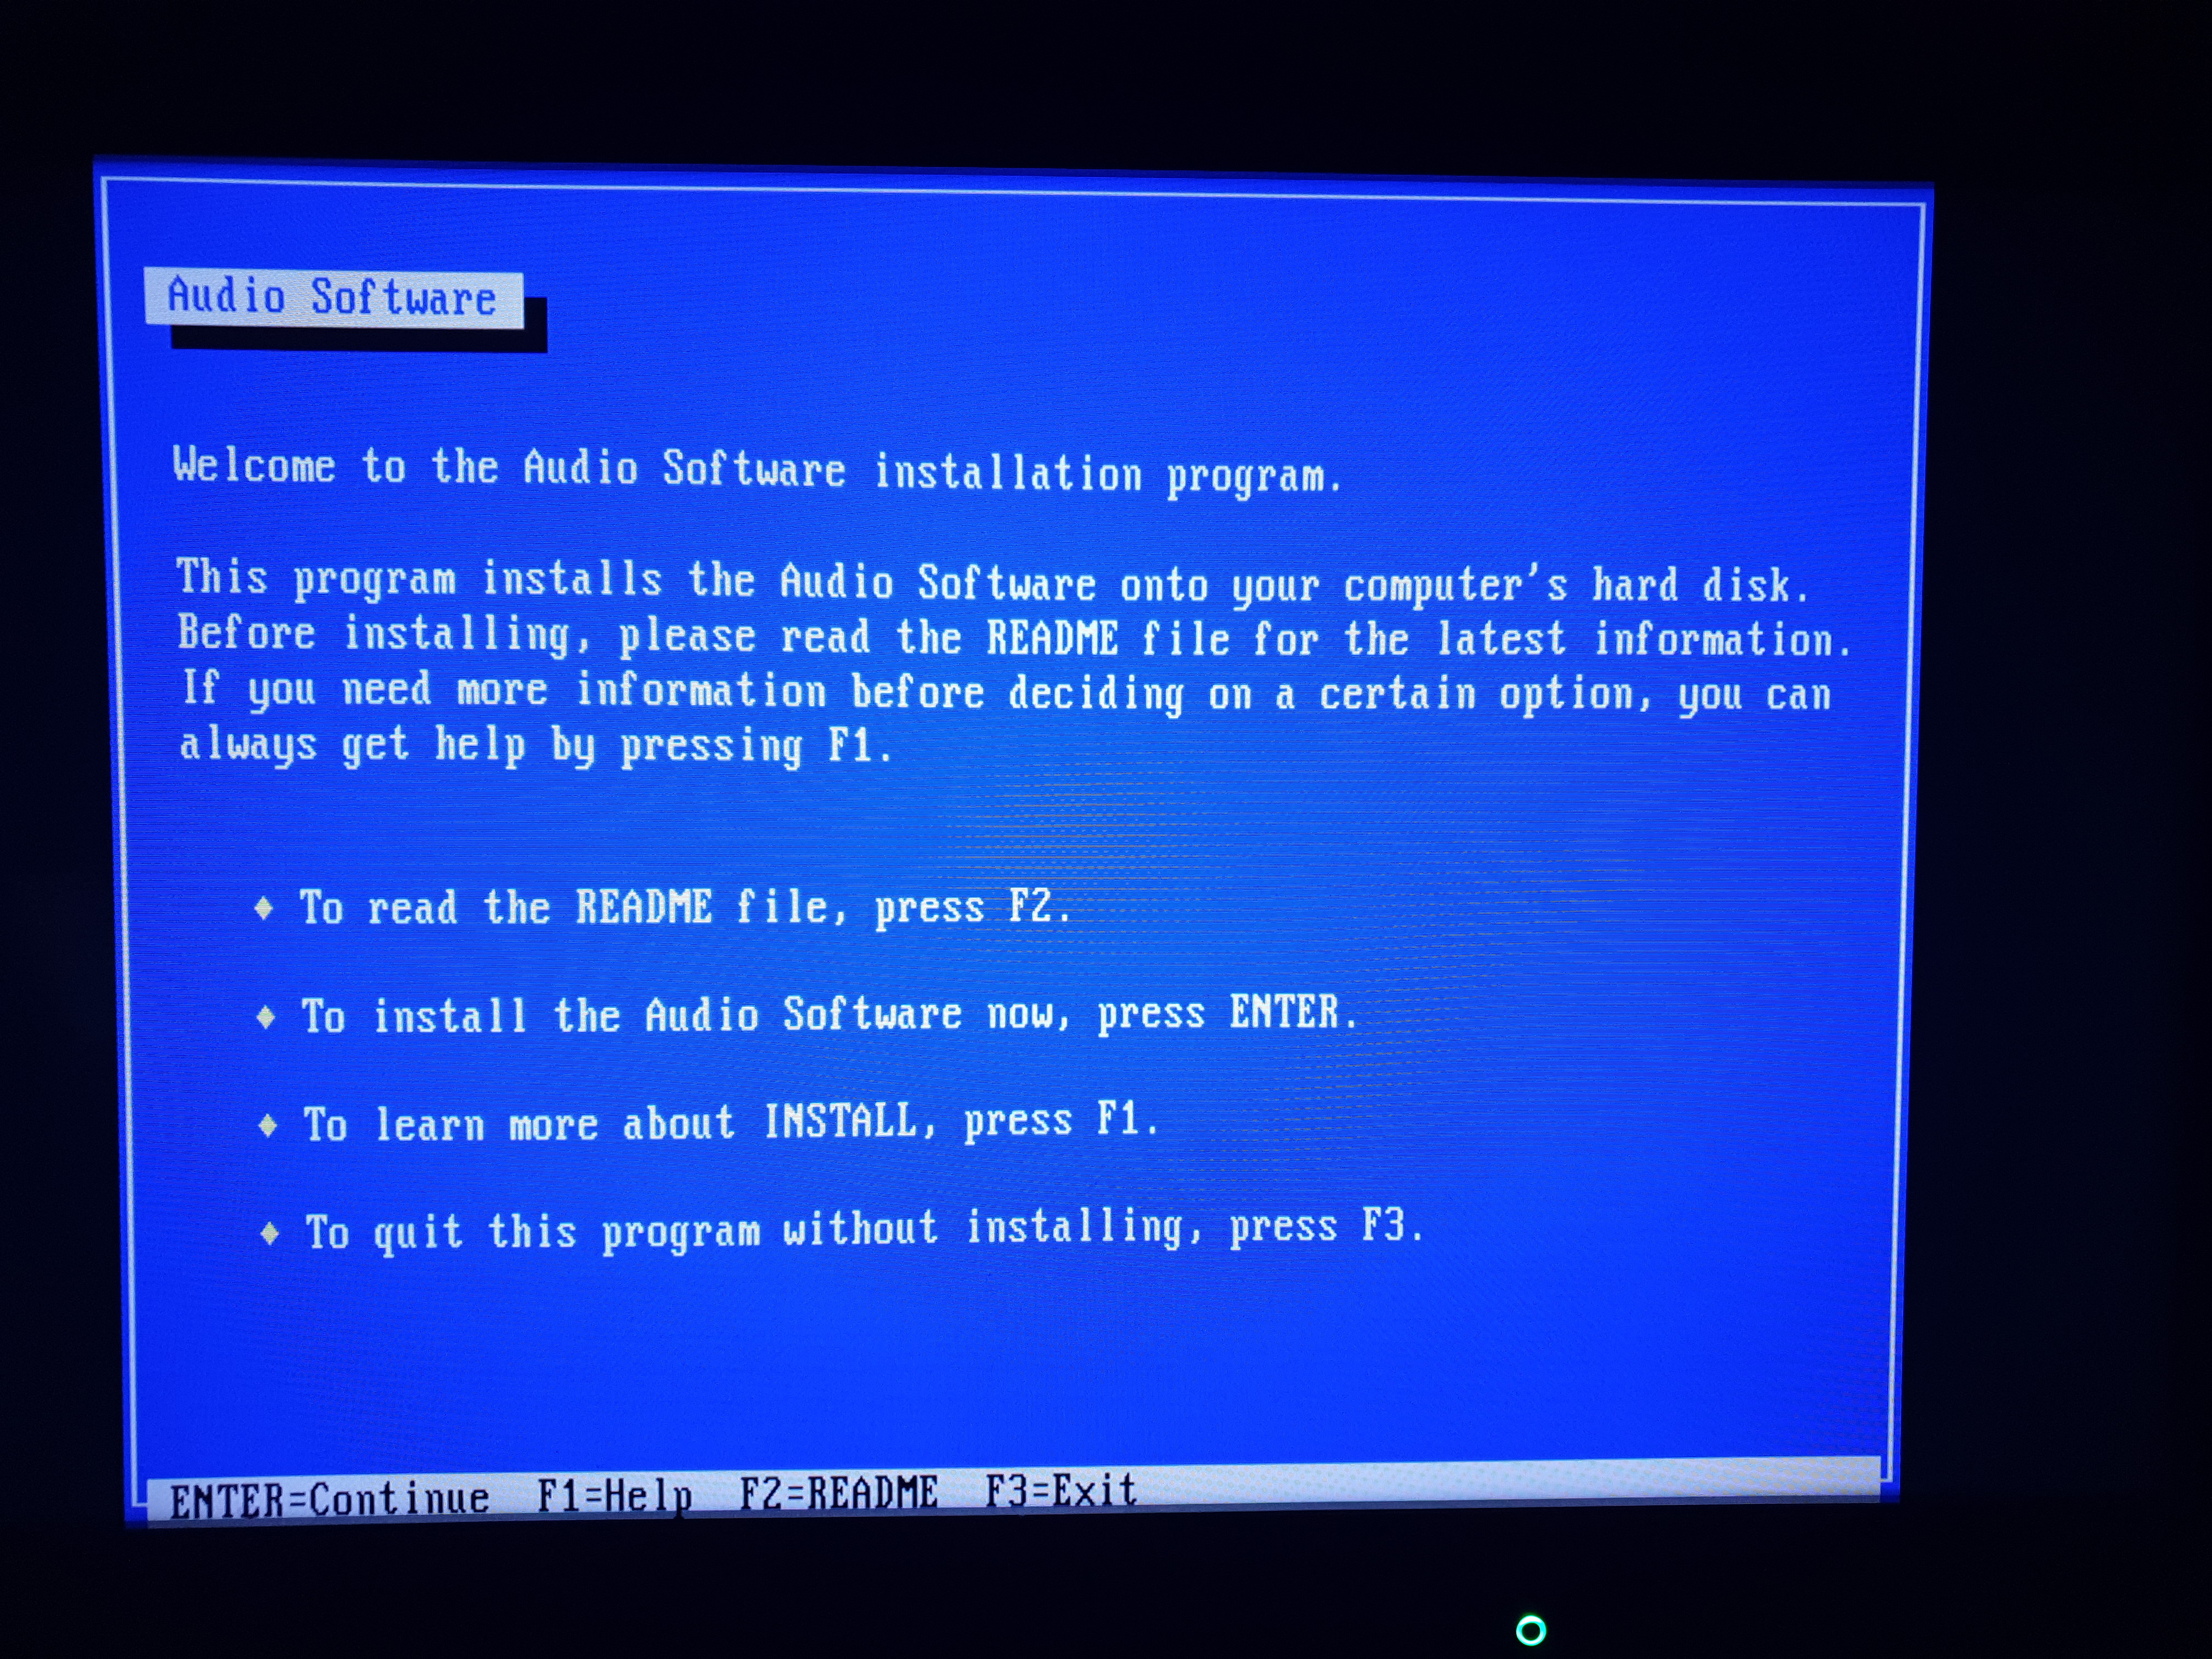
This appears to be a slightly later version of Creative's drivers for the Sound Blaster 16, as the readme files make reference to the AWE32 and the last disk is for Plug & Play cards. The *only* step I took was to unzip the contents in full to a directory on my DOS PC, go to the install directory inside that, and run INSTALL.EXE from the DOS prompt.
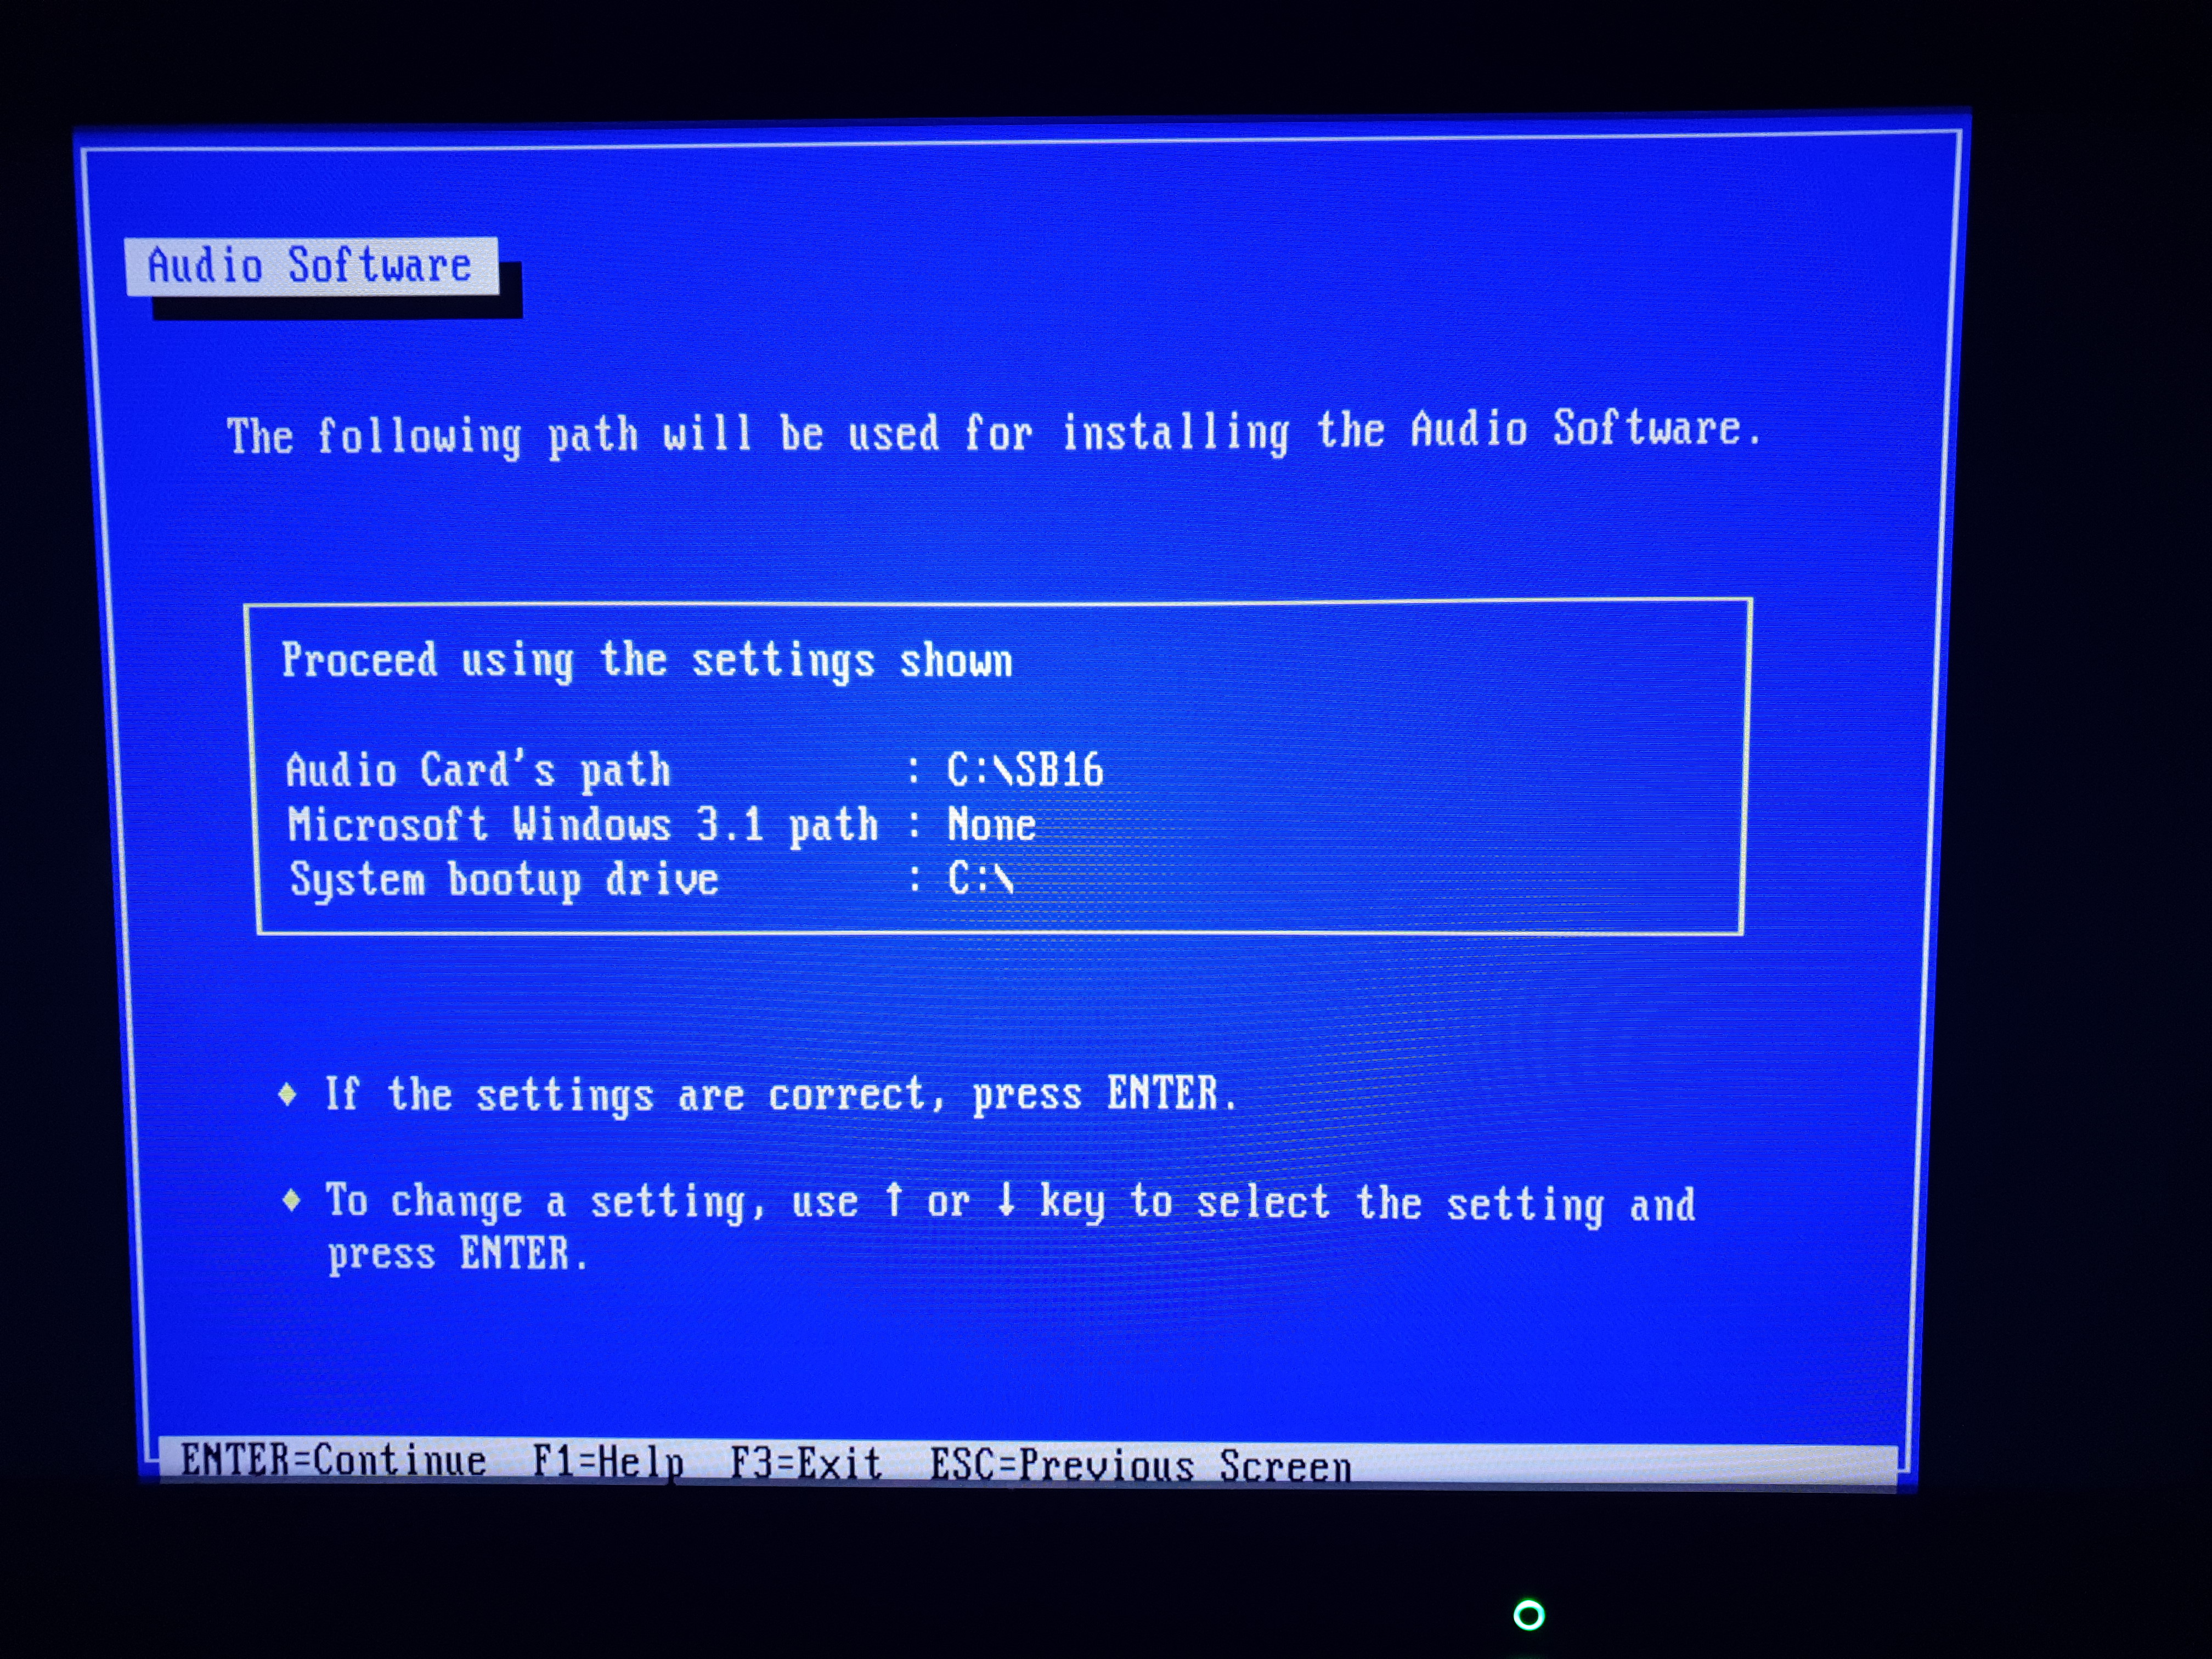
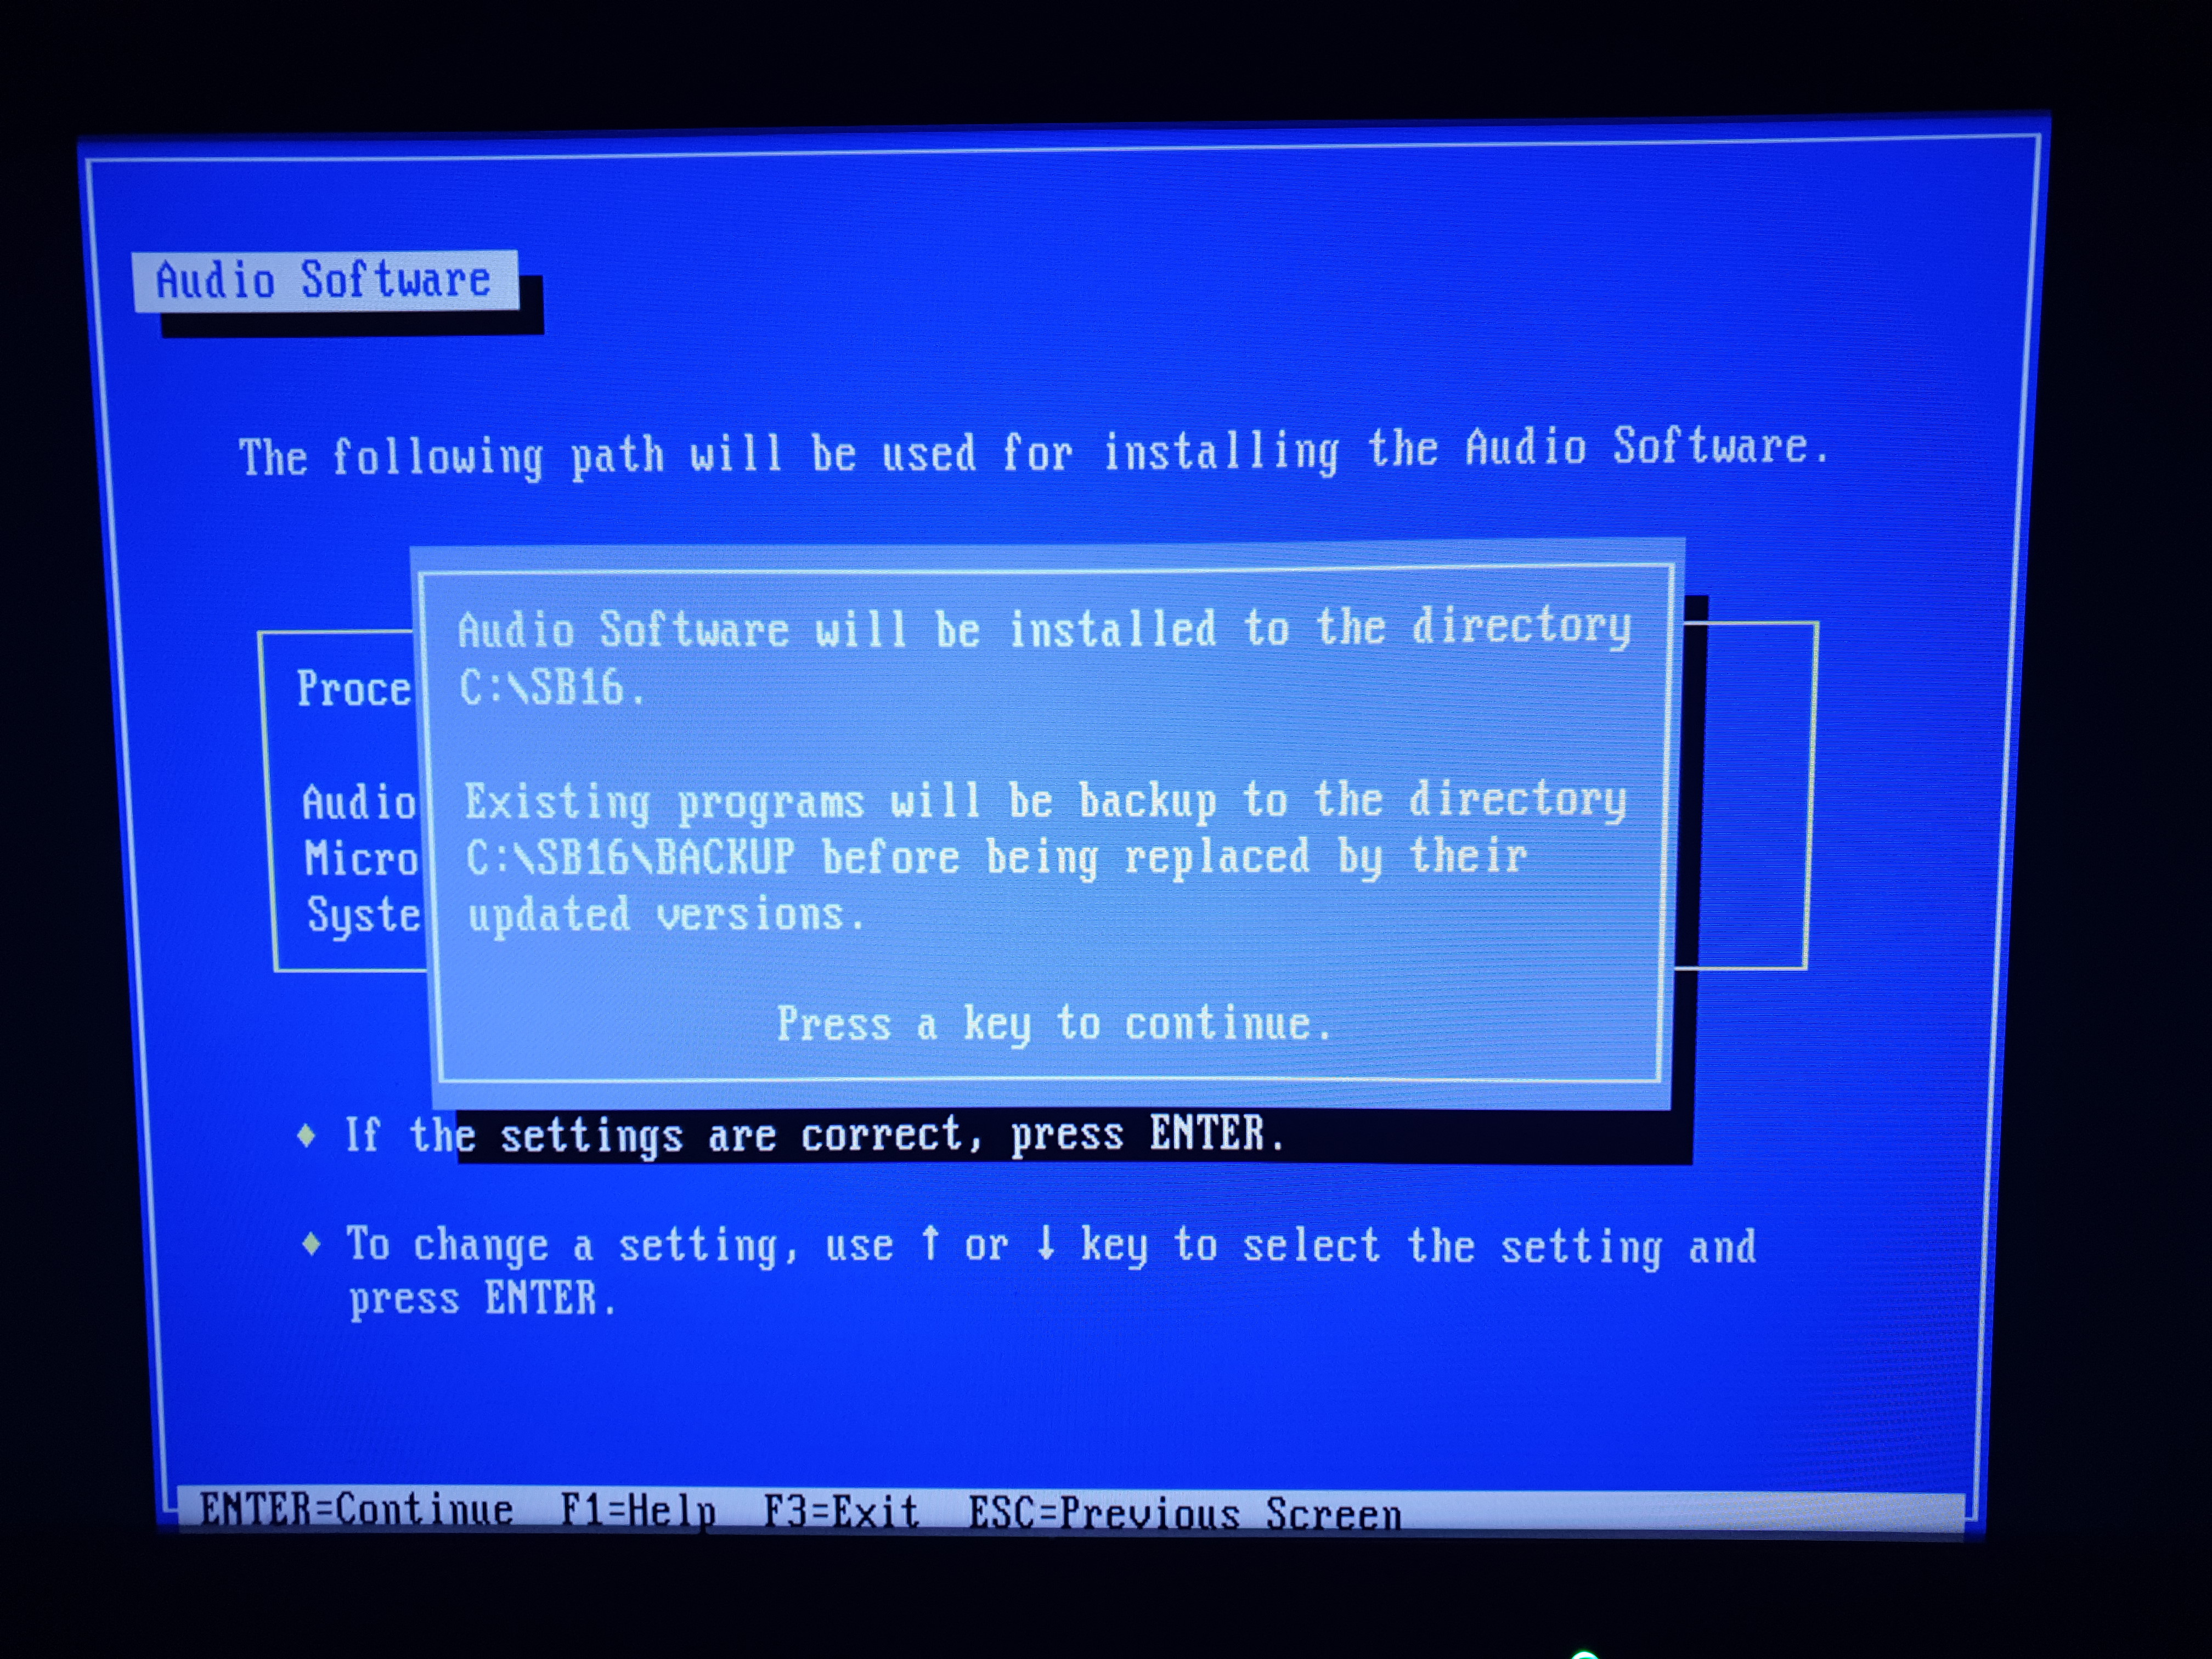
Steps 1-4: Initialization, intro screen, choose desination directory and confirm choices:-
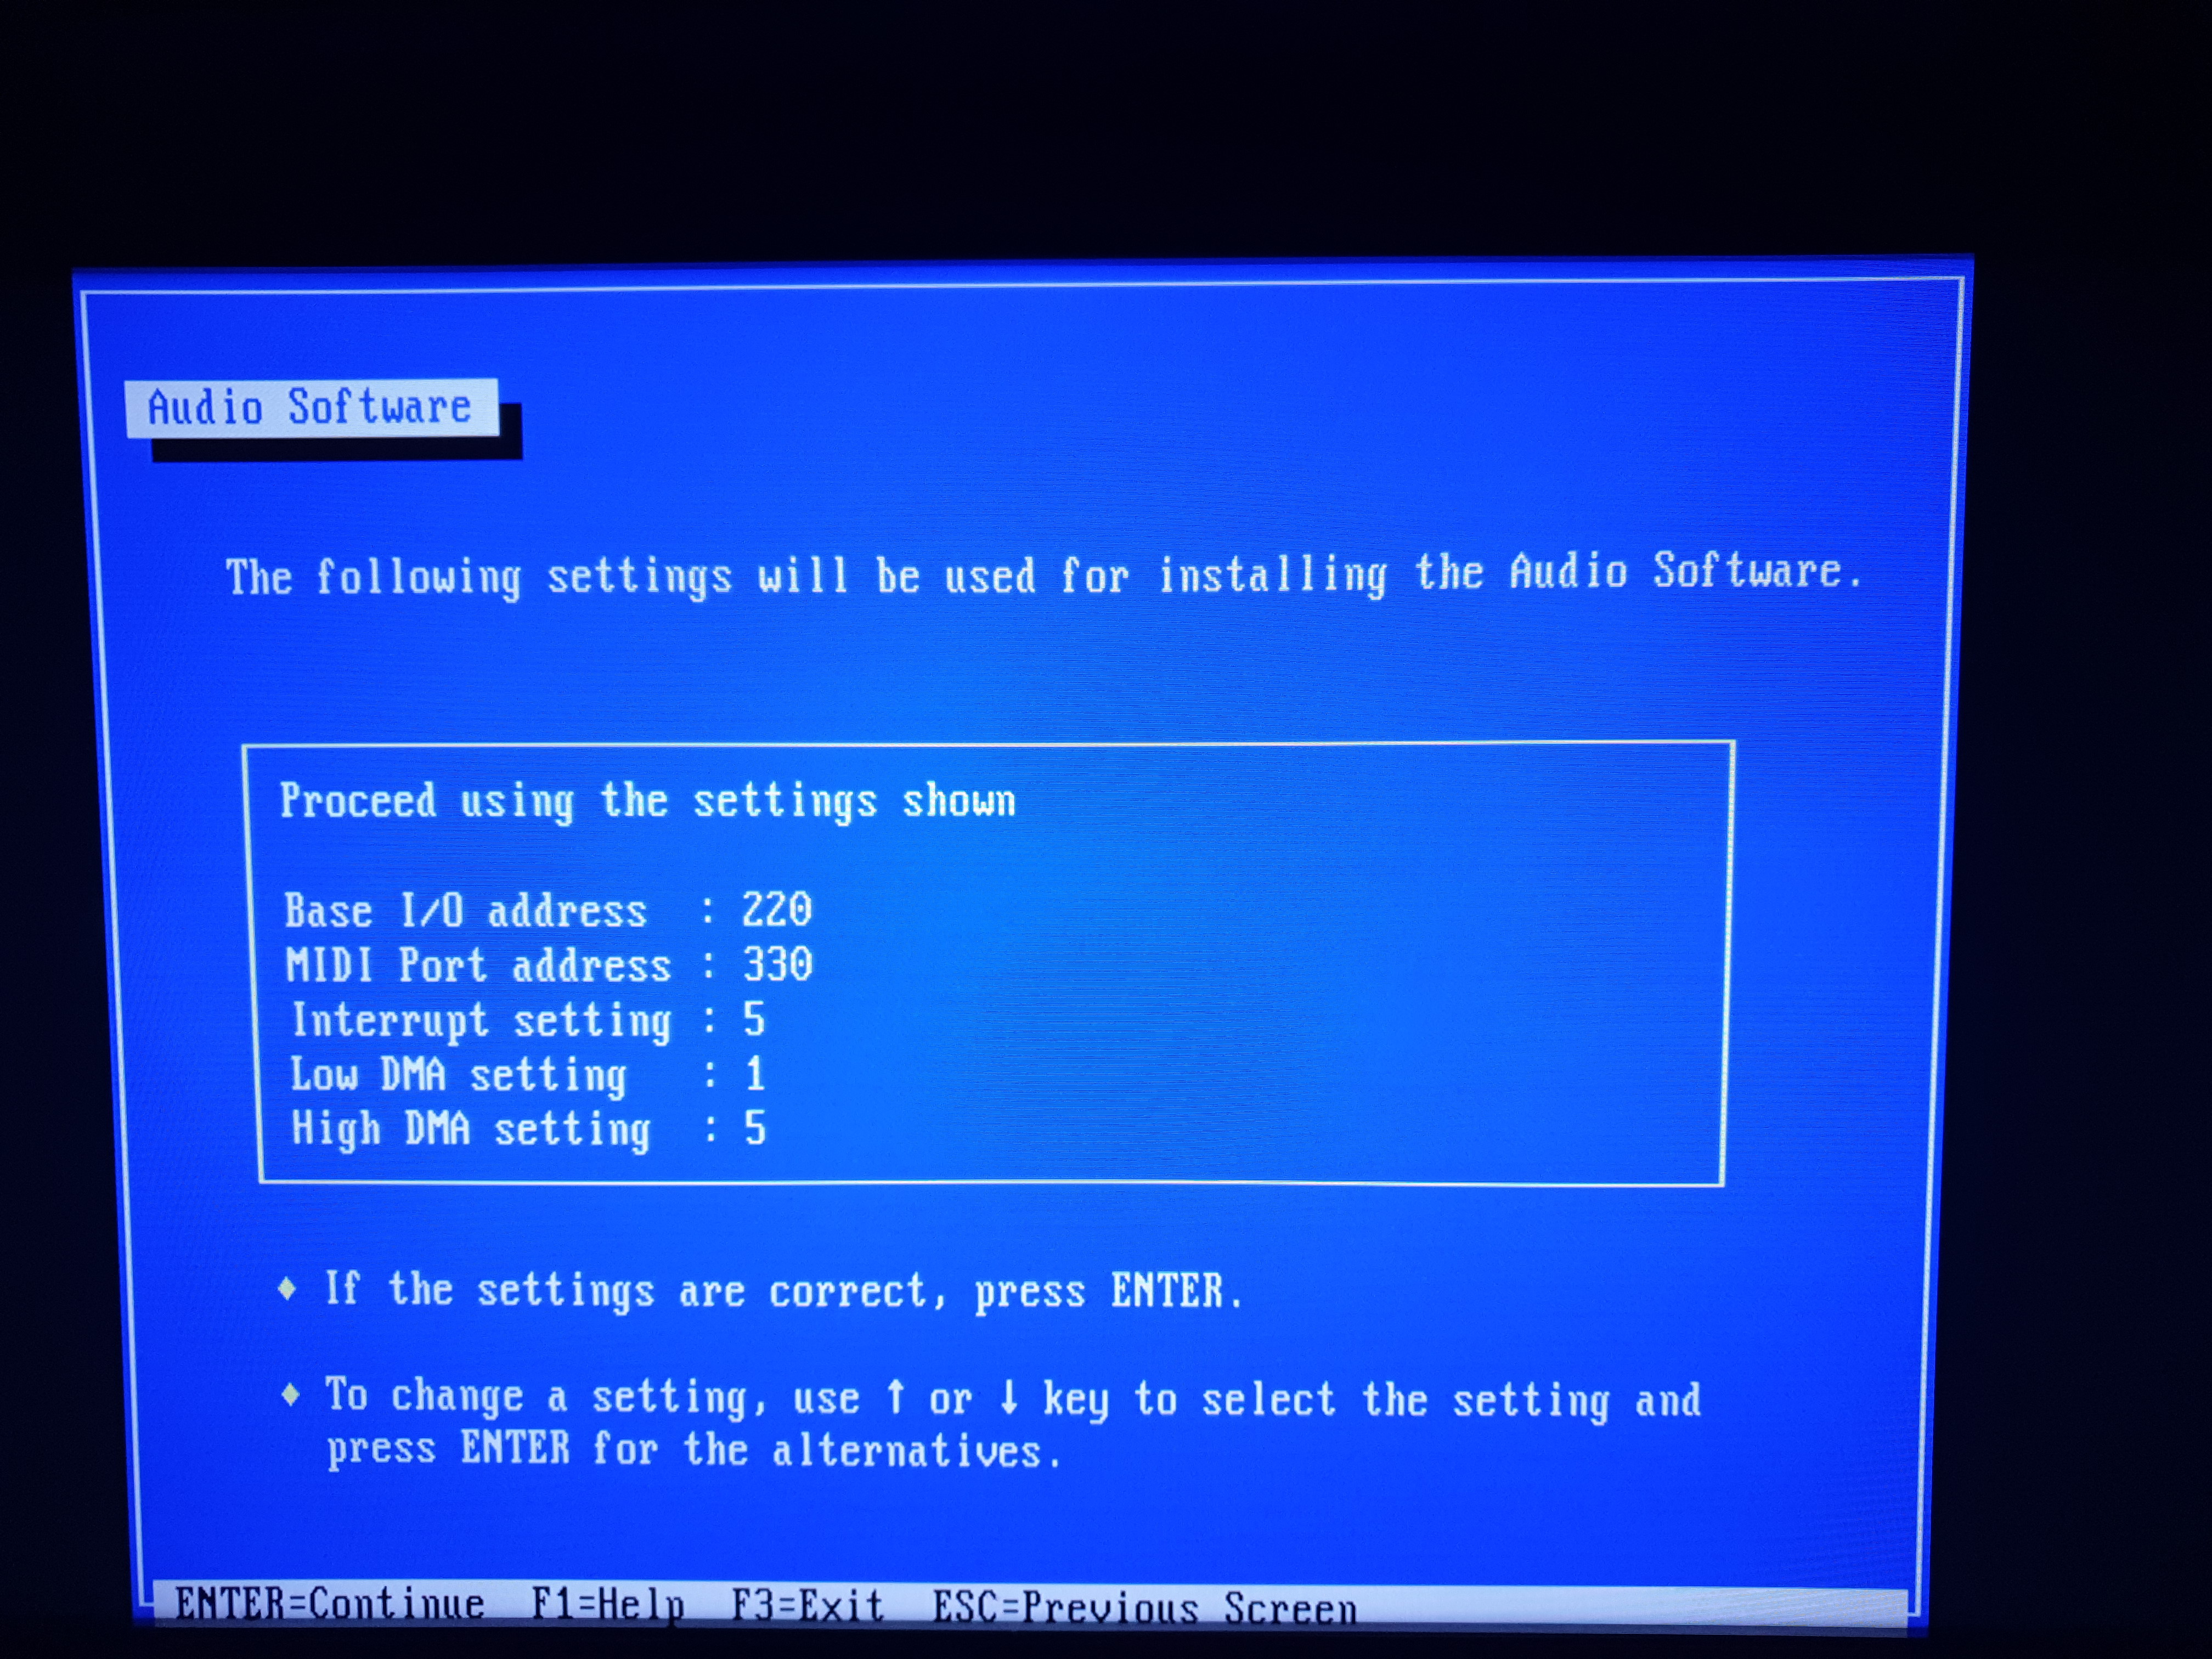
Steps 5-8: Detect the sound card, determine the configuration, and start installing the driver files:-


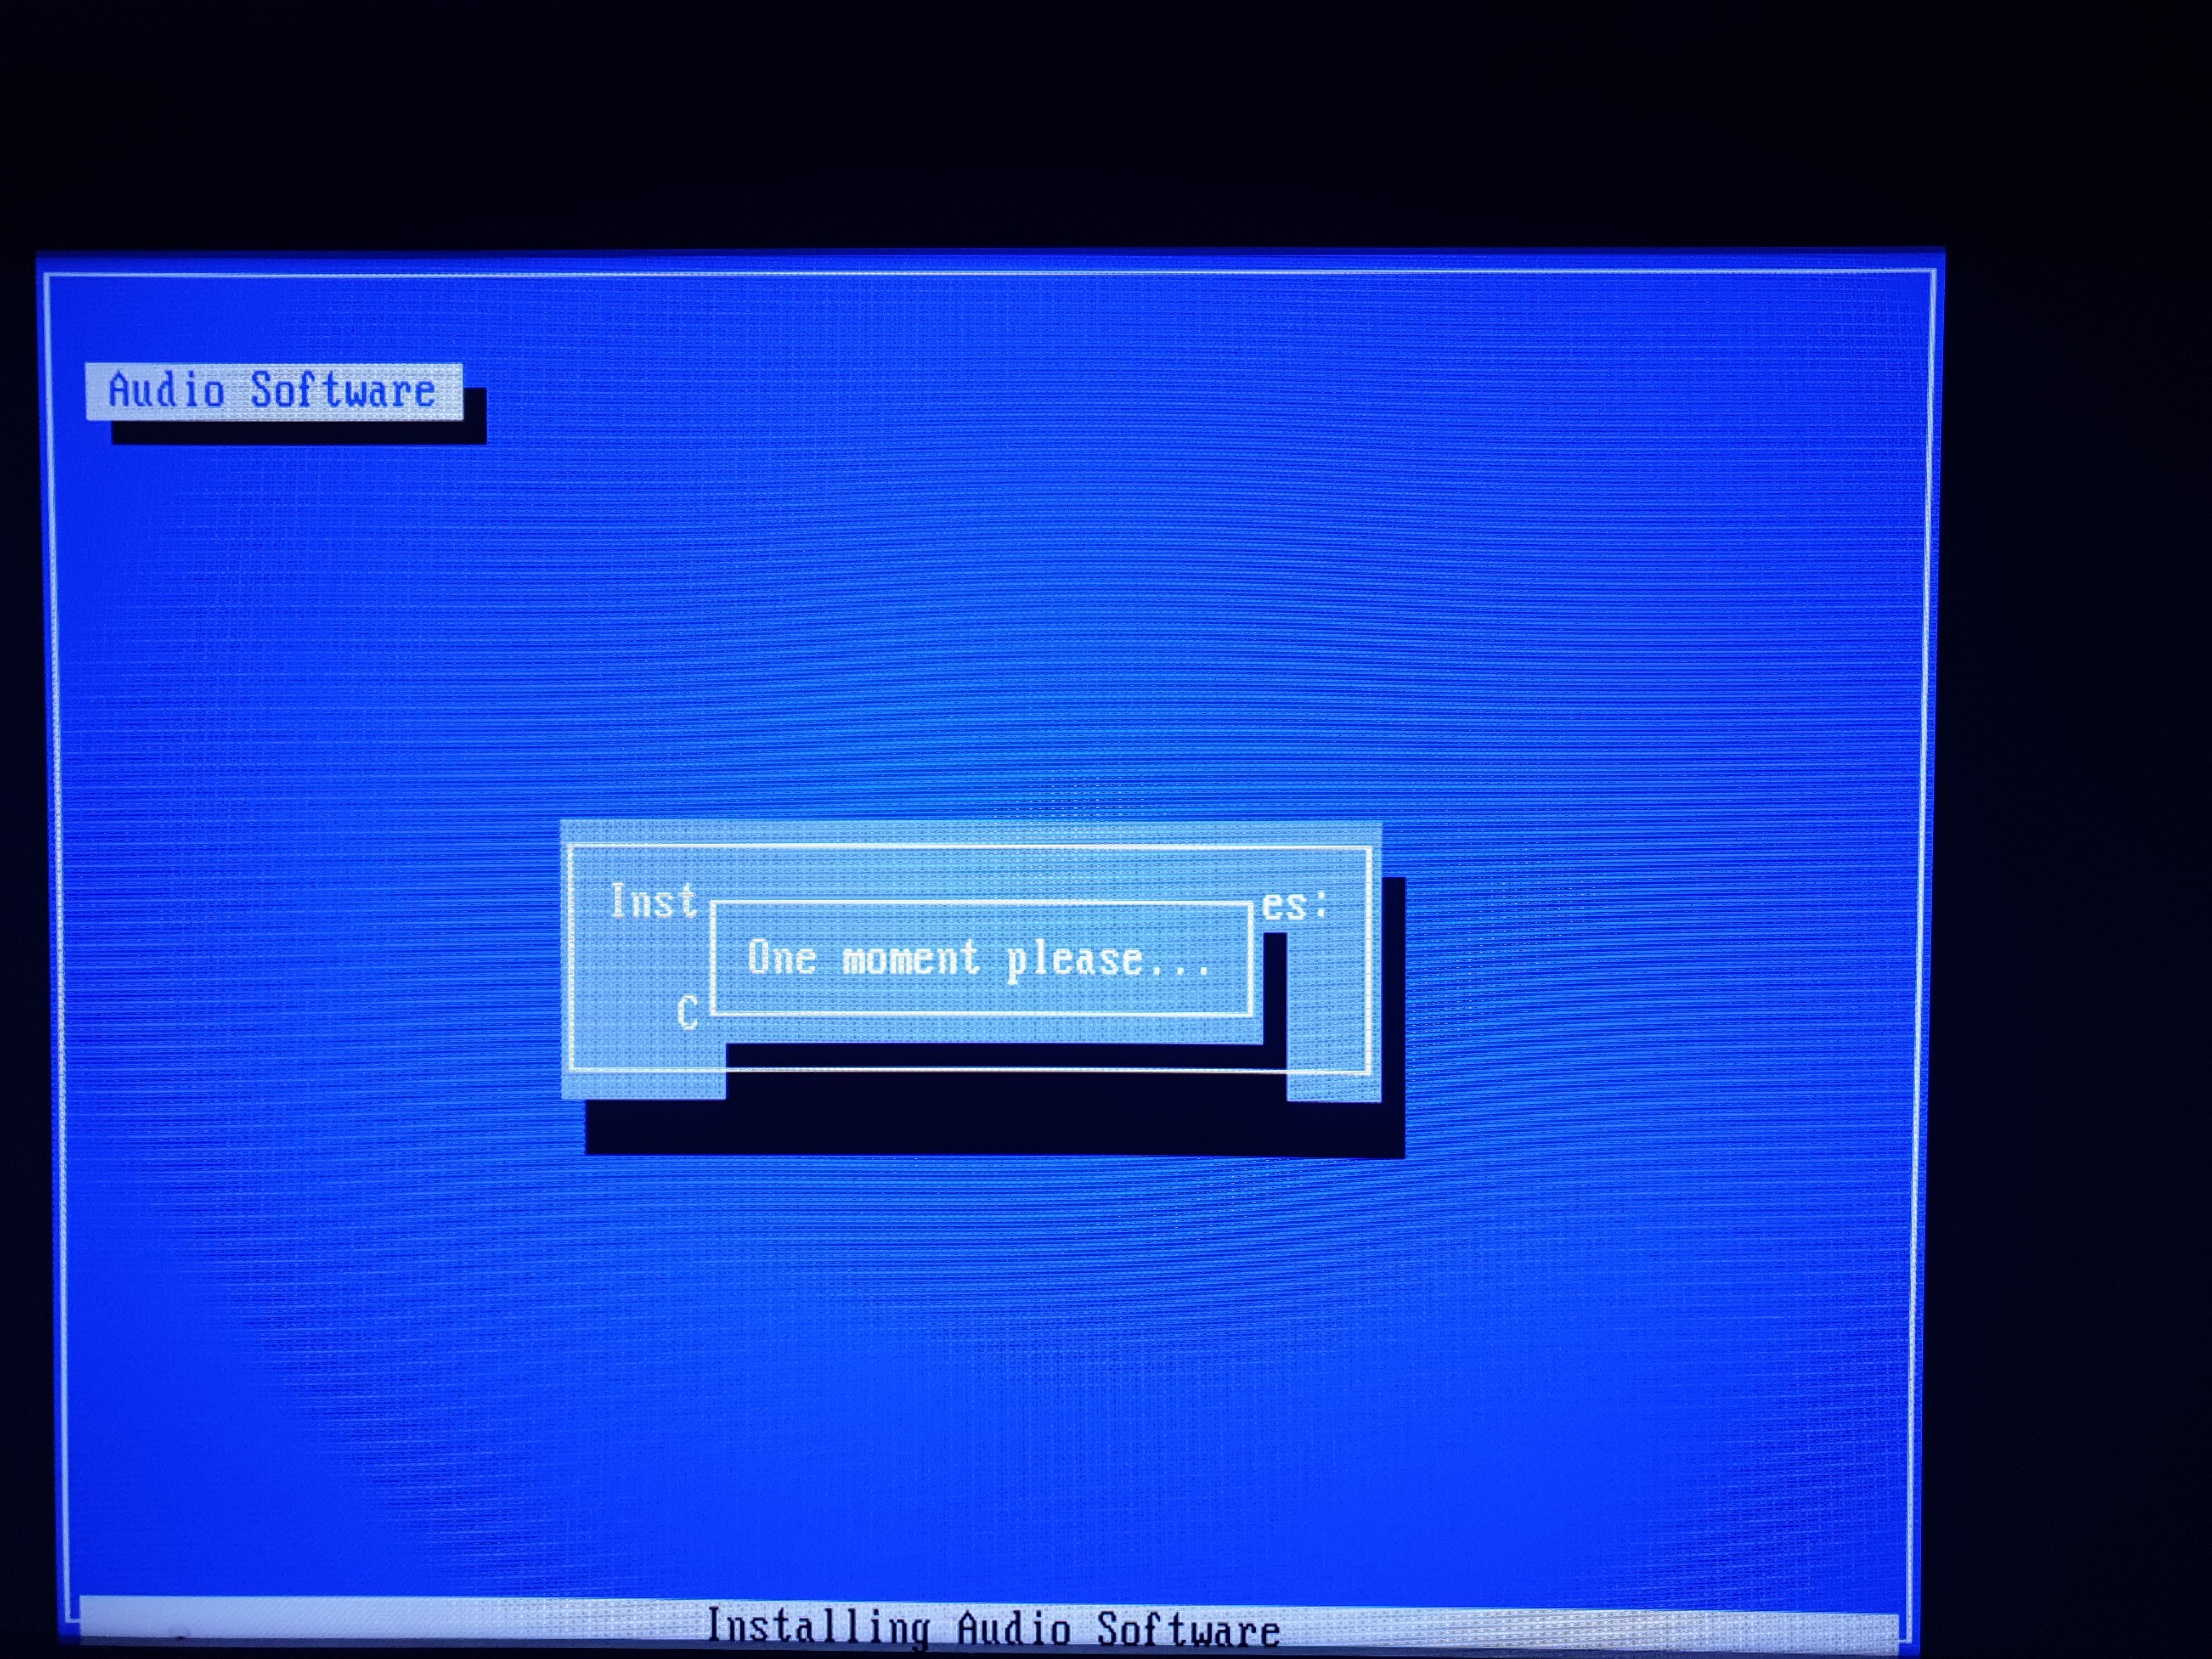
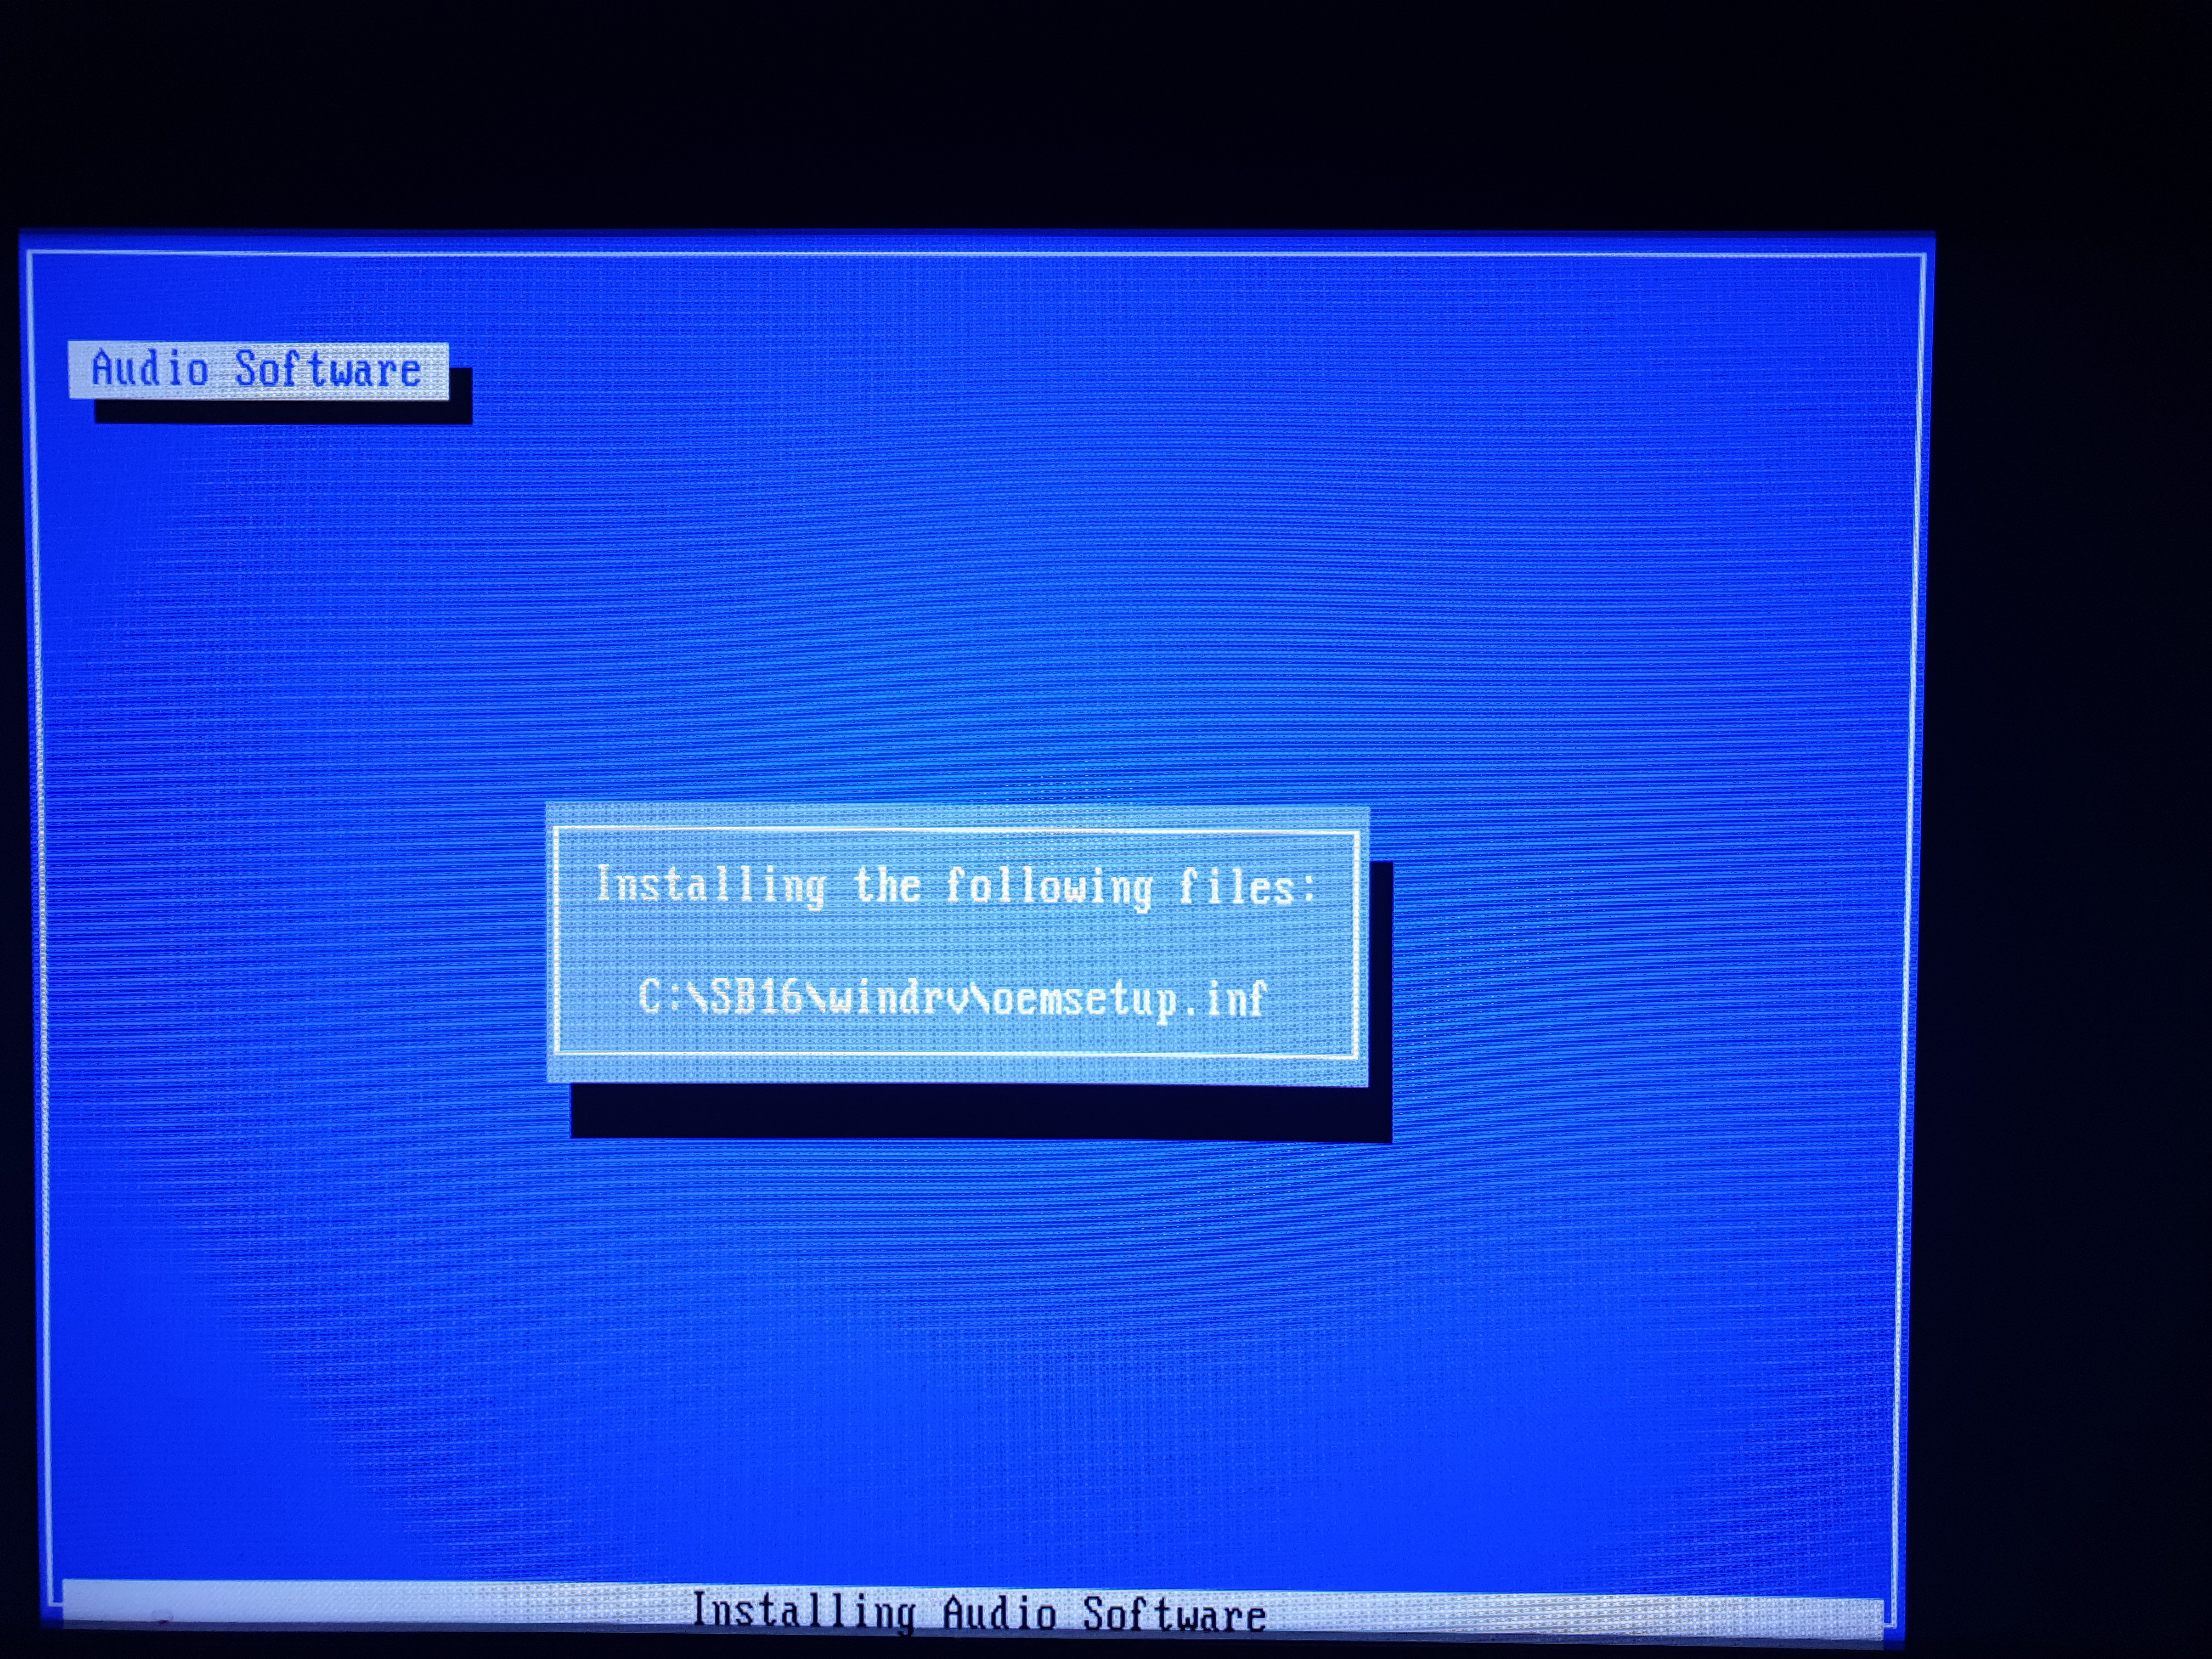
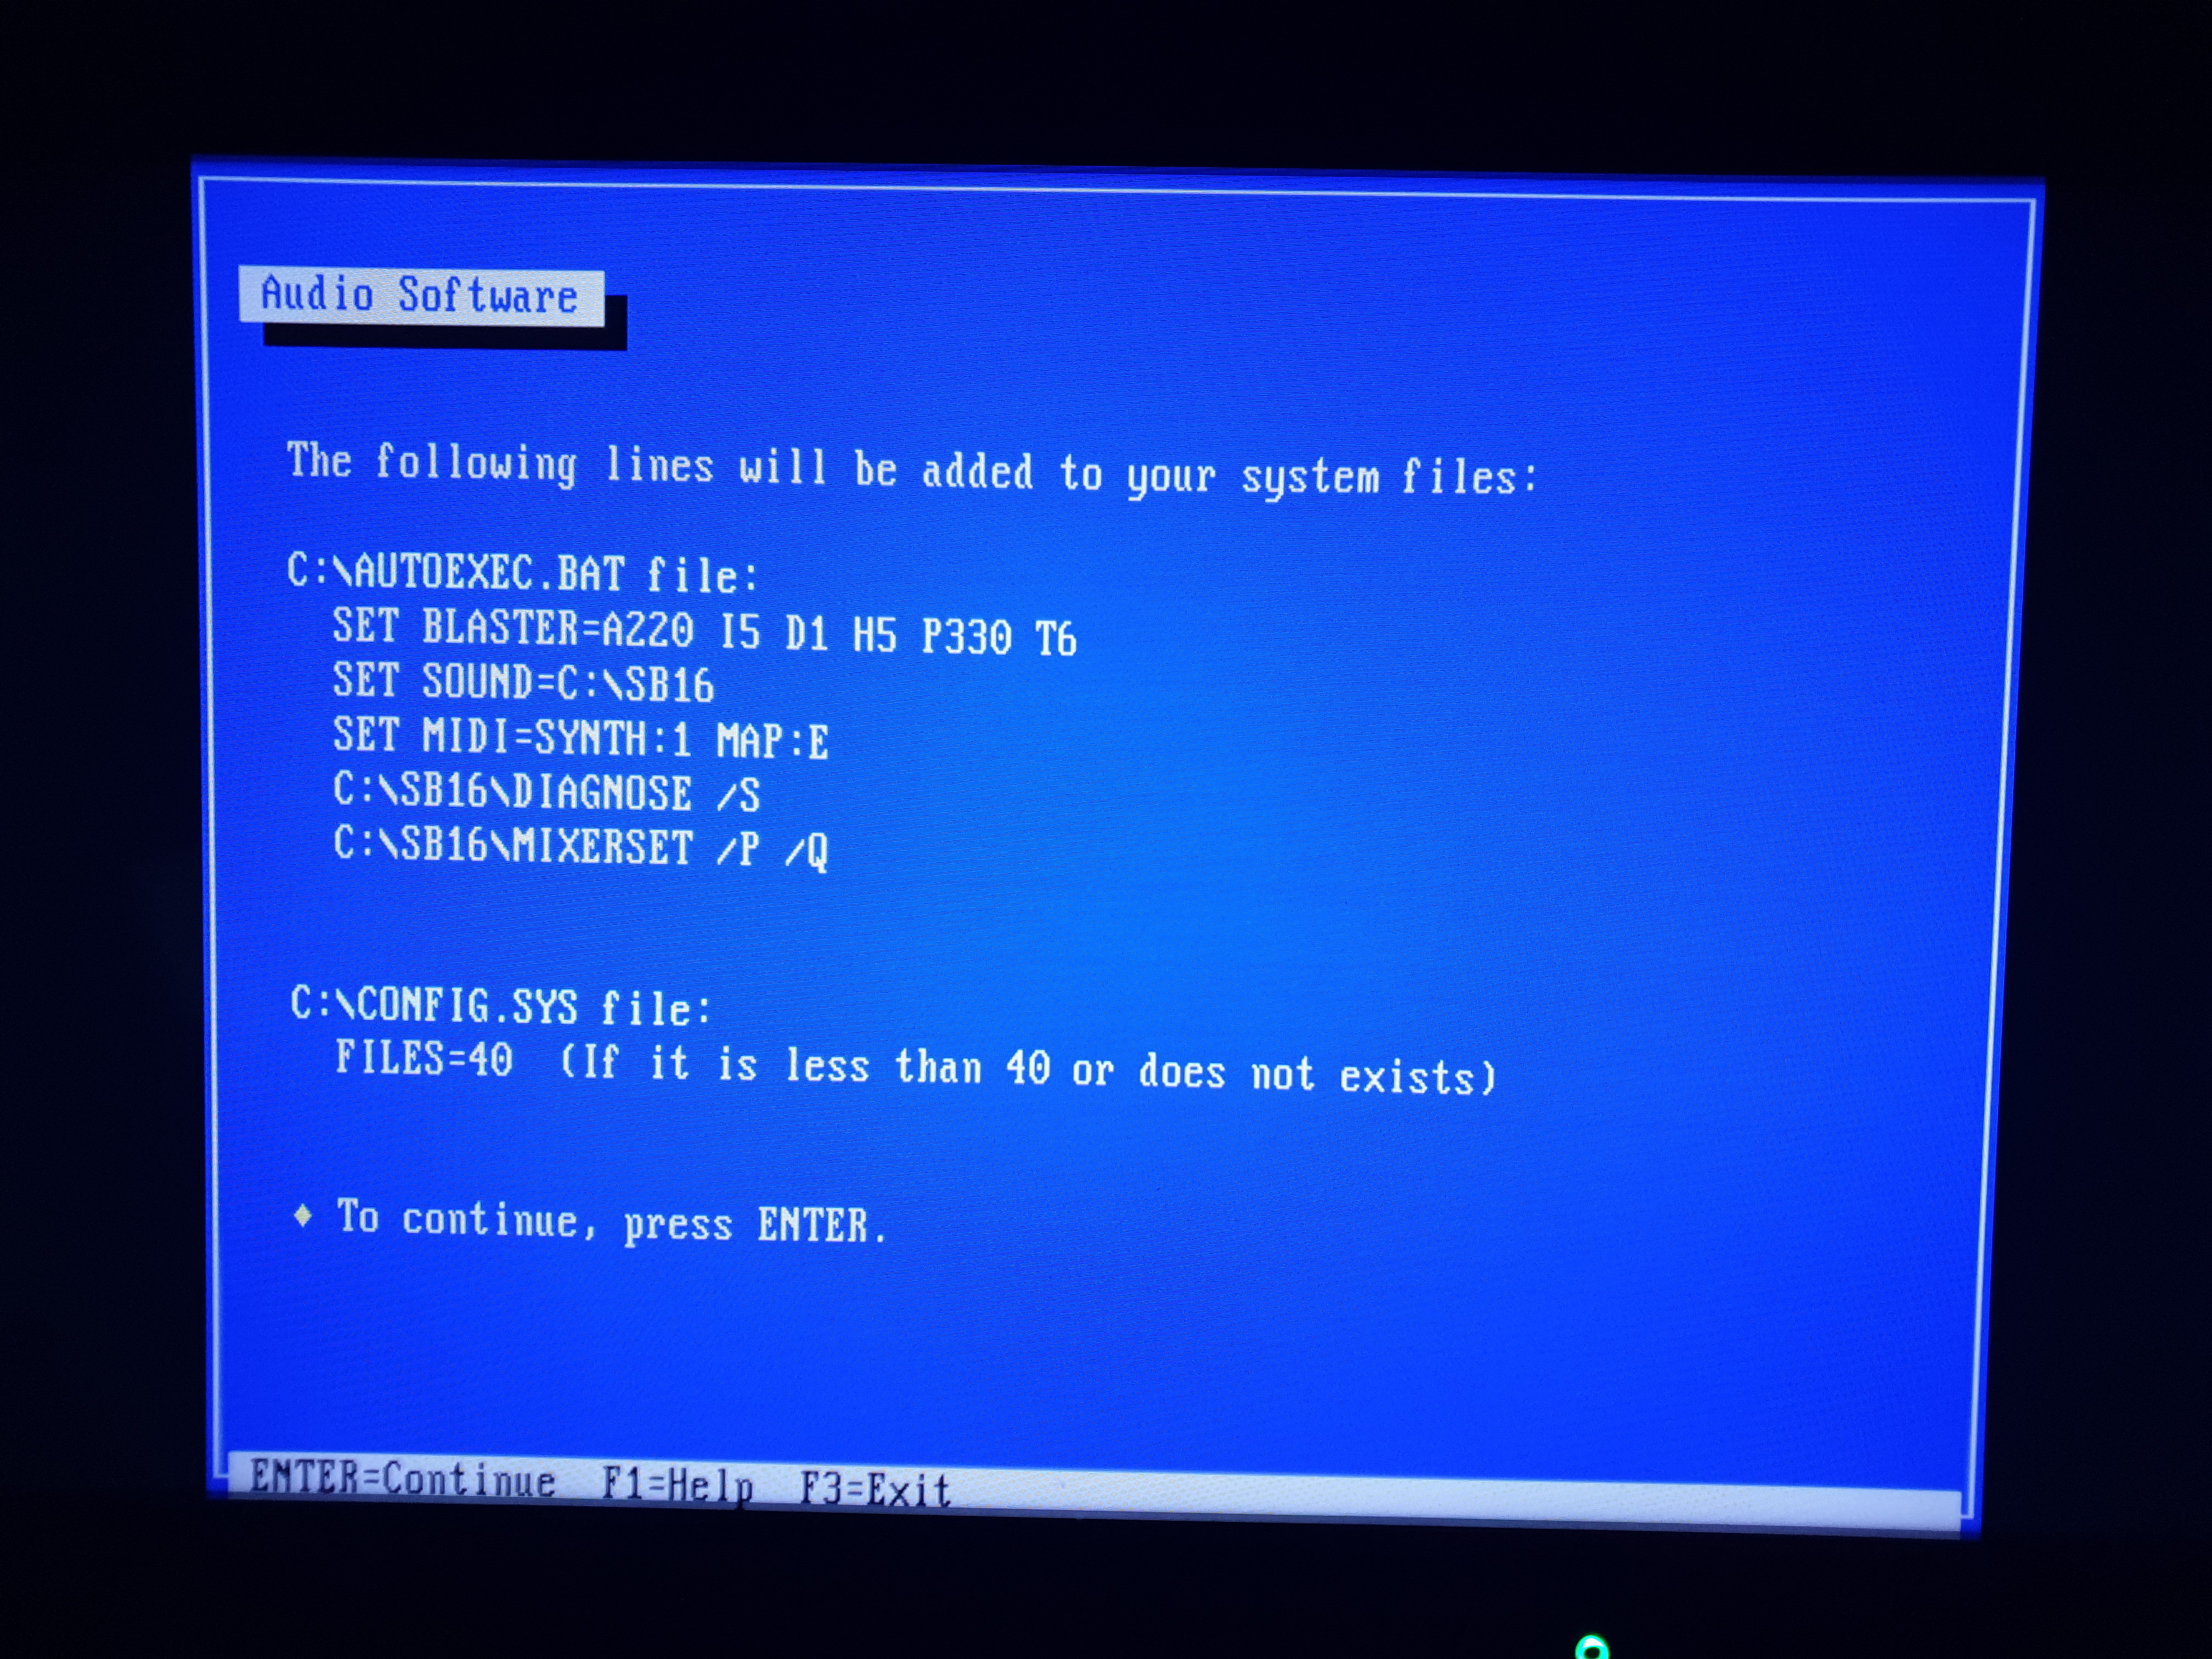
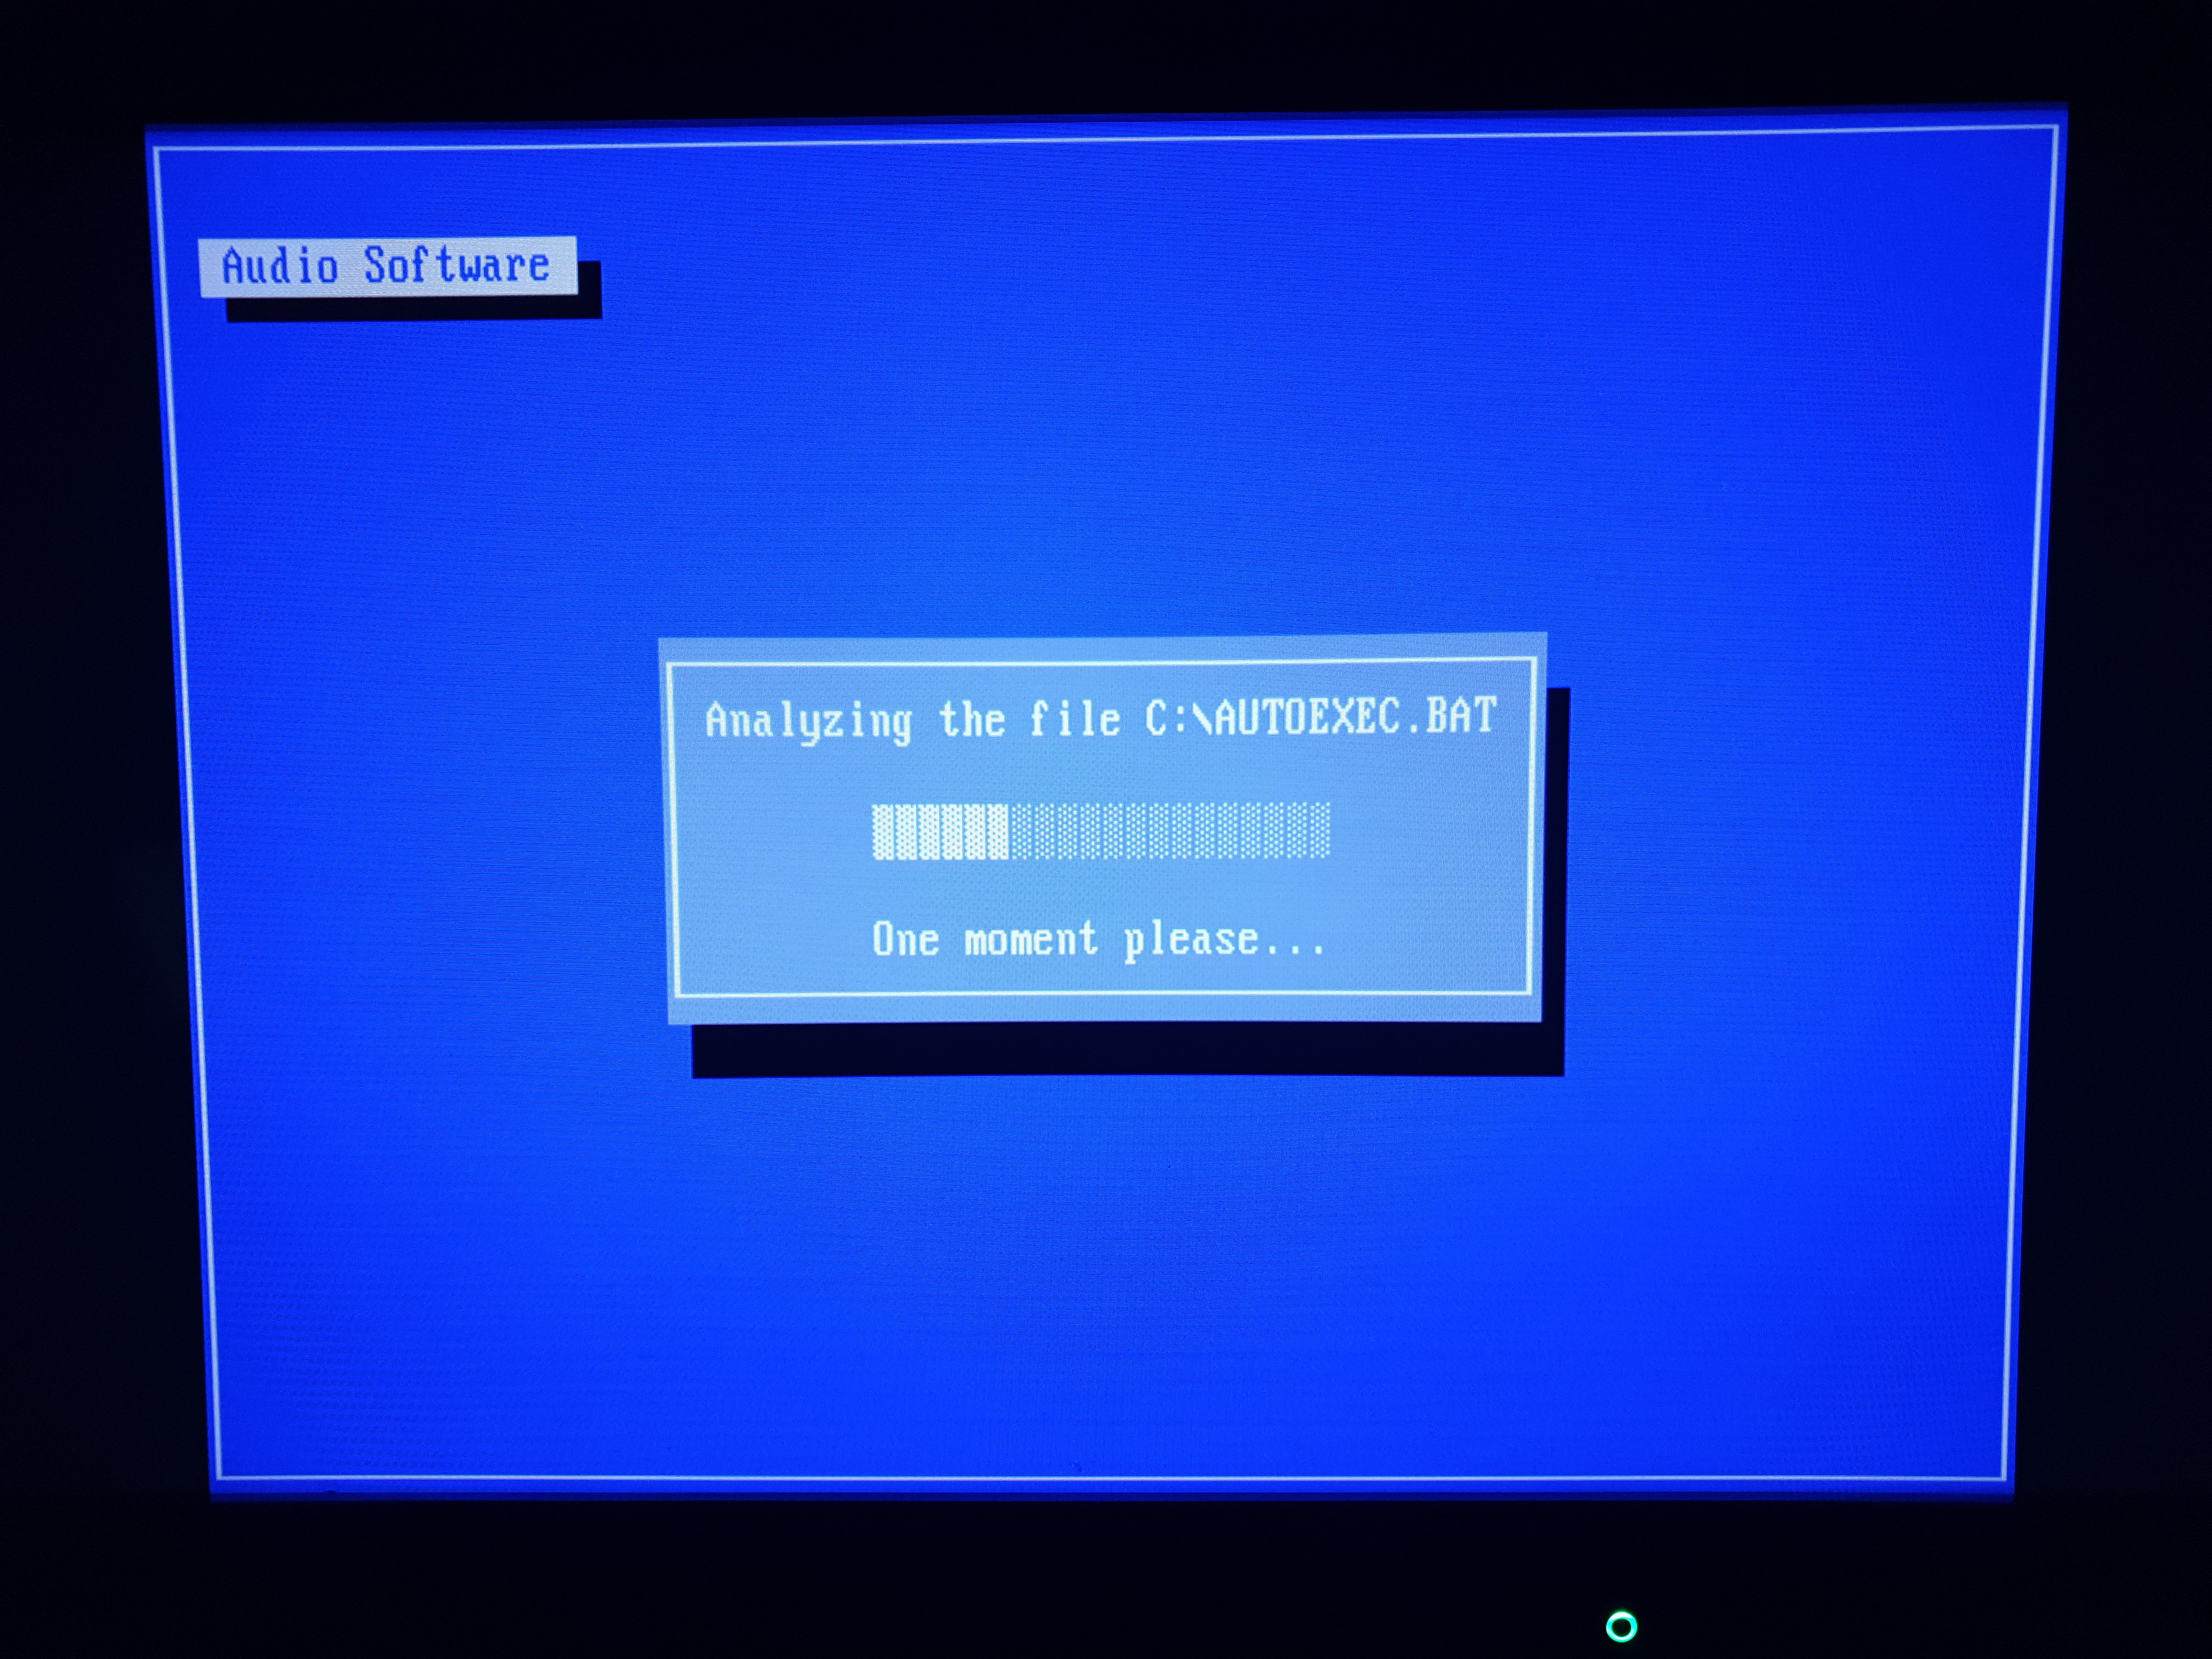
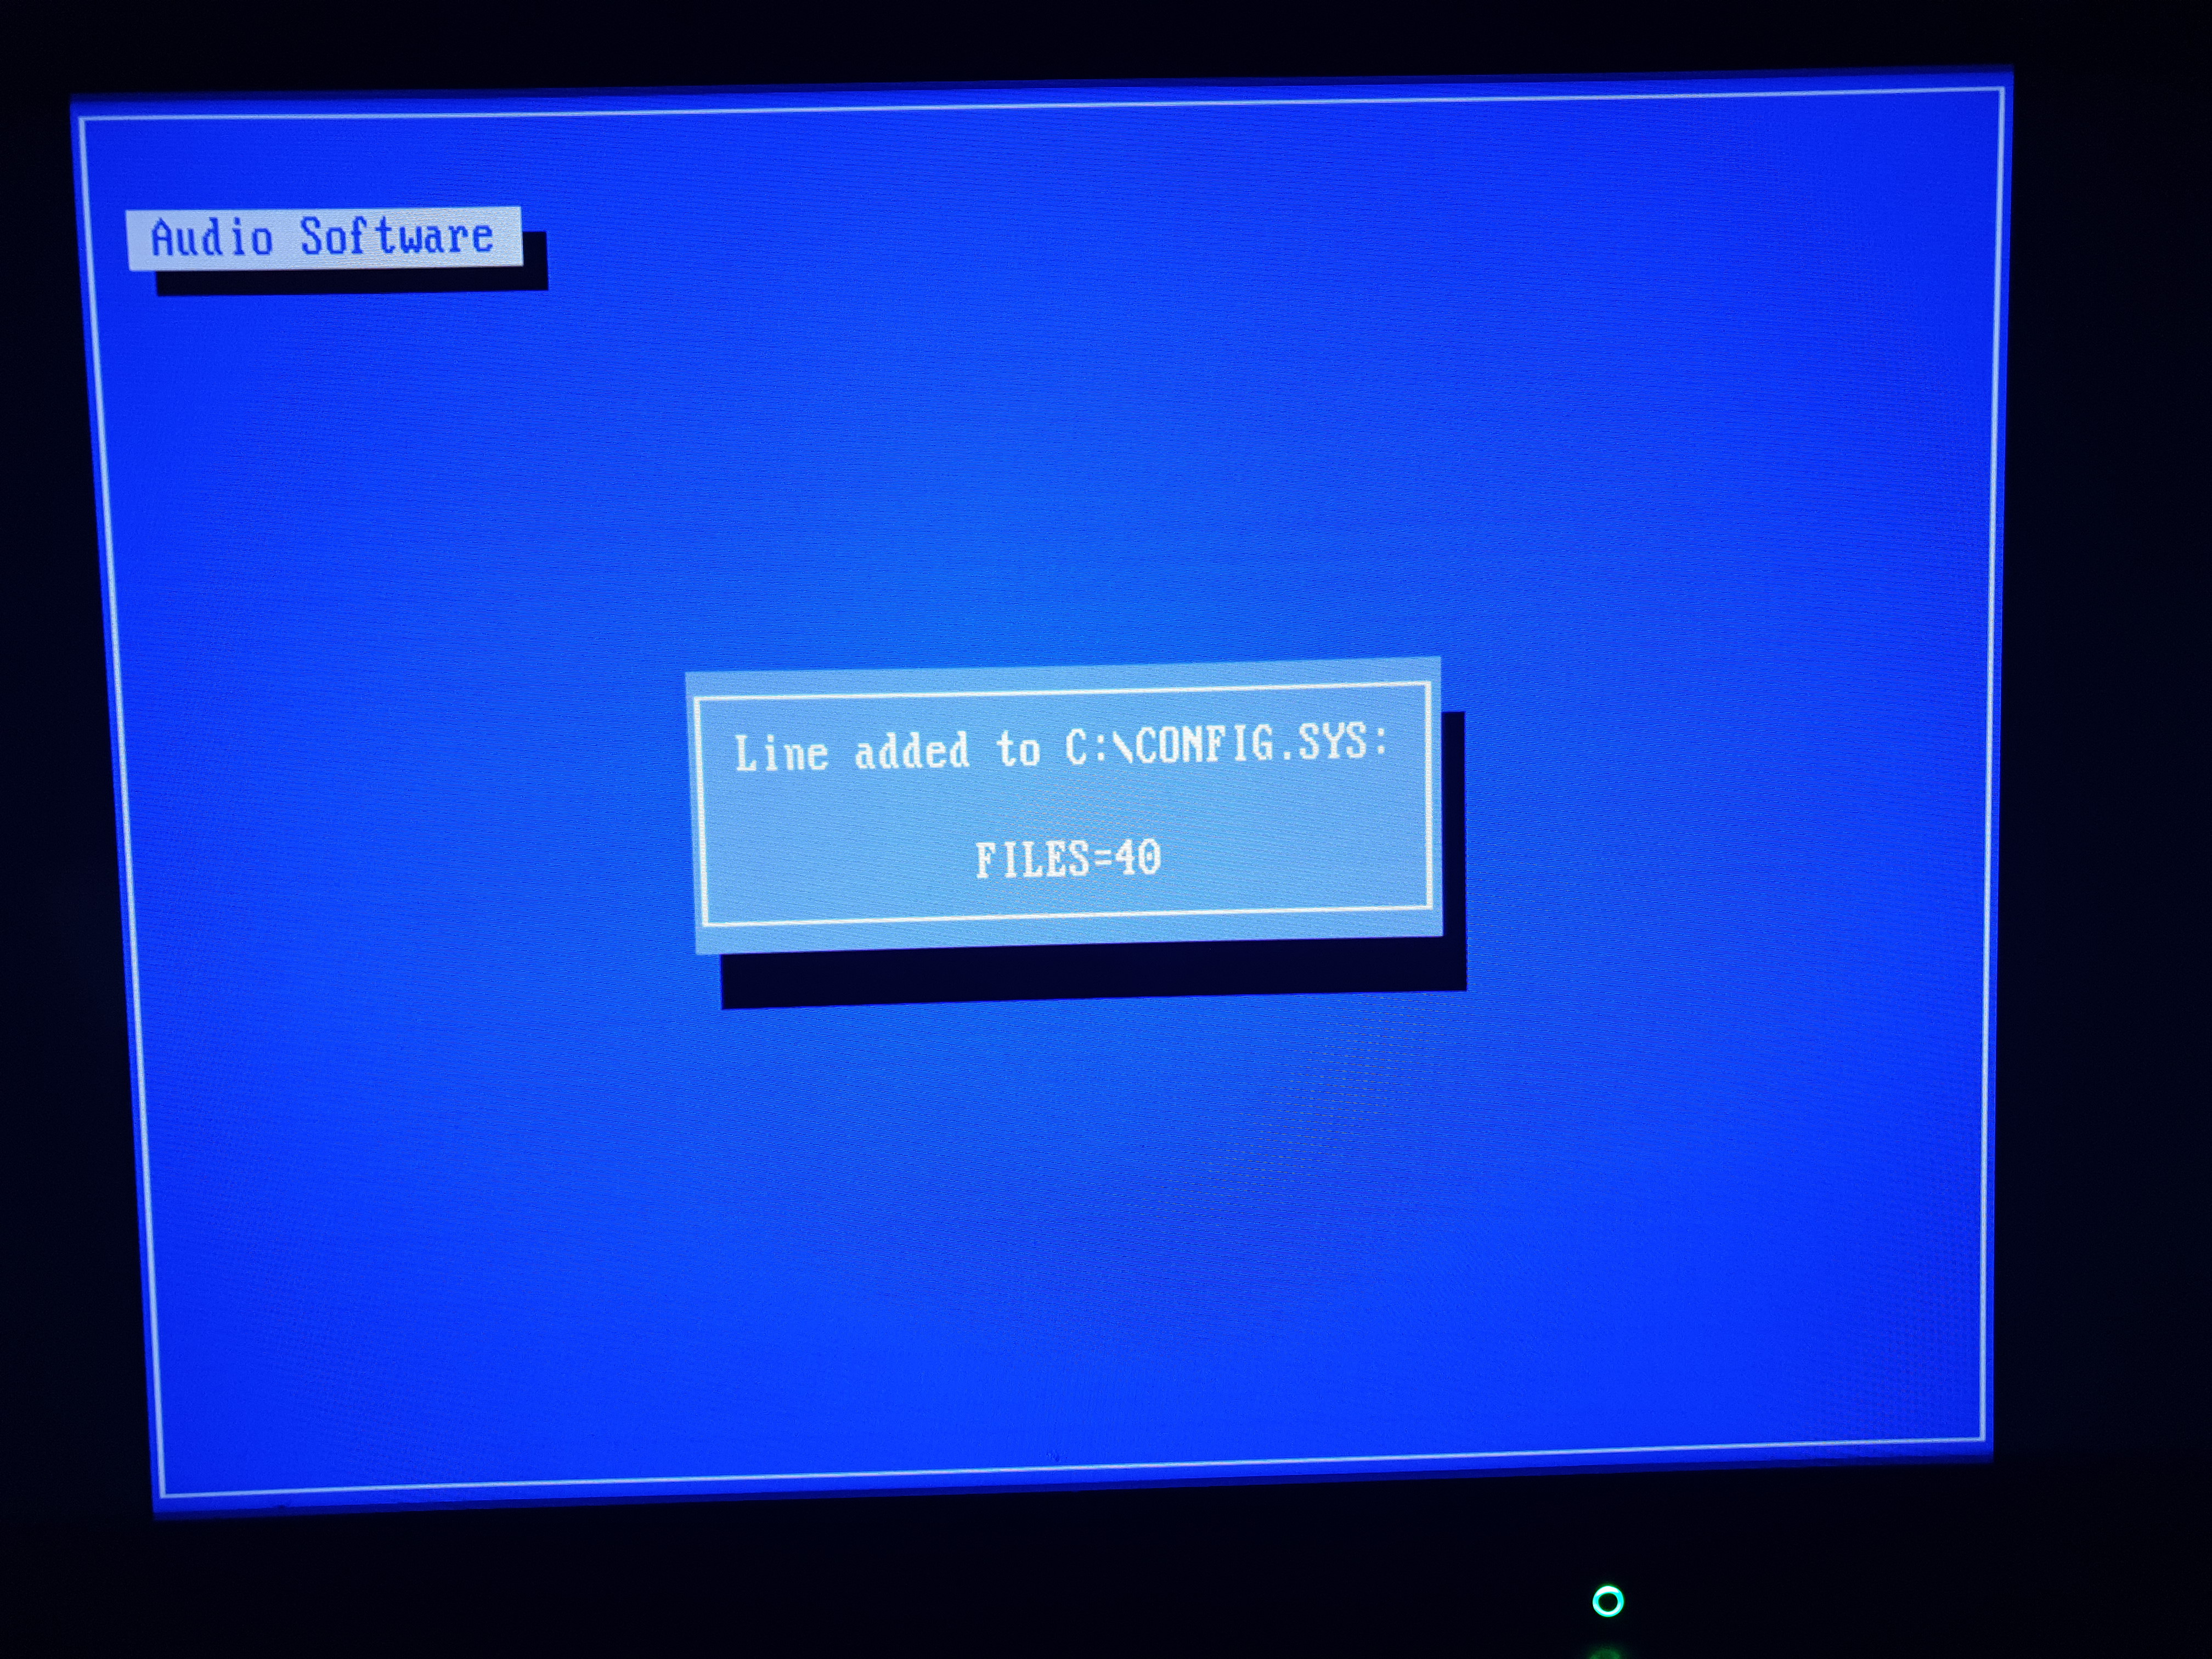
Steps 9-12: Continue installing files, show proposed changes to CONFIG.SYS and AUTOEXEC.BAT, and make changes to those files:-
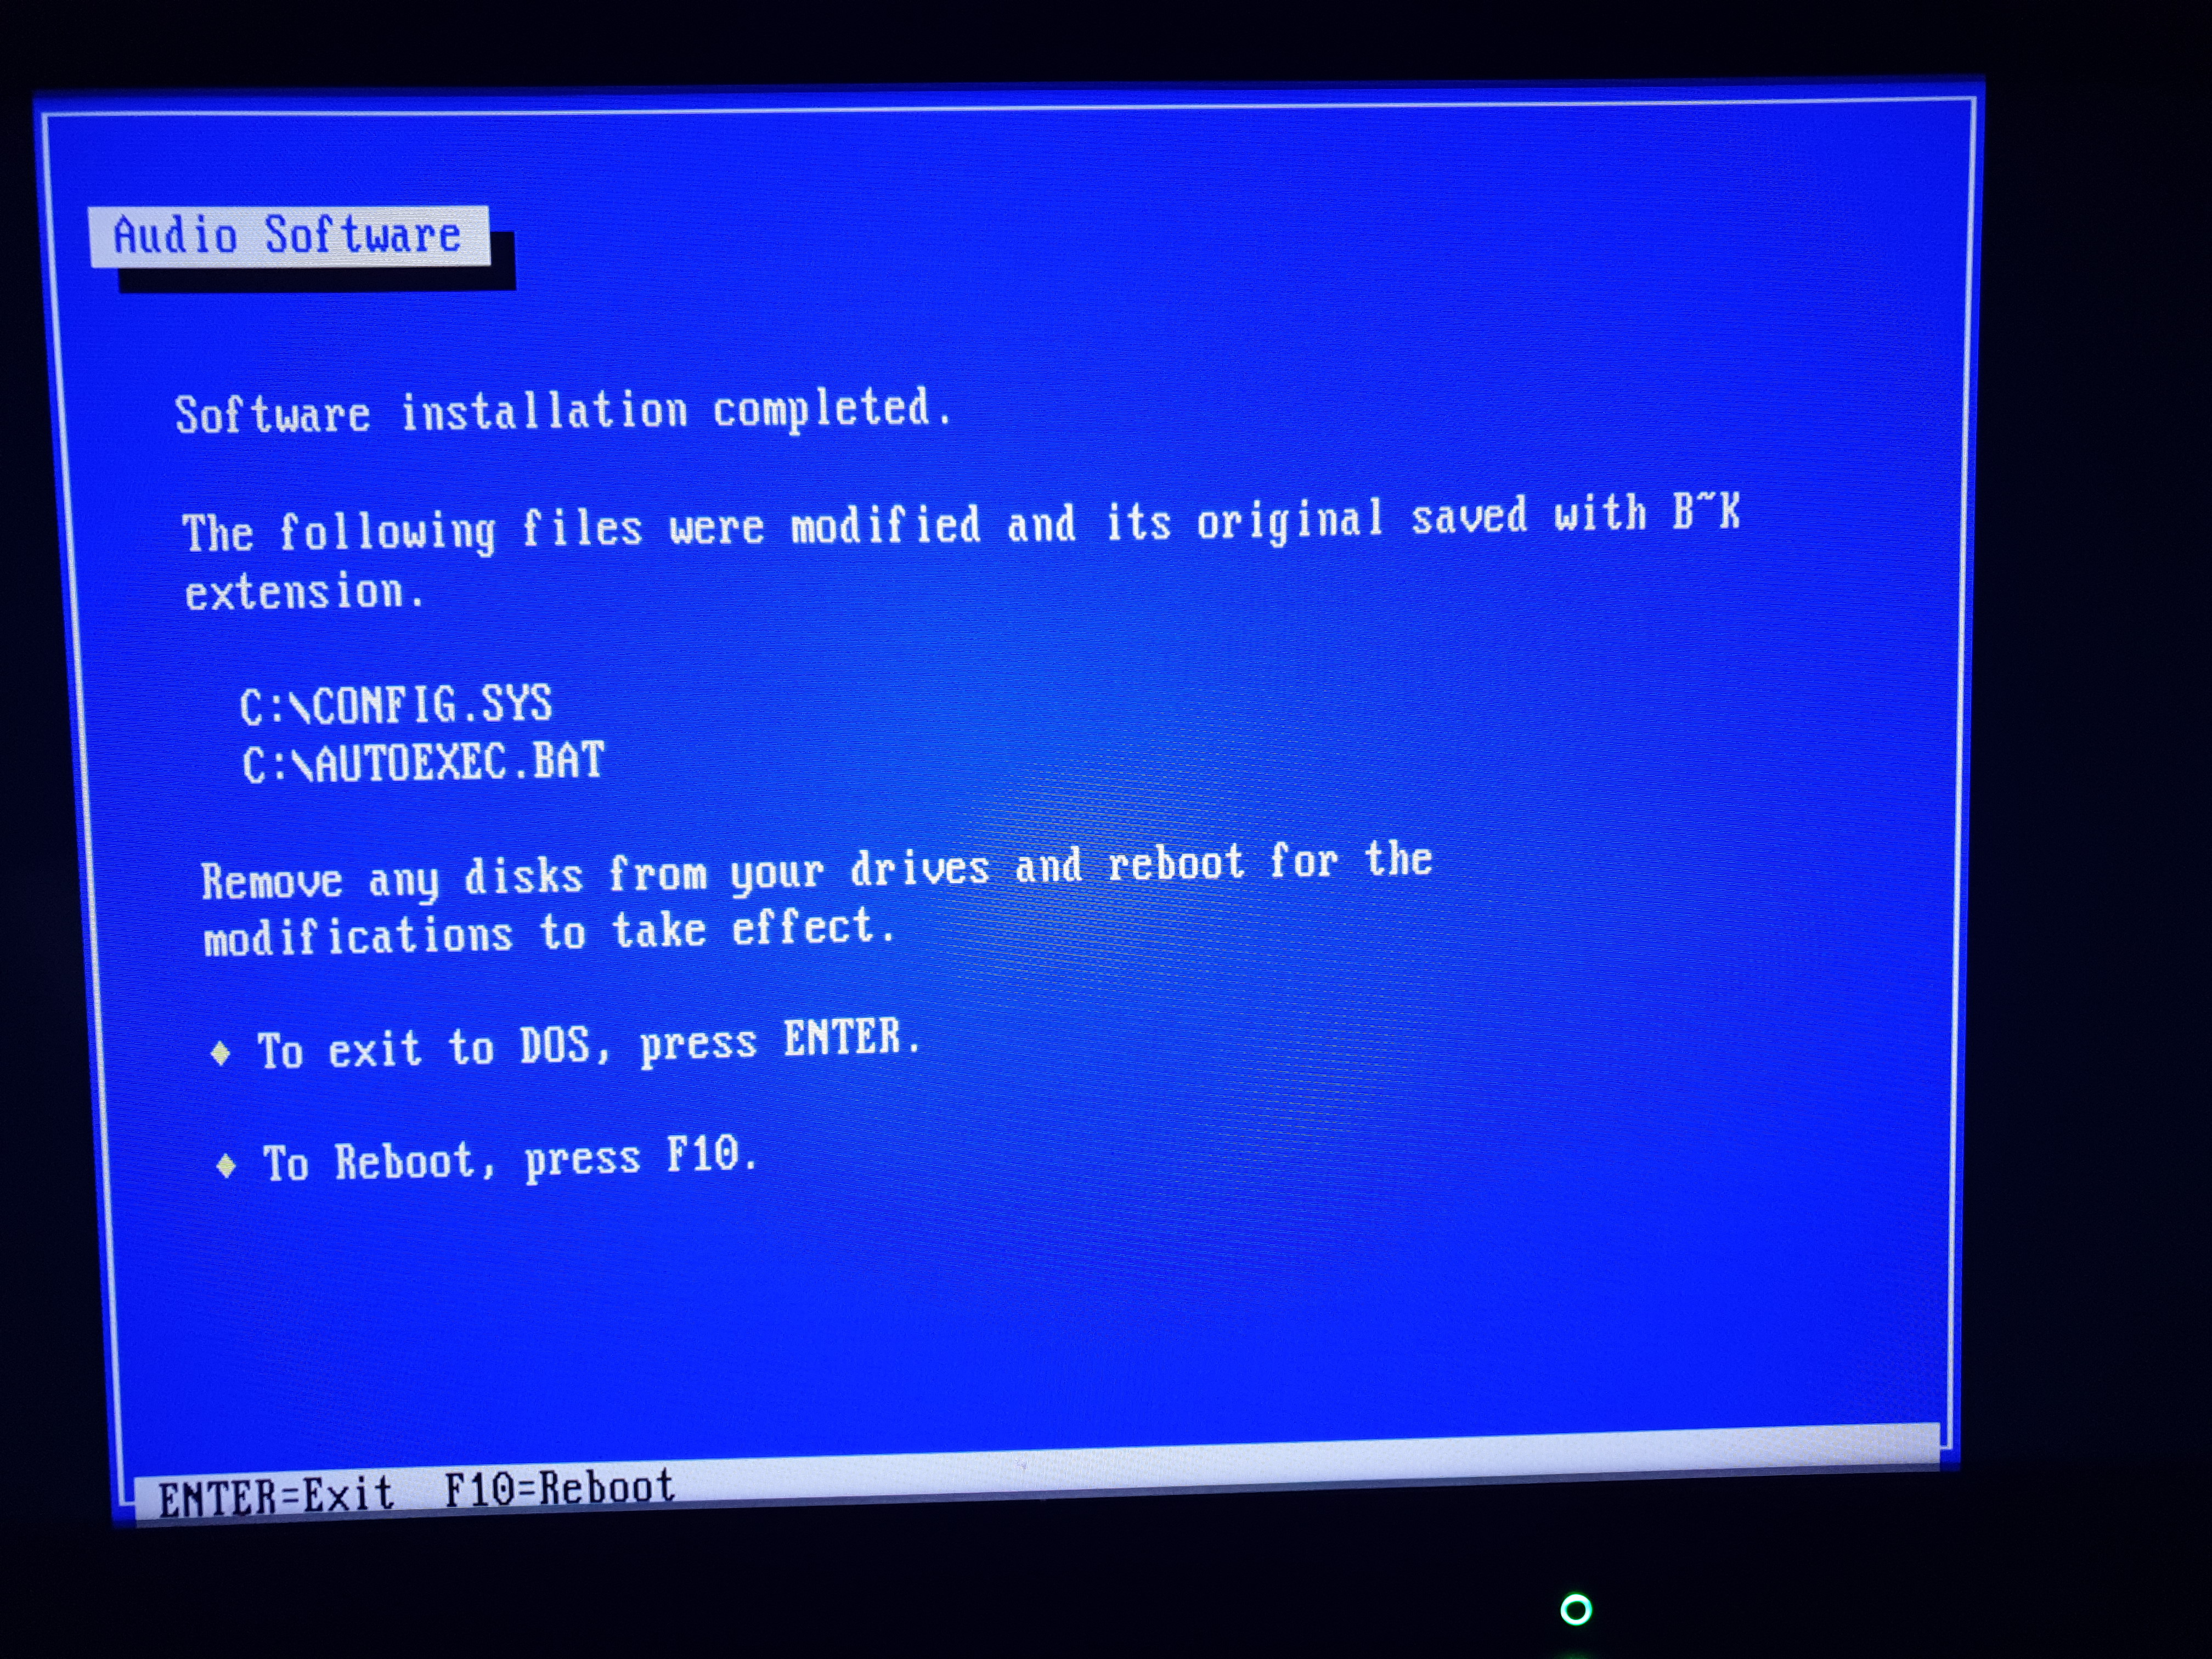
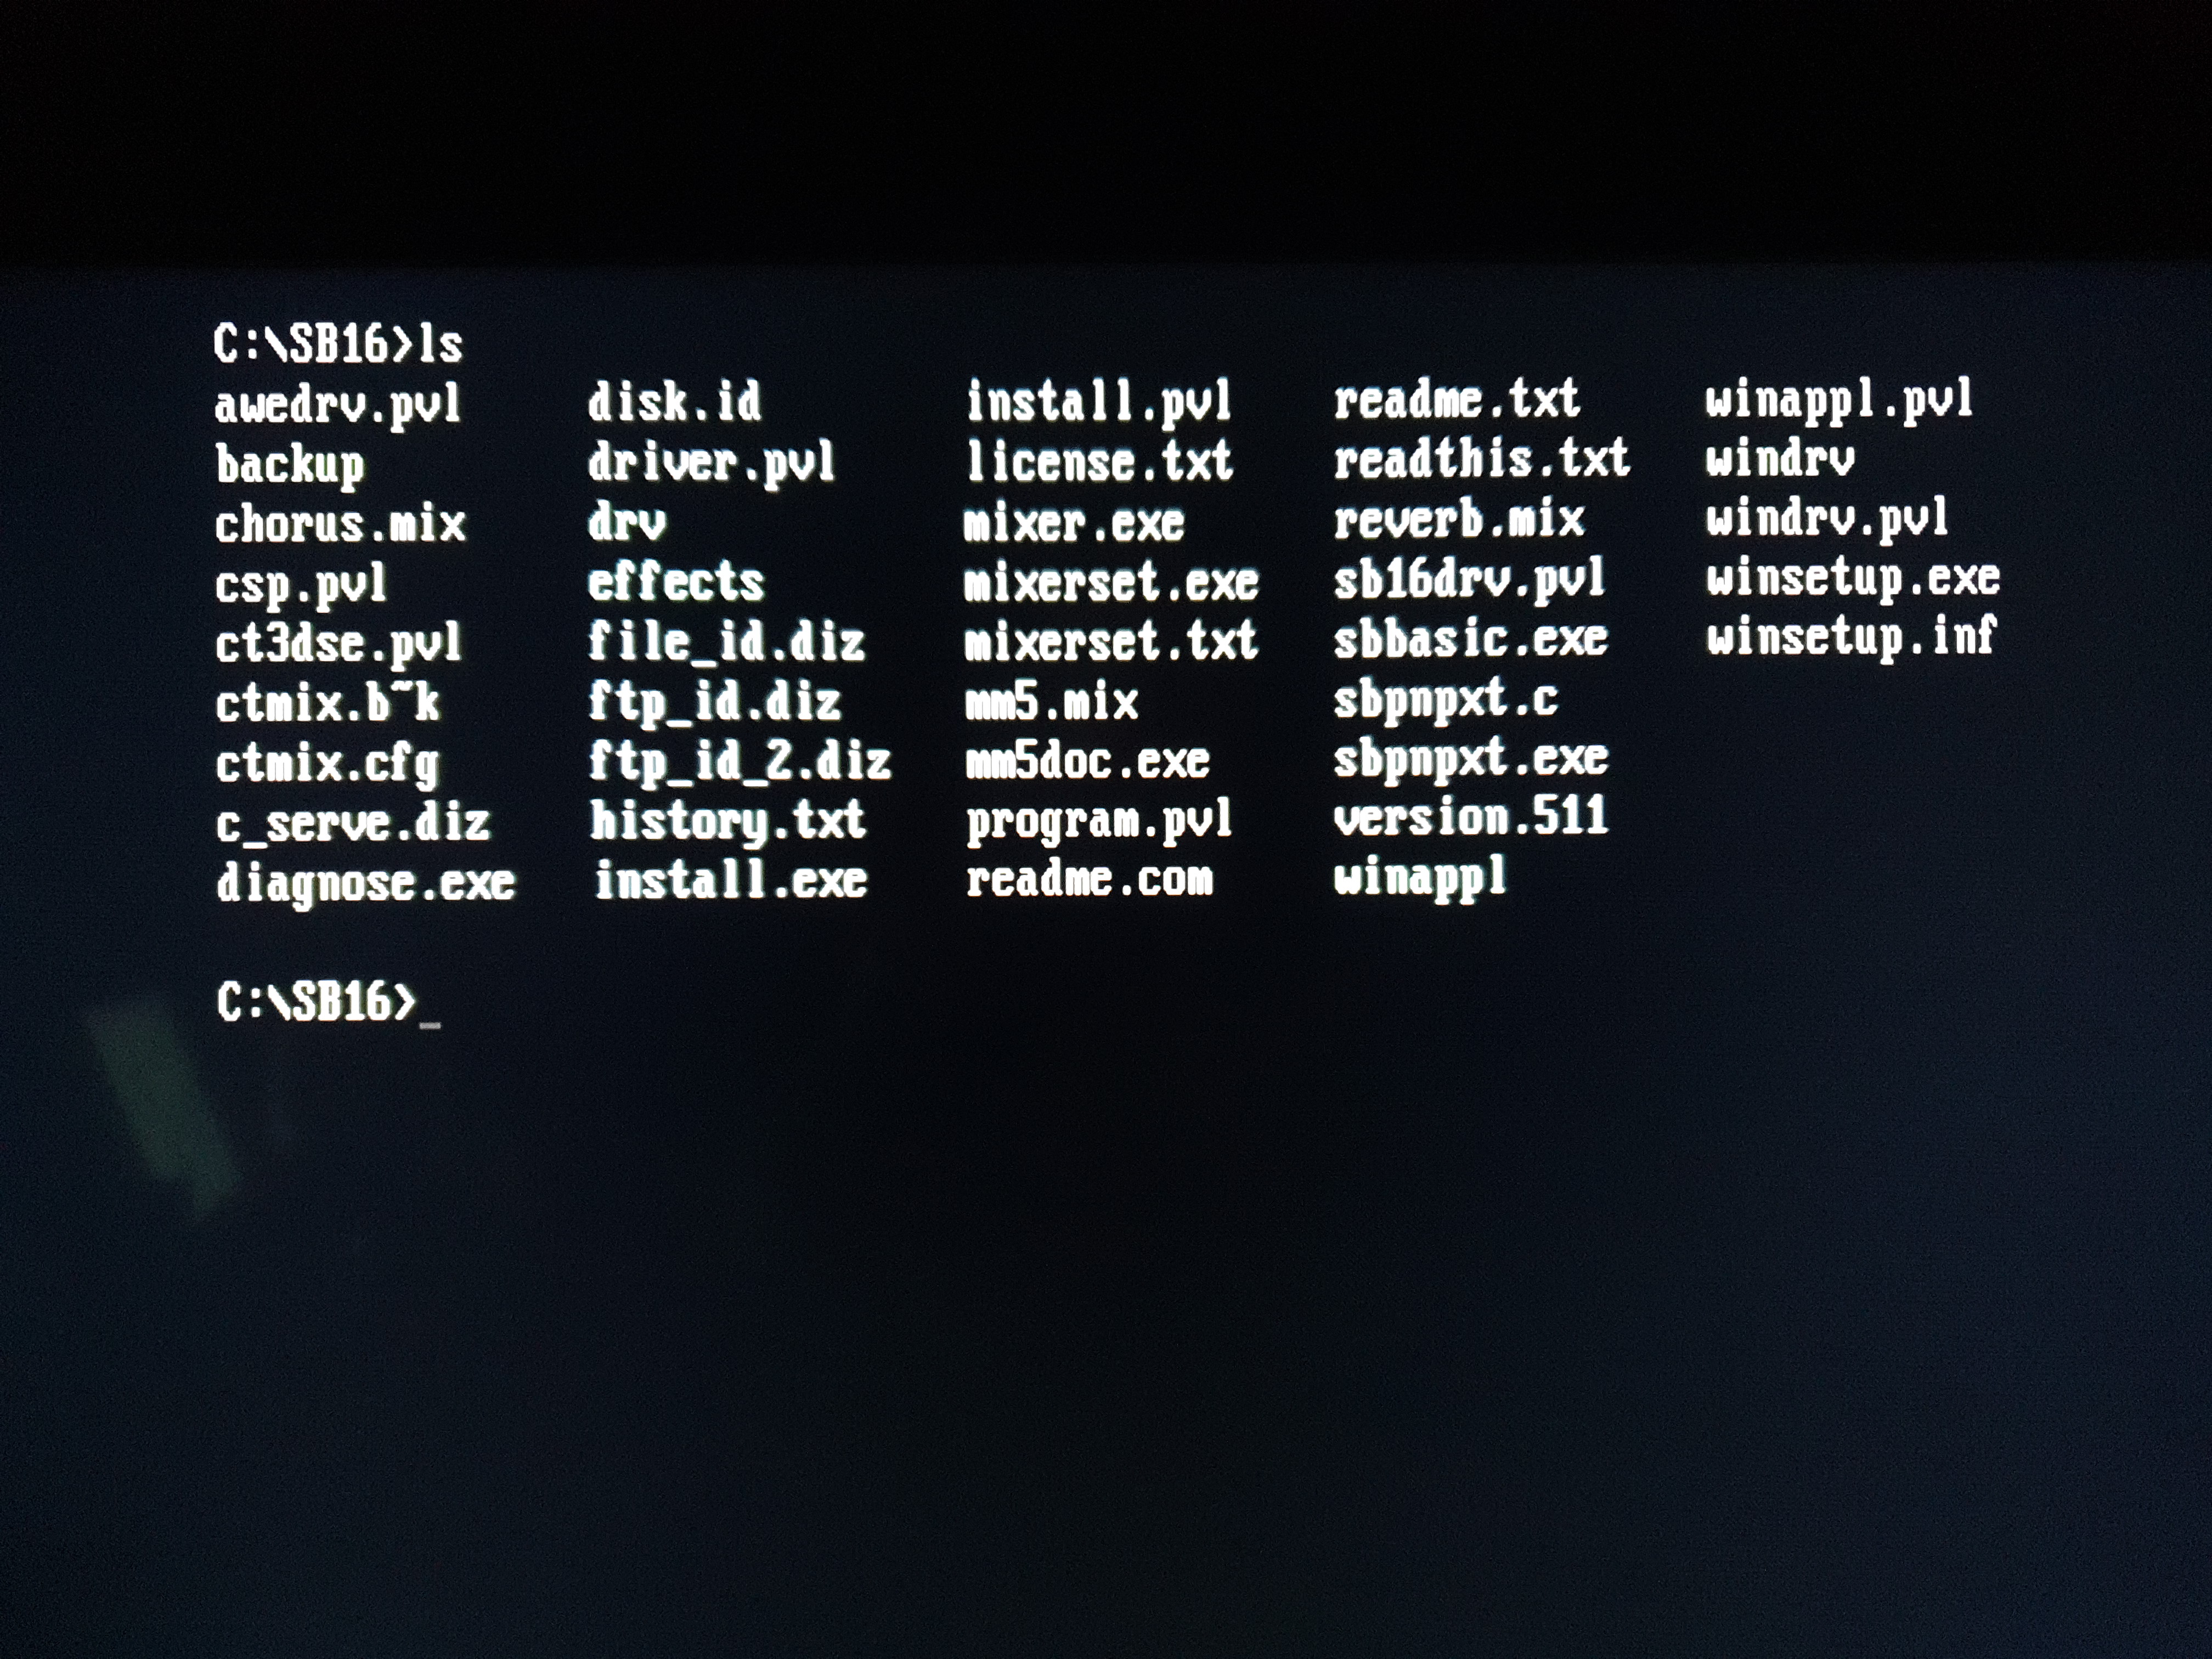
Steps 13 and 14: Complete file updates and show Installation Complete! The last screenshot shows the file contents in the destination directory, which by default is C:\SB16
Note that even though it attempts to detect if Microsoft Windows is installed when you start INSTALL utility, if it doesn't find one it will still install the Windows 3.1 drivers.
Memory Usage
Unlike later Creative cards (AWE32, I'm looking at you), this one is excellent in that it doesn't require any device drivers to remain resident and thus take up valuable conventional memory.
The only two programs it adds to AUTOEXEC.BAT are:
DIAGNOSE /SMIXERSET /P /Q
The first of these lines reads the SET BLASTER= environment variable and configures the card according to the card's jumper settings and those environment variable settings, then unloads. The second line sets the volume, balance, mute, etc for each channel on the card, then unloads.
Checking Everything is OK
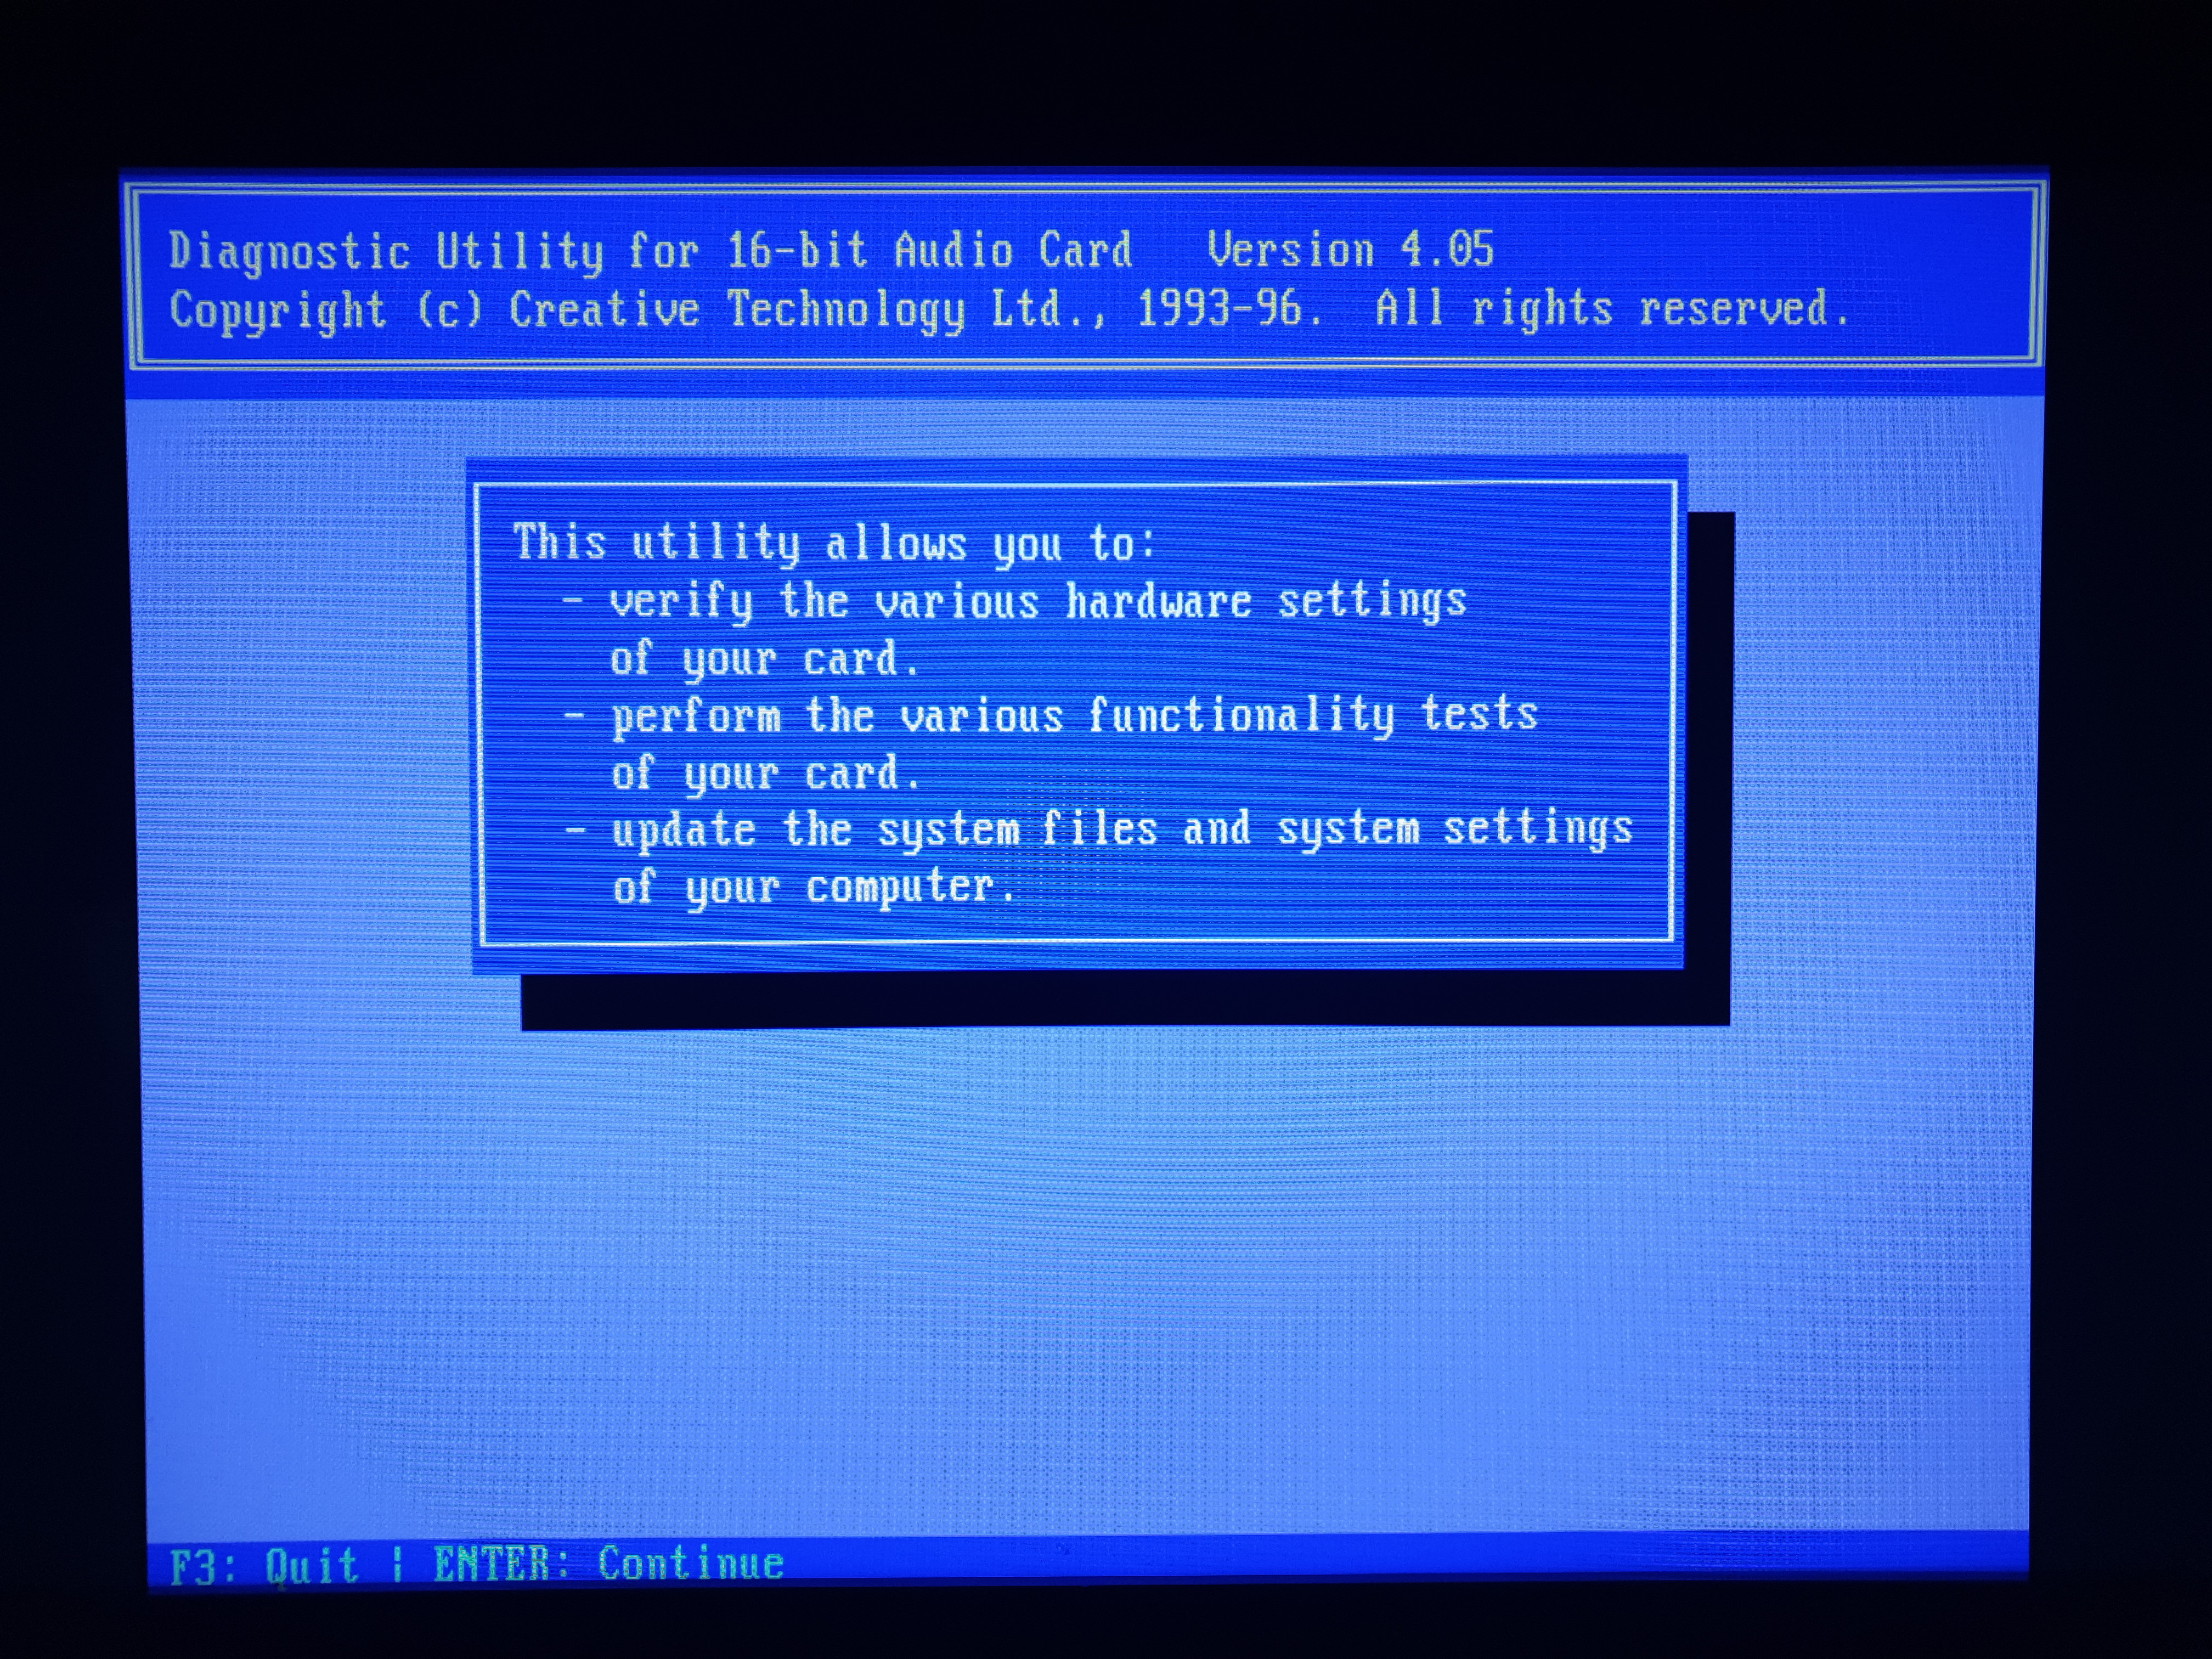
As mentioned earlier, DIAGNOSE.EXE is the tool provided by Creative Labs to check your configuration settings are ok and that playing some sound will output music and digital audio (sound effects). If you run this without any command-line arguments, it will do the following:
- Read the environment variables like BLASTER, MIDI, and so on
- Attempt to detect your sound card using these settings
- Test the playback of 8-bit and 16-bit digital audio, plus FM synthesis.
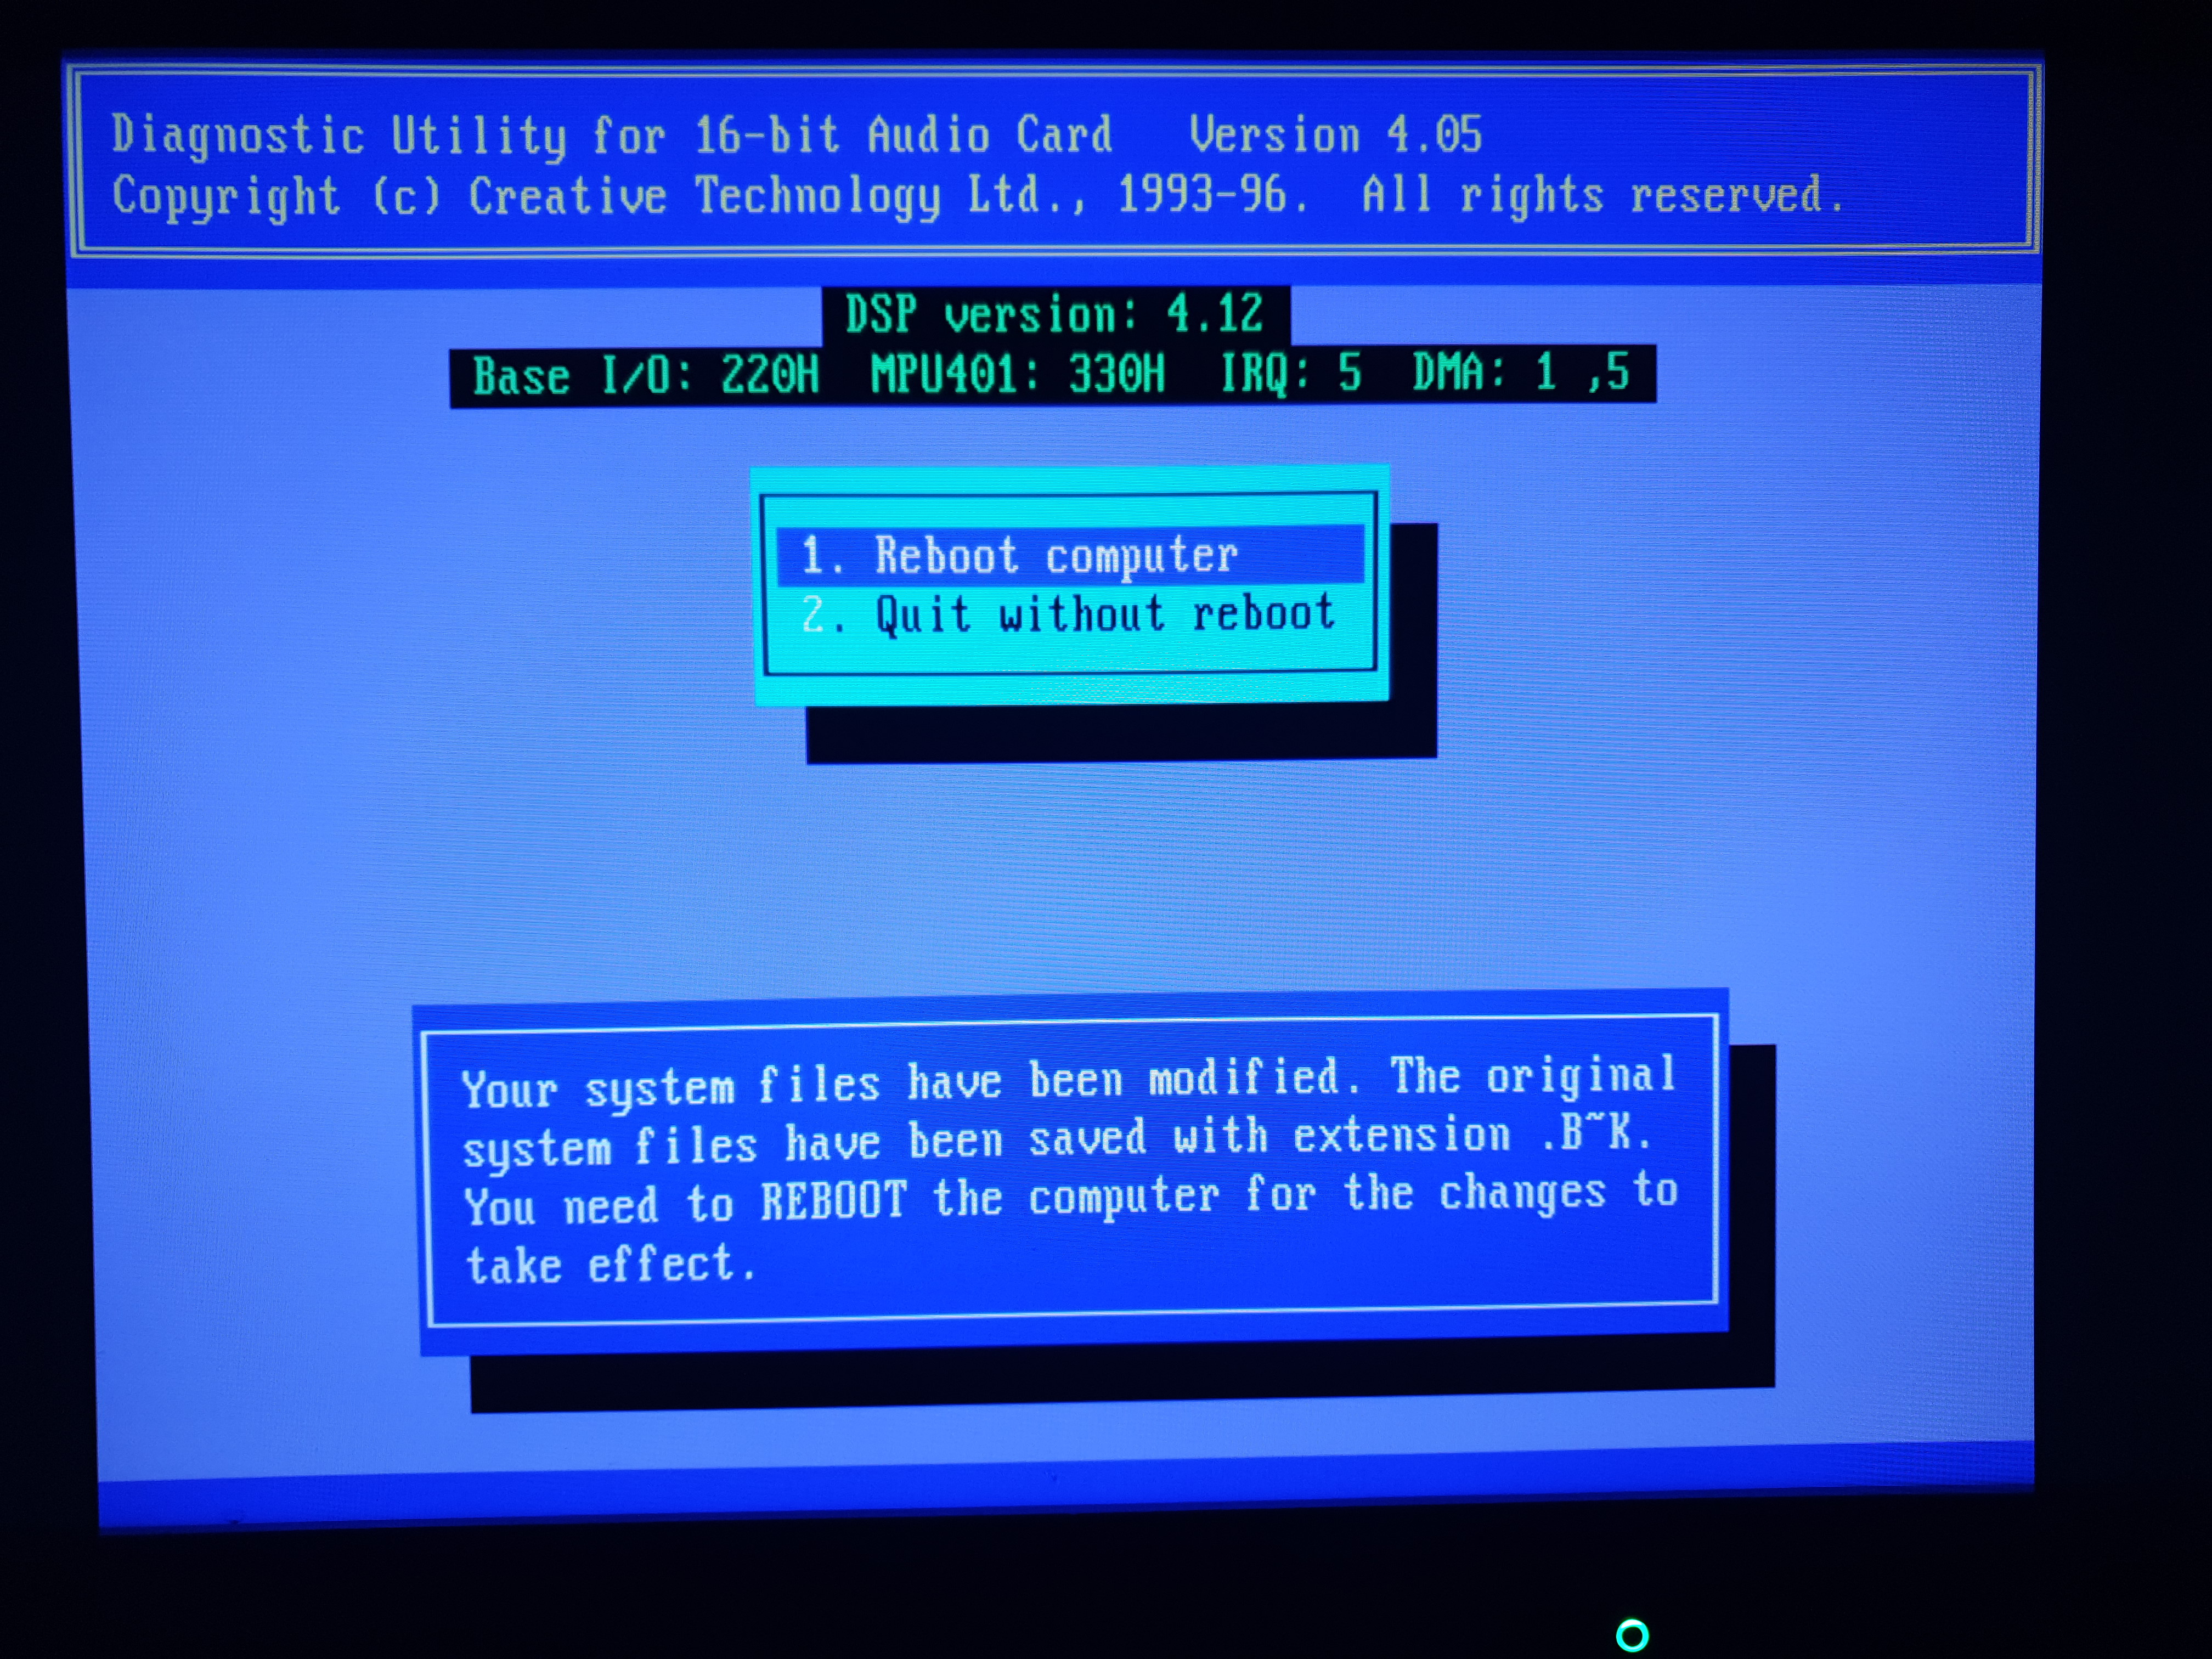
- Update your AUTOEXEC.BAT file to reflect the latest settings you have chosen.
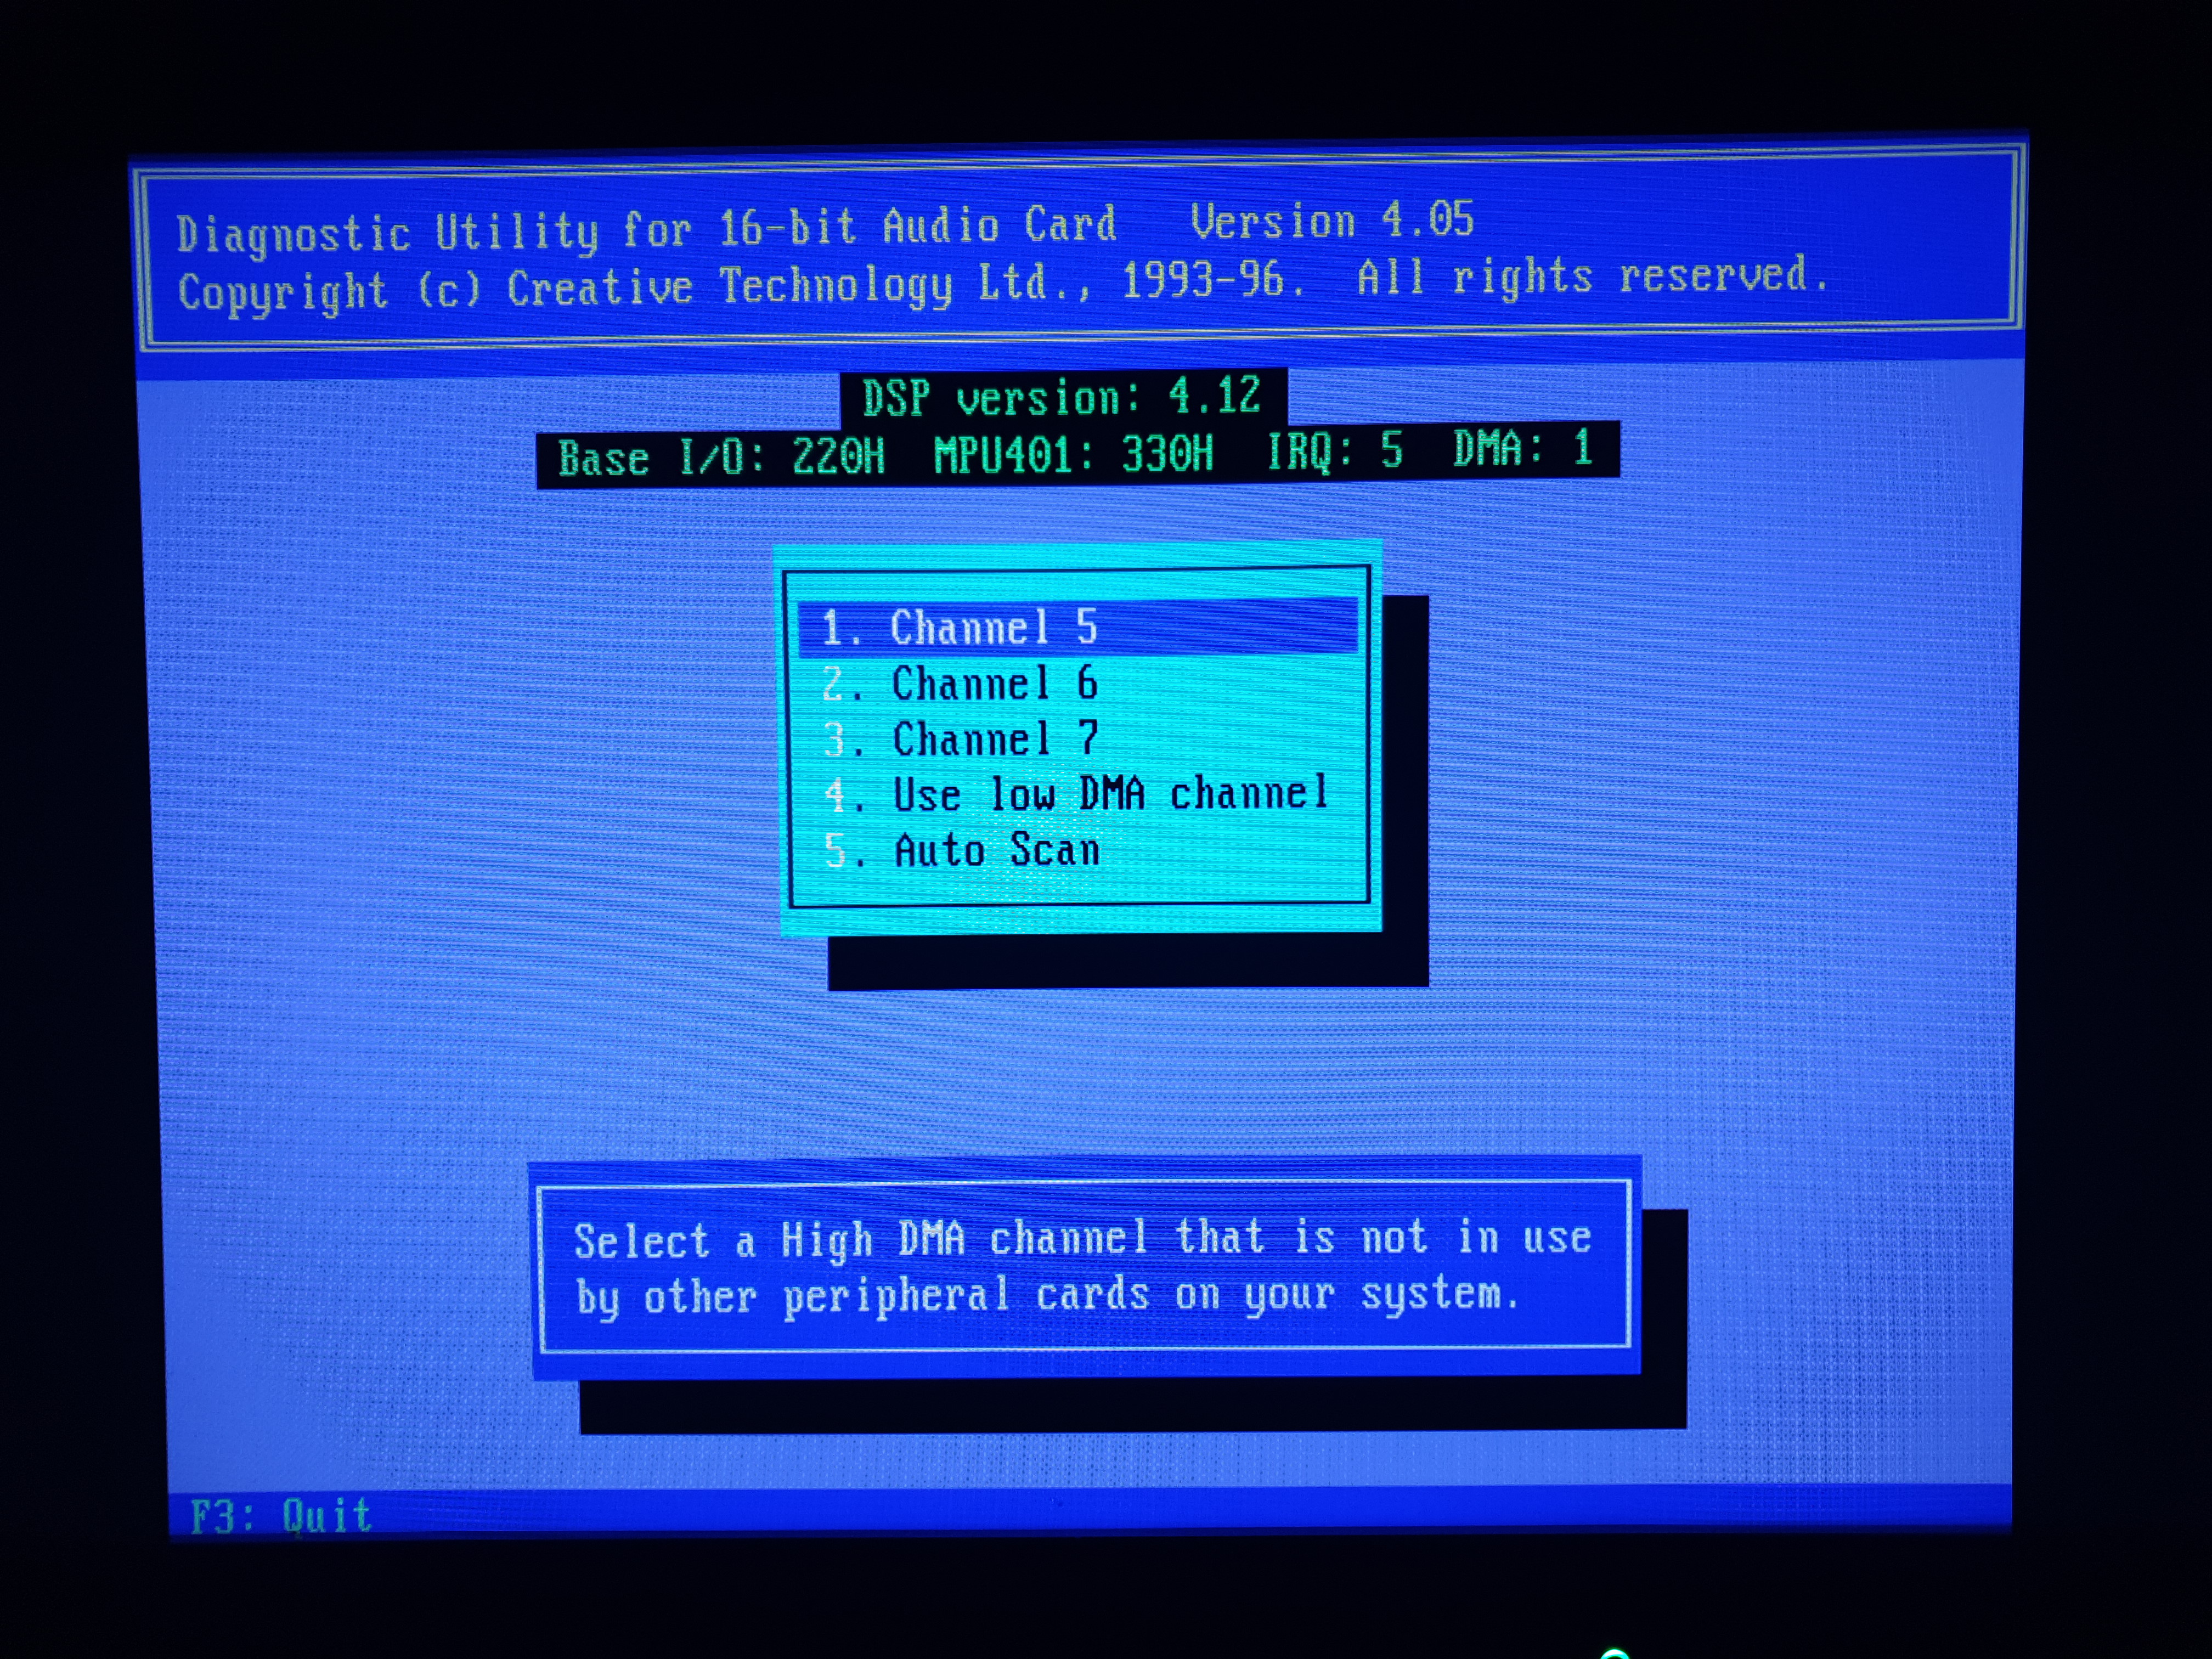
Here are some screenshots of DIAGNOSE:

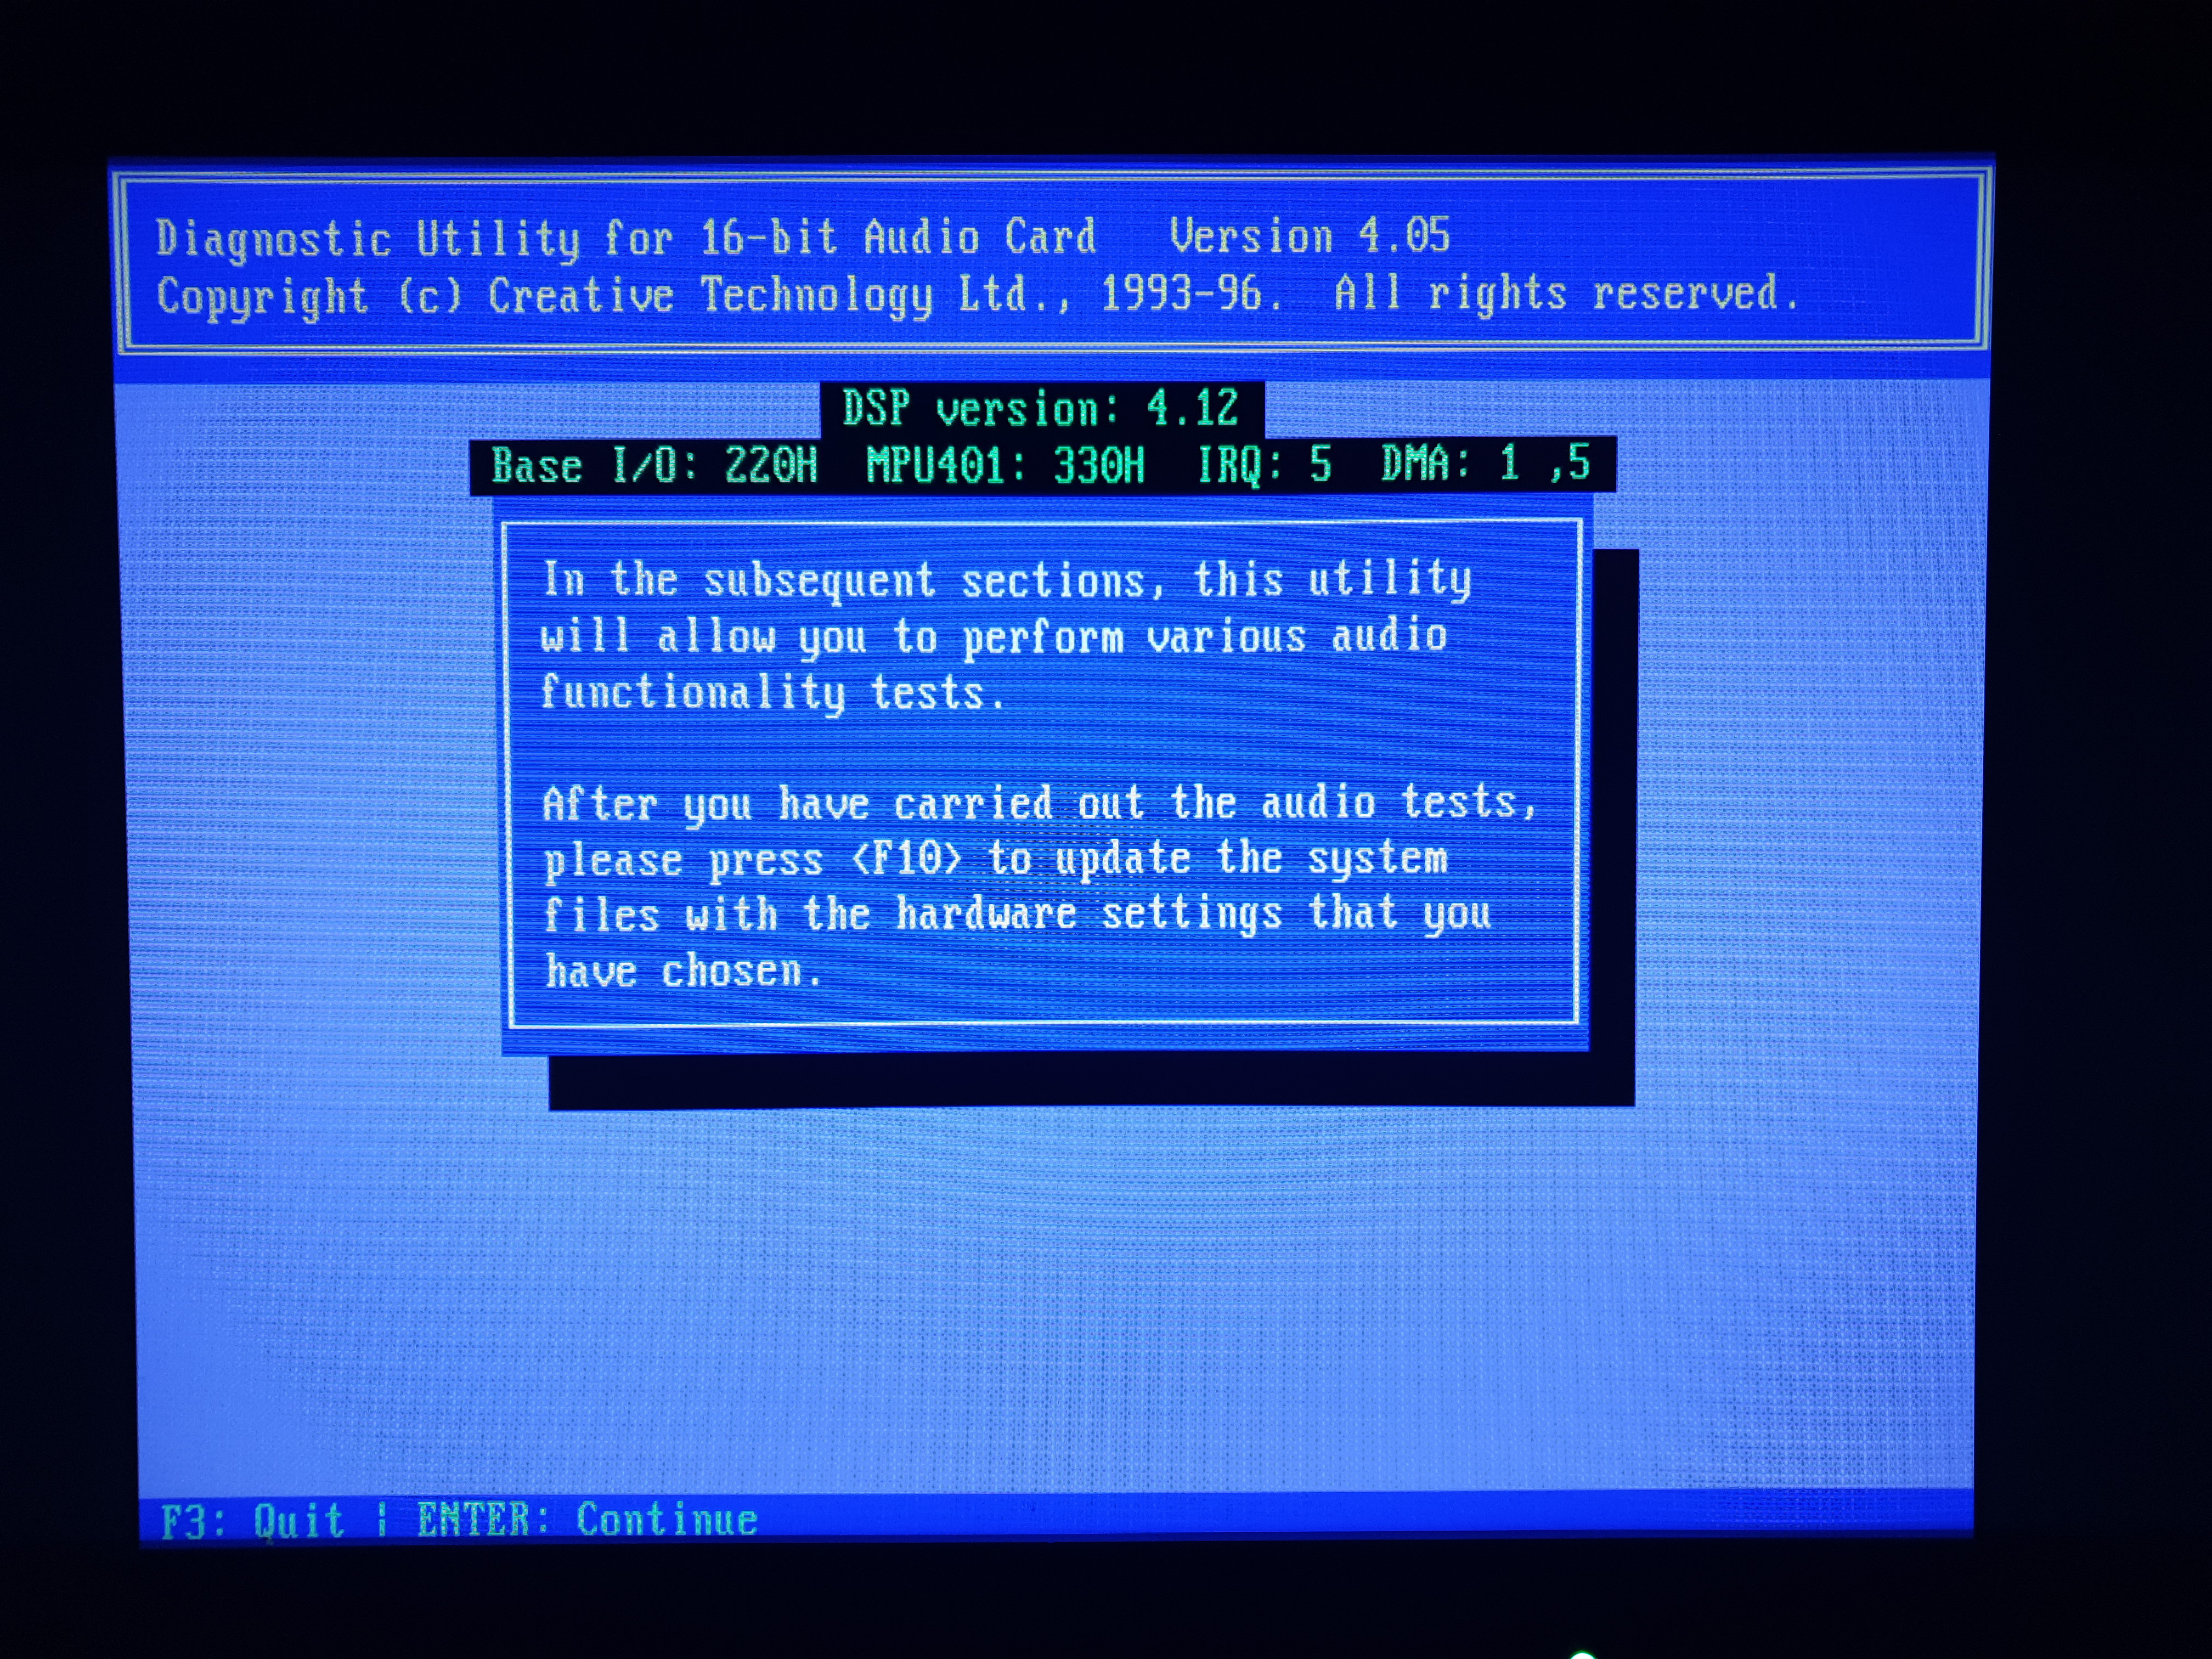

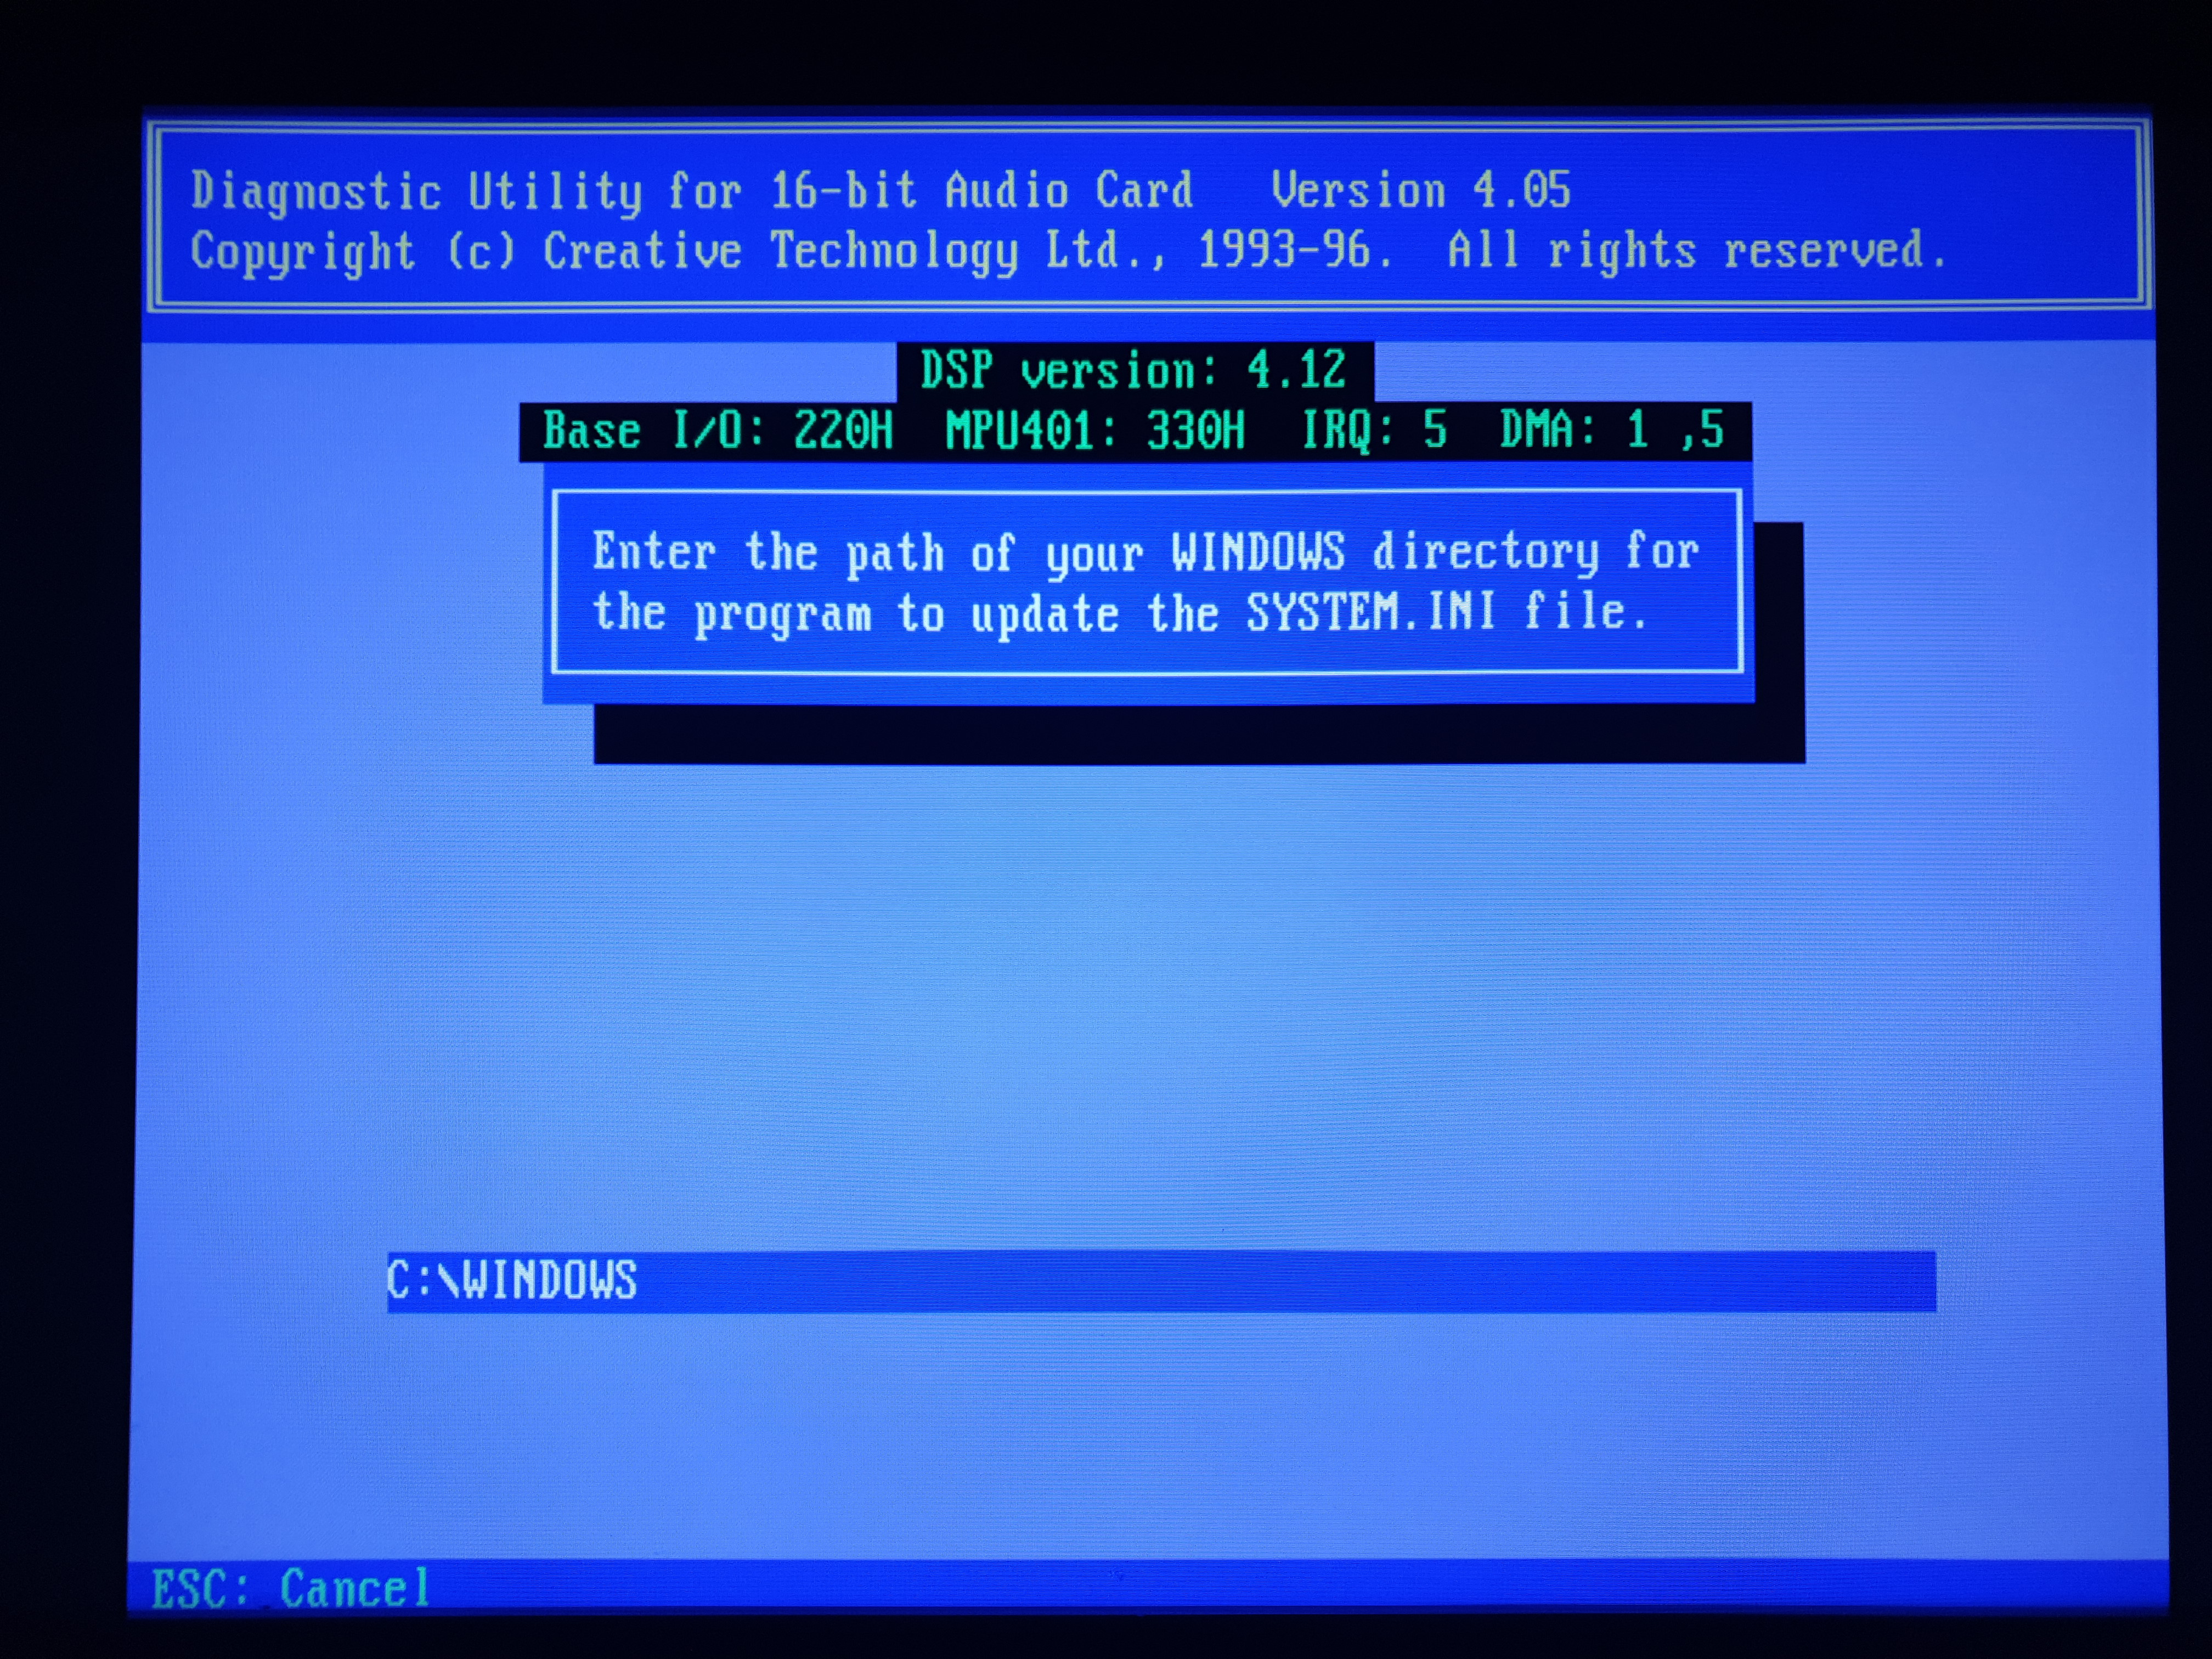
See that second from last screen, where it tries to also update a Windows file called SYSTEM.INI? If you don't have Windows installed just hit ESC on this screen.
DOS allows programs to read generic stored variables, such as the PATH environment variable that tells DOS commands where to search for files when you try to run them. Creative Labs cards all store your card's configuration in an environment variable called BLASTER. These are the primary configuration settings for your sound card. The letters in the value are:
A = I/O address of the sound card, usually 220
I = IRQ (interrupt request line) that the card will listen on, usually 5
D = [Low] DMA channel the card will use, usually 1
H = High DMA channel the card will use, usually 5 (for 16-bit audio only)
P = I/O address of the MIDI port, usually 330
T = Type of card installed (1=Original SB,2=SB1.5,3=SB2,4=SBPro,5=SBPro,6=SB16 and up)
E = (only needed on AWE-32 and up)
Run the DOS command SET to view the current environment variables. To create a new one or overwrite an existing variable's value, run SET <variable>=<value>
IMPORTANT: Using DIAGNOSE /S like you see in AUTOEXEC.BAT does some checking that your settings are correct! This means if your SET BLASTER= variable does not contain all of the Axxx Ix Dx Hx Pxxx Tx settings it will output an error. Furthermore, if you try to use an I/O address (for the A and P options) that doesn't match the jumpers on the card it will throw an error. The error doesn't tell you what you've done wrong either - you will just see something like this:
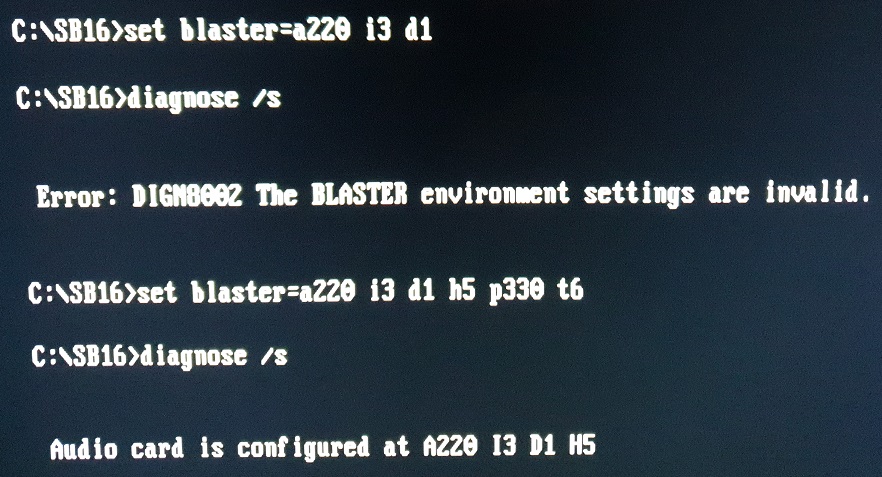
What it won't necessarily be able to handle is if you have chosen an IRQ line or DMA channel that is already in use by another piece of hardware in your PC, and hence is creating a conflict on that resource. So after you think you've got everything setup correctly, be sure to run DIAGNOSE with no arguments to fully test that whatever settings you have chosen will still output audio successfully before attempting to play any games.
OK, so hopefully at this point if you've been following along, you have audible output coming from your speakers when you run the tests in DIAGNOSE. For the digital audio tests, you hear a guy saying the words "8-bit testing..." and 16-bit testing..." and the FM synth test plays a twinkly tune.
Tweaking the Settings
After installation is compete, you can, and should, tweak the various channels, inputs, balances and so on using the MIXERSET.EXE utility:
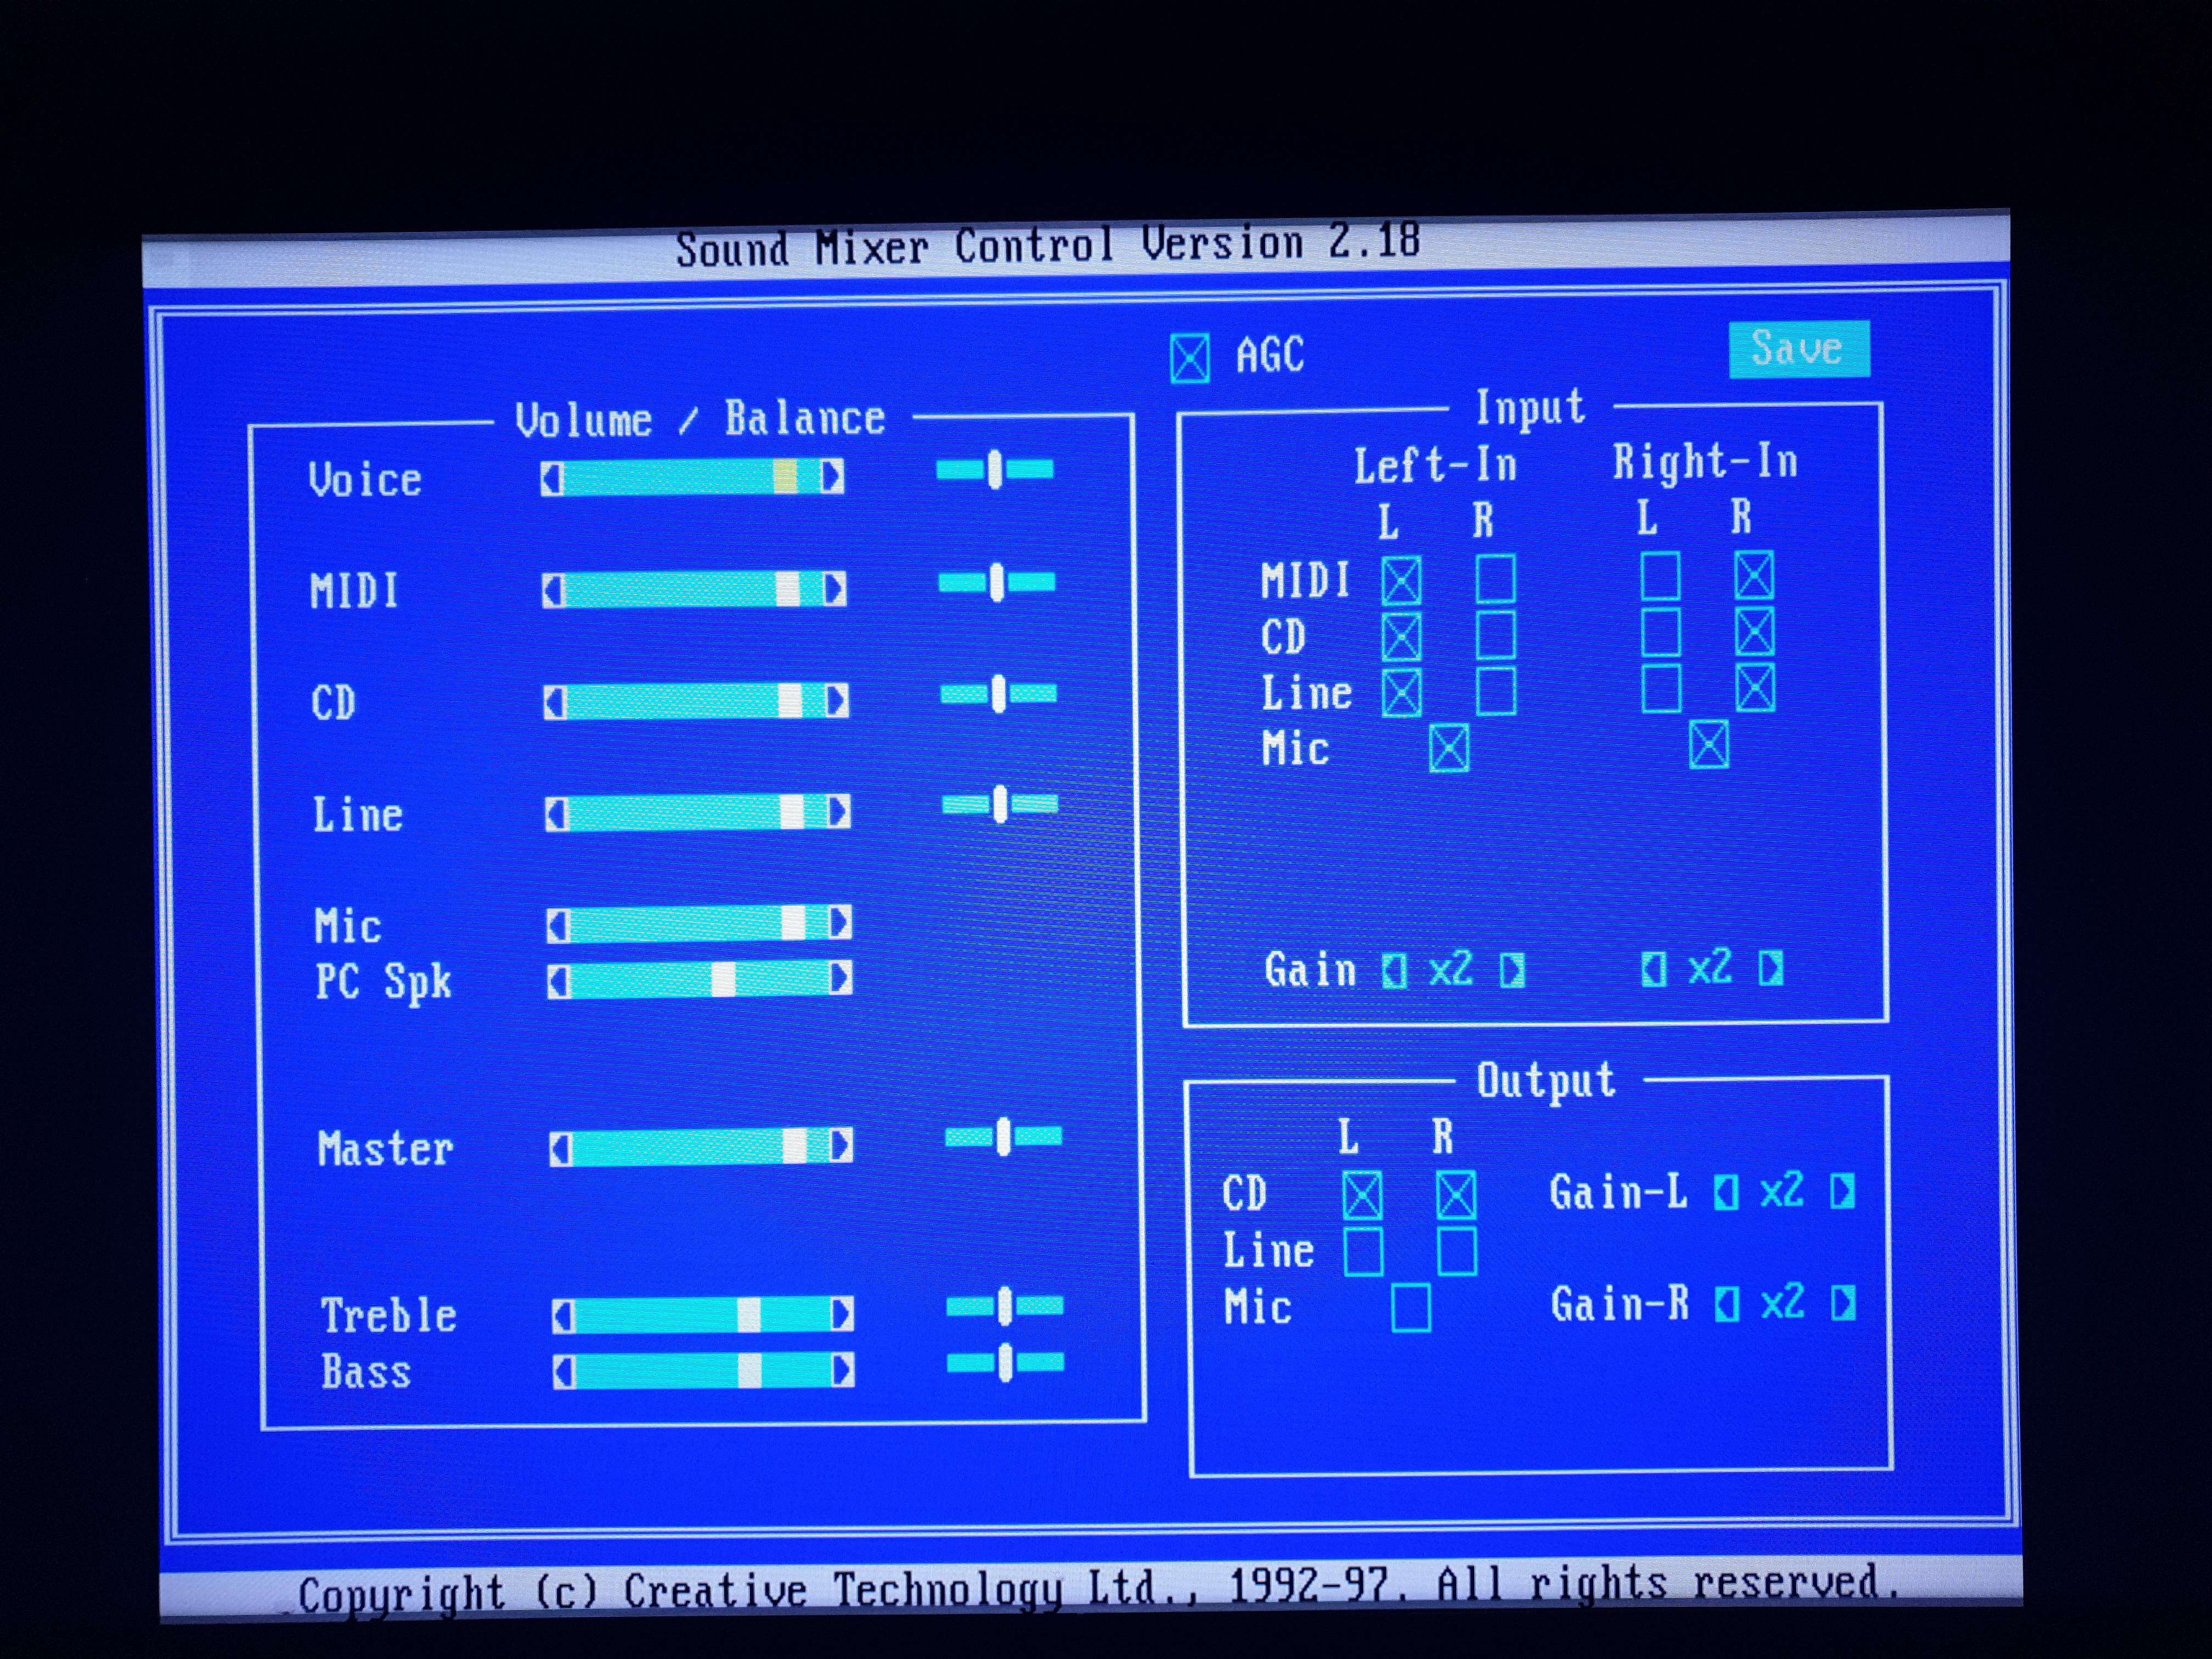
Use Tab and Shift-Tab to move between the various settings, and the left and right arrow key to adjust that setting. If you are on a check box, hitting Space toggles whether it's enabled (X) or disabled (empty box).
It is highly recommended to dial back every channel that will not be in use to reduce the amount of noise on the card. This will significantly help prevent humming, high-pitched whines, and more annoyances from coming through your speakers, which is especially noticeable when no sound is playing!
If the card is only going to be used for playing games in Sound Blaster mode, and not using the CD, Line-In, Microphone or have your PC speaker connected to the card pull all these volumes down to zero. Also uncheck all of the checked boxes on the right side too, and if you are aren't playing audio CDs from your CD-ROM via the sound card's output, also uncheck the CD L and R outputs in the bottom right. Then use the TAB or Shift-TAB keys to move up to 'SAVE', and hit ENTER to store your settings. By the way, these get saved to a file in C:\SB16 called CTMIX.CFG.
-----------------------------------------------------------------------------------------------
If you should be hearing music but aren't, try ramping up your speaker volume all the way - do you hear anything like music or sound but it's barely audible? If so, chances are your mixerset settings are bad - go and crank it all up, and try reducing each channel in turn to see what's wrong. If you hear nothing at all, double-check that (1) your speakers are switched on, (2) the volume is up, and (3) you have them plugged into the SPKR OUT or SPK on the back of the sound card, and not one of the other 3.5mm jacks by mistake.
If I'm just using this card for basic Sound Blaster output, my MIXERSET looks like this:
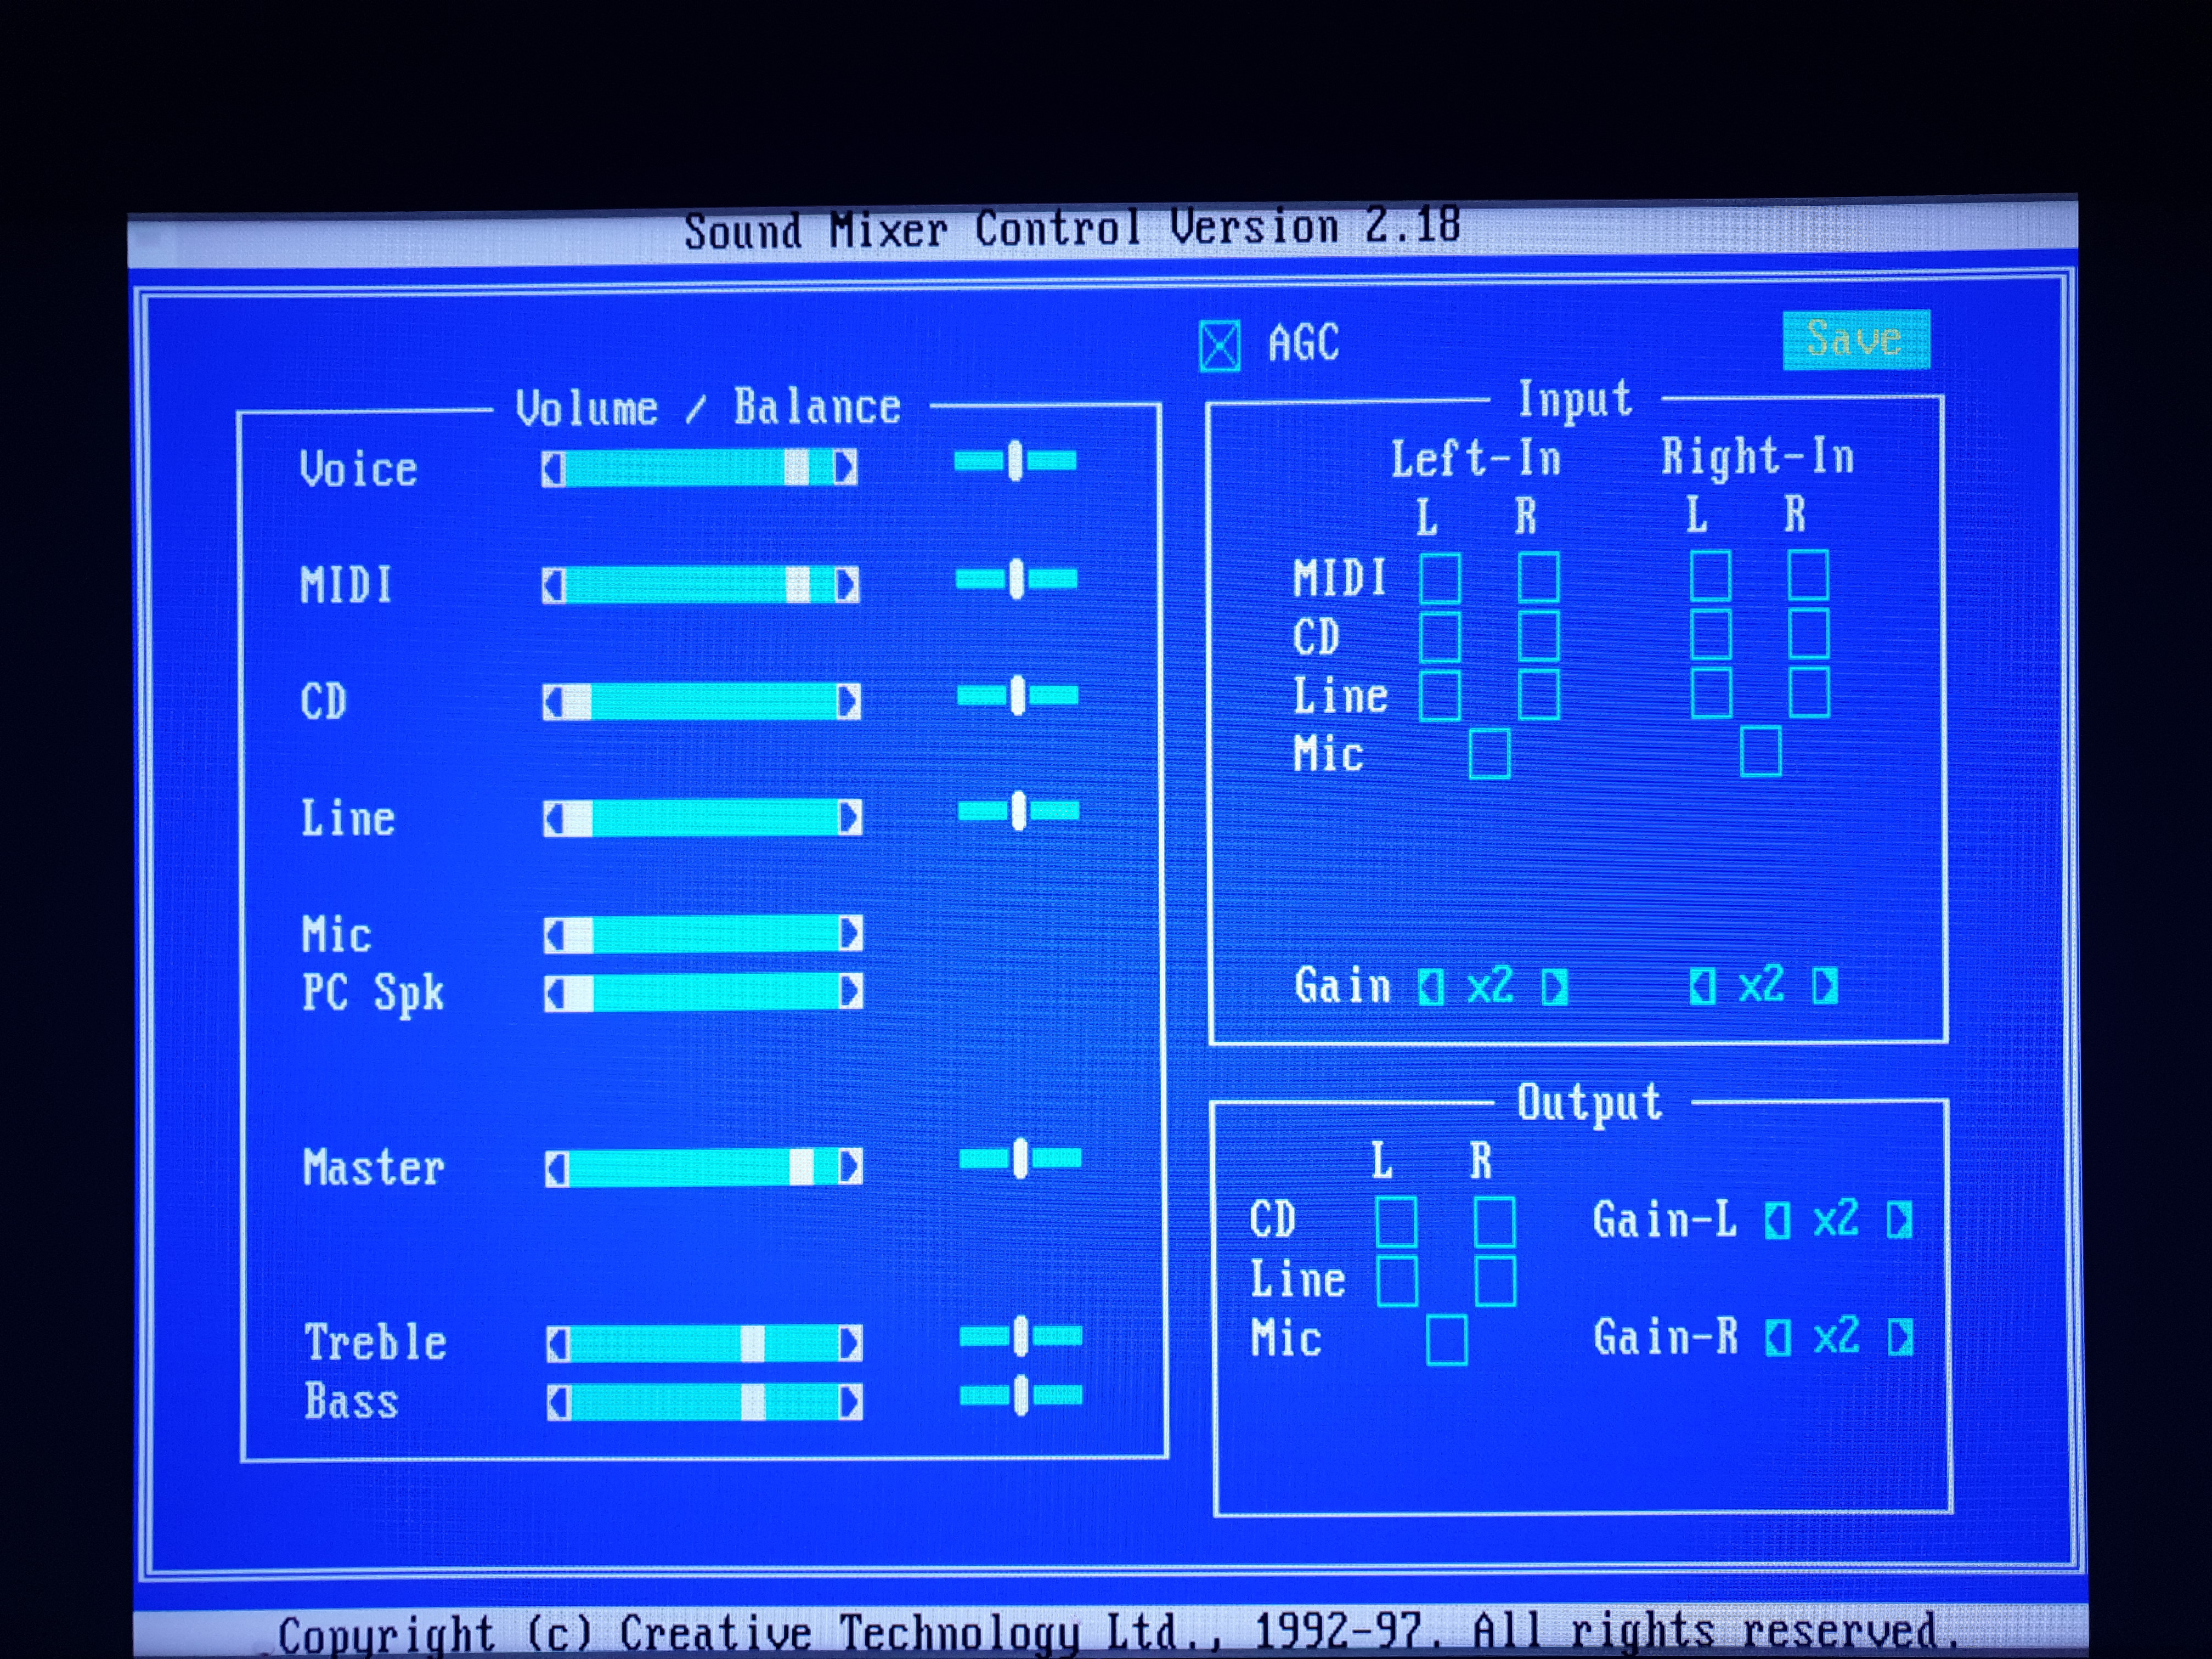
This will produce the cleanest, crispest output the card can deliver, though switching off AGC (Automatic Gain Control) may also help cut down on distortion if you sense any, though it can help in cases where your speakers are a little bit weak!
So be sure to tune in next time readers [in the next week or so!], for part 2, where I will get a few videos made to try to show off the audio capabilities of the Sound Blaster 16 "Value"... ugh, I don't like to keep using that word...